12
SE LP10 ML20600 Mortise Lock
Copyright © 2020, ASSA ABLOY Access and Egress Hardware Group, Inc. All
rights reserved. Reproduction in whole or in part without the express written
permission of ASSA ABLOY Access and Egress Hardware Group, Inc. is prohibited.
7) Installation Instructions (Continued)
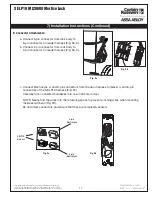
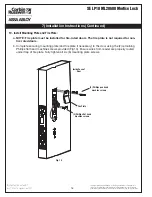
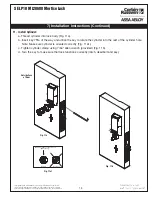
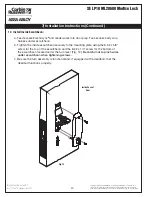
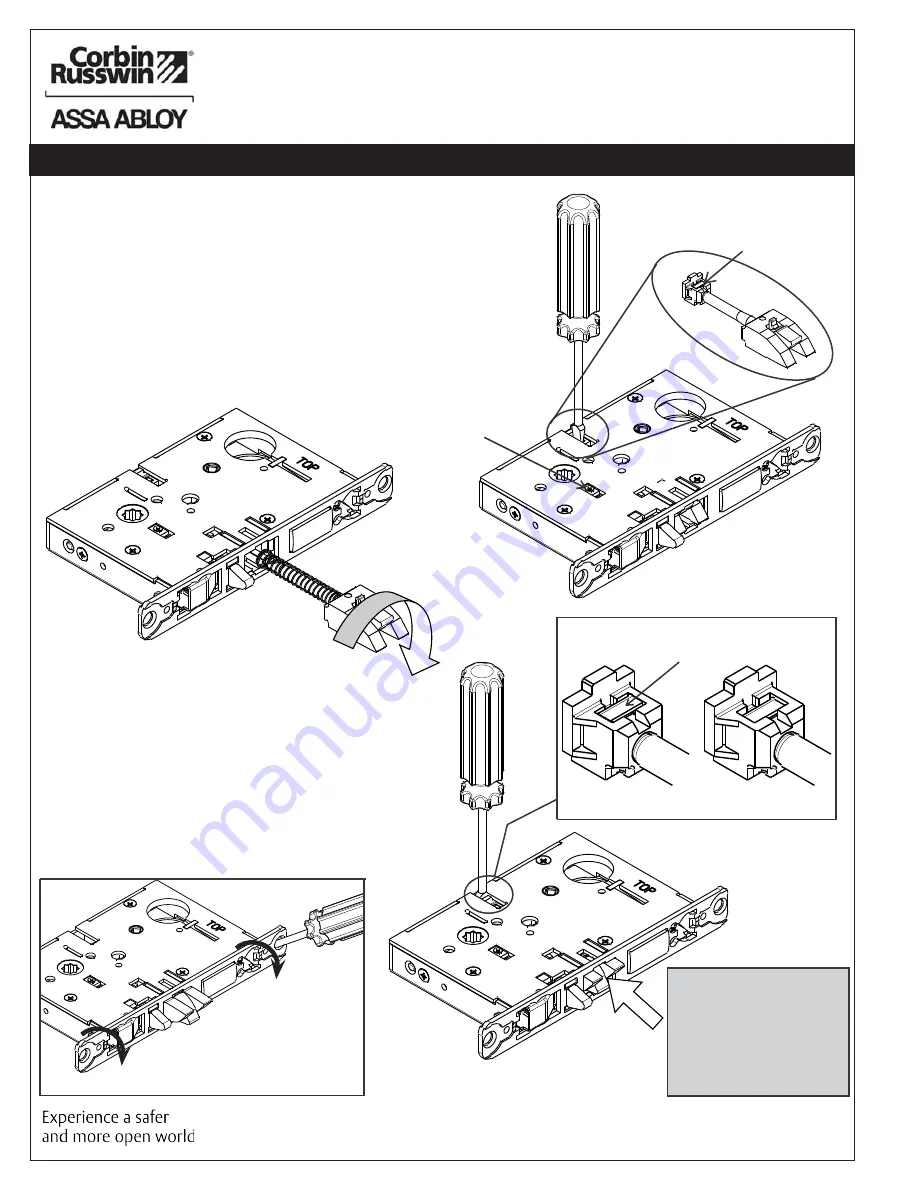
3. Handing of Lock Body
Step 1) Move the red locking screw to side of
lock body being locked (Fig. 3a)
Step 2) Push in latch then depress catch plate
with screw driver (Fig. 3a)
Step 3) Pull latch out of lock body
and turn latch over (Fig. 3b)
Catch Plate
RED Locking Screw
Step 4) Push in latch while holding
screw driver behind latch tail (Fig. 3c)
Note: Push in latch until catch plate is no longer
depressed (Fig. 3d)
MAKE SURE CATCH PLATE IS
EVEN W/TOP SURFACE
GOOD
BAD
Step 5) Rotate lock front to match
bevel of door as shown (Fig. 3e)
WARNING:
LOCK-IN CAN
OCCUR IF LATCH
IS NOT PROPERLY
INSTALLED
Fig. 3a
Fig. 3b
Fig. 3c
Fig. 3d
Fig. 3e


