Founded in the early 1800s, SARGENT
®
is a market leader in locksets, cylinders, door closers, exit devices,
electro-mechanical products and access control systems for new construction, renovation, and replacement
applications. The company’s customer base includes commercial construction, institutional, and industrial
markets.
Copyright © 2019, 2020 SARGENT Manufacturing Company. All rights reserved. Reproduction in whole or in part
without the express written permission of SARGENT Manufacturing Company is prohibited..
SARGENT Manufacturing Company
100 Sargent Drive
New Haven, CT 06511 USA
800-727-5477
www.sargentlock.com
A6286M 4/20
1
Reassembly
2
FOR ALL FUNCTIONS
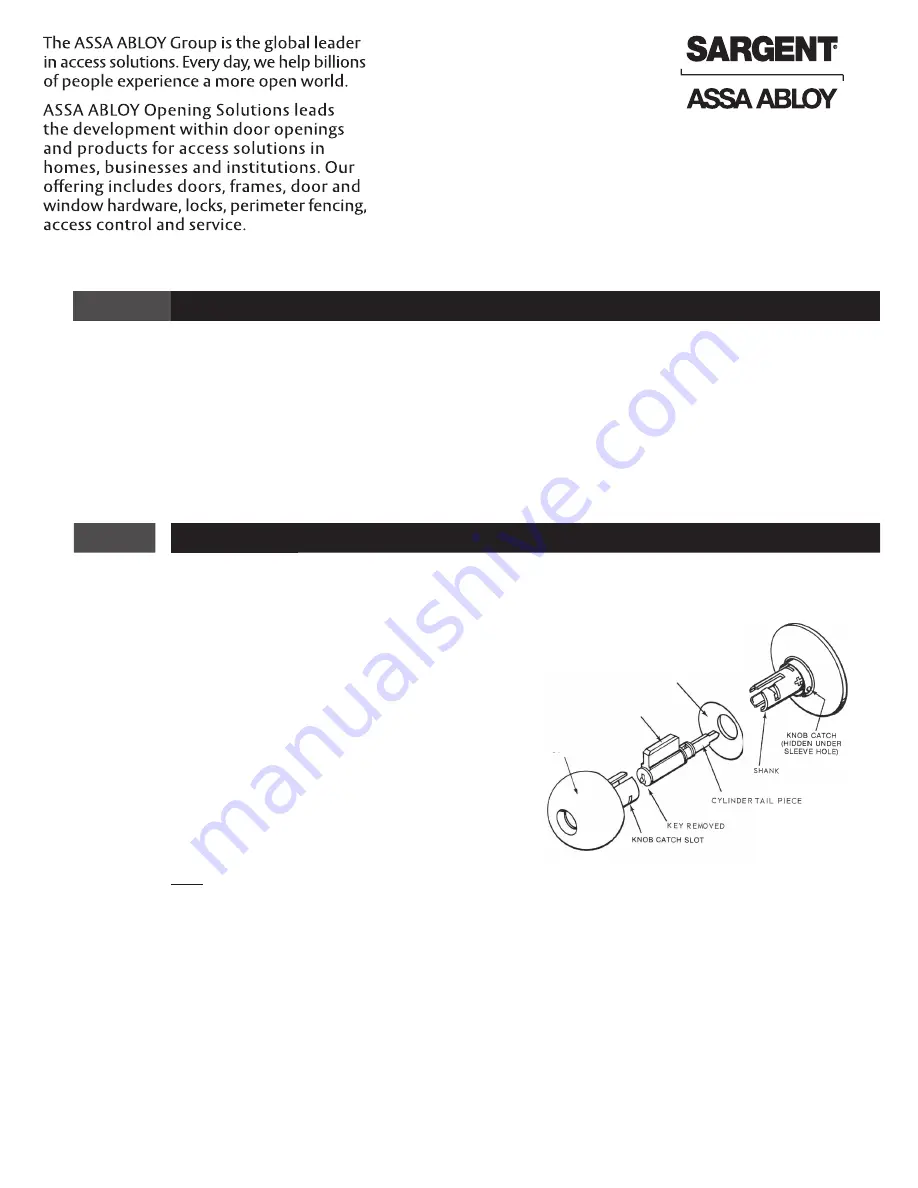
When the cylinder has been removed completely as for purposes of rekeying], reassemble as follows:
STEP 1
A
. Slip knob collar over shank
B
. Insert cylinder fully, engaging tail piece
C
. Slip knob on until it bottoms against knob catch
A
B
C
STEP 2
•
Insert key fully into cylinder, press a small
nail into the outside knob sleeve hole.
Turn key (in clockwise direction) approx. 45º or
until depression of the knob catch is felt with
nail. Checking alignment of cylinder head with
hole in knob, push knob until knob catch “clicks”
into position. Pull collar back into proper posi-
tion against knob.
Note
For 37 & 38-2 functions, check to determine that the slotted member which engages the cylinder tail piece has
been rotated clockwise fully and lies in a vertical position.
If not, reverse cylinder as follows:
1. Insert key fully into cylinder.
2. Press a small nail into the outside knob sleeve hole.
3. Turn key (in clockwise direction) aprox. 45º or until depression of the knob catch is felt with nail; pull off
knob.
4. Rotate knob 180º (so that keyway is vertical and down). Push knob on to shank until it contacts knob
catch.
5. Release knob catch by pressing Knob Release Tool into the outside knob sleeve hole; turn key (in clockwise
direction) approx. 45º or until depression of the knob catch is felt.
6. Checking alignment of cylinder head with hole in knob, push knob until knob catch “clicks” into position.
1 Installation
(continued)


