V1.0 04/02/20
TD0192
Page 6 of 13
This Document is uncontrolled when printed unless over stamped “CONTROLLED DOCUMENT”
2.2
TOOLS AND MATERIALS REQUIRED
Traka does not provide tools and certain materials for the installation of the TrakaMEC Cabinet Cabinets, so you will
need to source the following:
•
Drill
•
Wall Fixings (appropriate for the type of wall you are fixing to)
•
Plinth to Cabinet fixing (only applicable if the Plinth is purchased)
•
Plinth floor fixings
•
Screwdriver
•
Hammer
•
Spirit Level
•
Measuring Tape
•
M8 x 16 Countersunk Screws X4 (to attach Plinth & Cabinet)
NOTE:
Due to the weight of this product we recommend you use appropriate support. Please be advised that
the TrakaMEC Supreme Cabinet installation is a TWO person job and due to the weight and size of the Cabinet
you should always follow correct Manual Handling techniques.
TrakaMEC offers two different sized Plinths designed to go with each TrakaMEC Cabinet. For further information please
visit our webshop
This guide shows installation using appropriate floor to Cabinet support which is TrakaMEC Plinth. If you wish to mount
your Cabinet directly to the wall please follow steps 4 to 11 (Traka strongly recommends that you use the Plinth for the
installation).
NOTE:
TrakaMEC systems can be very heavy and therefore need a strong wall to fix to. The wall fixings are
not included so when selecting the appropriate fixings it is essential they are strong enough to retain the
system to the wall.
NOTE:
The wall (and any wall covering) to which the TrakaMEC System is fixed must be made of low
flammability material (at least 94 UL-5V flammability class equivalent).
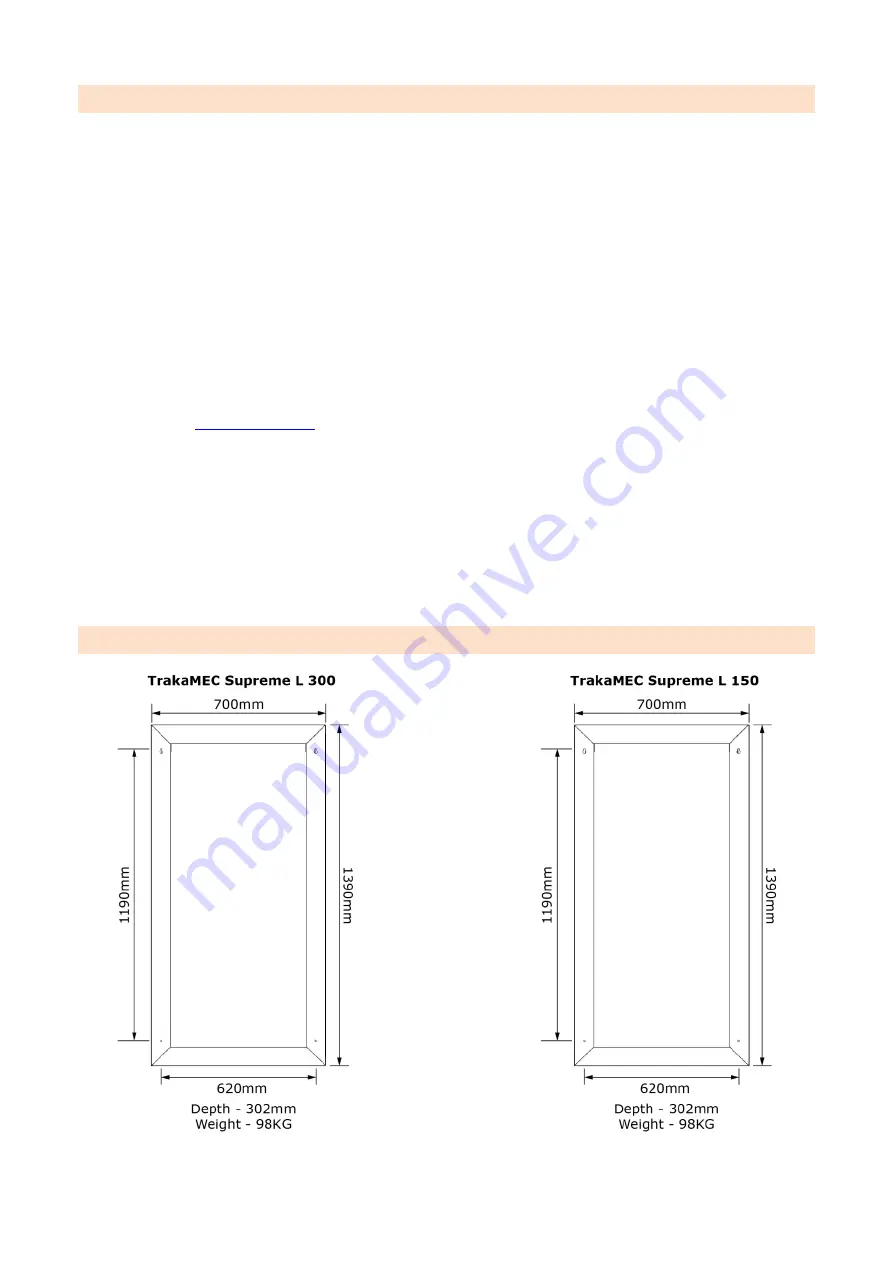
2.3
DIMENSIONS


