background image

3

800-810-WIRE (9473) • www.sargentlock.com


• 

A7757C

Profile Series v.G1 Exit Device

Copyright © 2006, 2008, Sargent Manufacturing Company

, an A

SSA ABL

O

Y Group company

. All rights reserved. 

Reproduction in whole or in part without the express written permission of Sargent Manufacturing Company is prohibited.

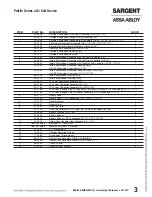
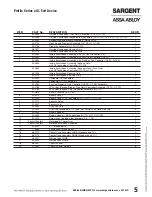
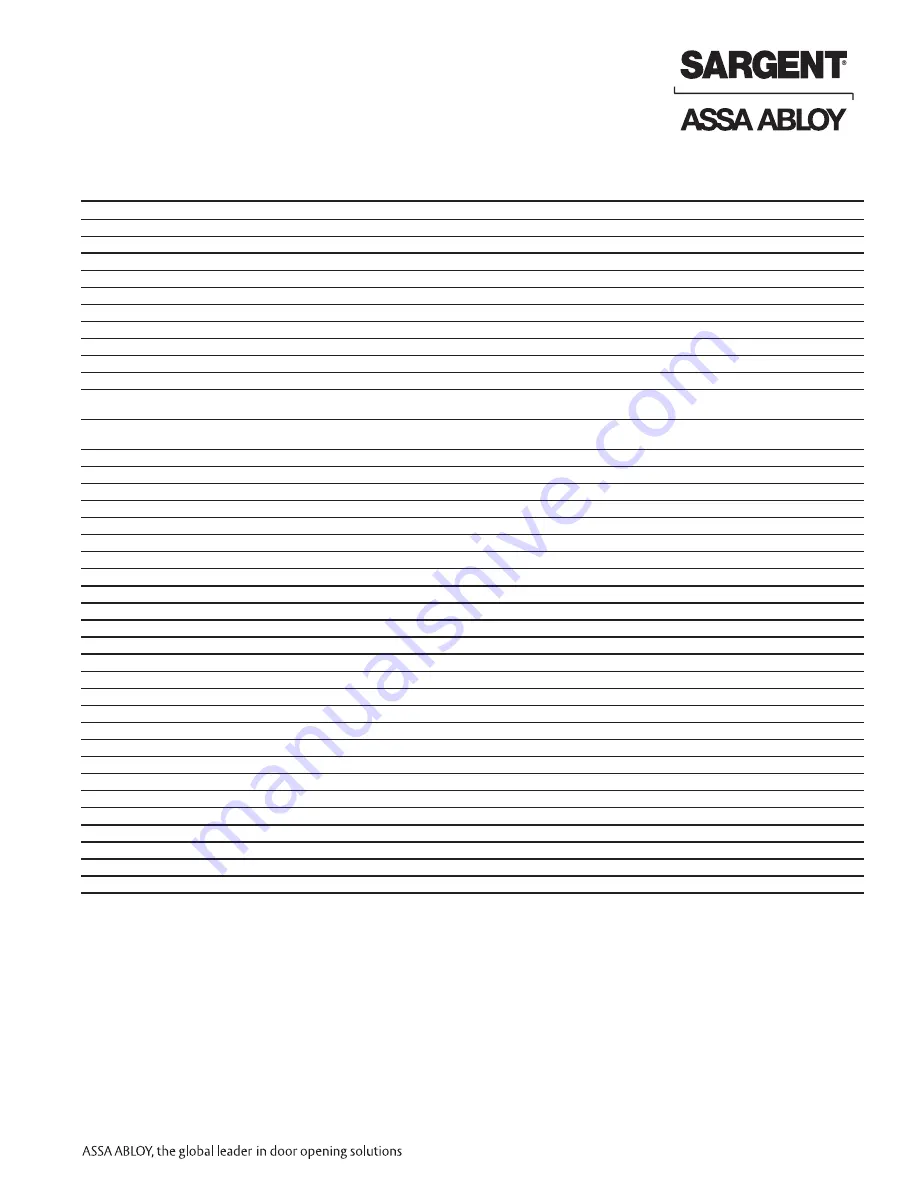
ITEM

PART 

No. 

DESCRIPTION

REQ’D

1

52-2839

Outside Escutcheon (Prox Only) Assembly (G1-PA, G1-TA)

1

52-2474

Outside Escutcheon (Keypad Only) Assembly (LK)

1

52-2838

Outside Escutcheon (Keypad/Prox) Assembly (G1-LU, G1-PK, G1-TU, G1-TP)

1

52-2704

Key Pad and Proximity Assembly (G1-LU, G1-PK, G1-TU, G1-TP)

1

52-2432

Keypad/Proximity Bezel Assembly w/ Harness (LK)

1

52-2706

Proximity Only Assembly (G1-PA, G1-TA)

1

68-1397

Outside Escutcheon Housing Only

1

52-0176

Outside Escutcheon End Cap

1

2

52-2460

Inside Escutcheon Assembly with 100 User Controller (LK)

1

2

52-2833

Inside Escutcheon Assembly with 2000 User Controller (G1-LU)

1

2

52-2834

Inside Escutcheon Assembly with Prox/Key Pad Controller (G1-PA, G1-PK)

1

52-2836

Inside Escutcheon Assembly (Keypad Only)
with RF Technology Controller (G1-TU)

52-2835

Inside Escutcheon Assembly (Keypad/Prox or Prox Only)
with RF Technology Controller (G1-TA, G1-TP)

68-1396

Inside Escutcheon Housing Only

1

52-0175

Inside Escutcheon End Cap Only

1

52-2441

100 User Controller Assembly (LK)

1

52-2783

2000 User Controller Assembly (G1-LU)

1

52-2784

2000 User Controller Assembly (G1-PA, G1-PK)

1

52-2786

2000 User (Keypad/Prox or Prox Only) Controller Assembly w/ RF Technology (G1-TA, G1-TP)

52-2785

2000 User (Keypad Only) Controller Assembly w/ RF Technology (G1-TU)

3

52-0170

Battery Cover

1

52-2309

Battery Cover –  RF Technology (G1-TU,G1-TP, G1-TA)

4

01-1212

Security Screw

1

5

01-0297

Security Tool

1

6

52-0033

Fire Stop Plate

1

7

01-1500

Fire Stop Screws #8 x 1/2” Type “AB” Phillips Pan Head Self Tap

2

01-0803

Battery Alkaline (“AA” Cell) 

6

9

52-0253

Battery Keeper

1

52-0344

Battery Keeper – RF Technology (G1-TU, G1-TP, G1-TA)

10

52-2425

Screw Pack (Includes item numbers 5, 6, 7, 15)

1

11

Consult Factory

Motorized ET Lever Trim

1

12

Consult Factory

Motor and Harness Assembly

1

13

01-4451

ET Through-bolts

2

14

13-0074

Cylinder Retaining Screws

2

15

77-0685

Escutcheon Through-bolts

2

16

68-4261

Center Case Assembly LHRB & RHRB (Std.)

1

68-4263

Center Case Assembly LHRB (12-) & RHRB (12-)

1

17

68-0406

Chassis Cover

1

18

97-0052

Chassis Cover Screws

4

Summary of Contents for v.G1 Sargent

Page 1: ...t 2004 2008 Sargent Manufacturing Company an ASSA ABLOY Group company All rights reserved Reproduction in whole or in part without the express written permission of Sargent Manufacturing Company is prohibited FOR ASSISTANCE CONTACT SARGENT AT 800 727 5477 or www sargentlock com ...

Page 2: ...nterference will not occur in a particular installation If this equipment does cause harmful interference to radio or television reception which can be determined by turning the equipment off and on the user is encouraged to try to correct the interference by one or more of the following measures Reorient or relocate the receiving antenna Increase the separation between the equipment and receiver ...

Page 3: ...on with Keypad Outside Motorized Trim Assembly Exit Device Inside Escutcheon with Circuit Board and Battery Pack 6 AA alkaline batteries Screw Pack Specifications Profile Series Rim Exit Latch 3 4 throw stainless steel Outside motor driven ET lever controlled by keypad Push bar retracts latch from inside Fire stop provided on all lever handle designs Profile Series exit devices furnished for 1 3 4...

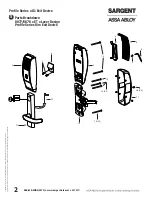
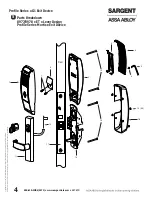
Page 4: ...acturing Company an ASSA ABLOY Group company All rights reserved Reproduction in whole or in part without the express written permission of Sargent Manufacturing Company is prohibited Parts Breakdown 8877 8878 x ET x Lever Design Profile Series Rim Exit Device 5 1 7 6 12 11 14 13 X2 13 X2 13 15 2 9 3 5 4 18 X4 17 ...

Page 5: ...r G1 TU 52 2835 Inside Escutcheon Assembly Keypad Prox or Prox Only with RF Technology Controller G1 TA G1 TP 68 1396 Inside Escutcheon Housing Only 1 52 0175 Inside Escutcheon End Cap Only 1 52 2441 100 User Controller Assembly LK 1 52 2783 2000 User Controller Assembly G1 LU 1 52 2784 2000 User Controller Assembly G1 PA G1 PK 1 52 2786 2000 User Keypad Prox or Prox Only Controller Assembly w RF ...

Page 6: ...acturing Company an ASSA ABLOY Group company All rights reserved Reproduction in whole or in part without the express written permission of Sargent Manufacturing Company is prohibited Parts Breakdown 8977 8978 x ET x Lever Design Profile Series Mortise Exit Device 5 Door 9 3 5 15 19 X4 18 13 16 17 12 11 7 6 1 4 2 ...

Page 7: ...tcheon Assembly Keypad Prox or Prox Only with RF Technology Controller G1 TA G1 TP 68 1396 Inside Escutcheon Housing Only 1 52 0175 Inside Escutcheon End Cap Only 1 52 2441 Enclosure LK Assembly 1 52 2783 Enclosure G1 LU Assembly 1 52 2784 Key Pad Proximity Only Controller G1 PA G1 PK Assembly 1 52 2786 2000 User Keypad Prox or Prox Only Controller Assembly G1 TA G1 TP 52 2785 2000 User Keypad Onl...

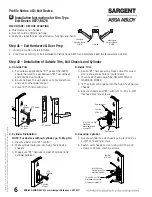
Page 8: ...and outside door surface 2 Route harness through under cut of cylinder hole and out to other side of door 3 Place ET control onto door B Inside Trim 1 Route ET harness along track cutout for wood doors and access hole for metal doors 2 Mount exit chassis carefully DO NOT PINCH HARNESS WIRES 3 ET spindle will engage into the hub of exit device chassis 4 Secure chassis and ET with 2 1 4 20 x 2 3 8 f...

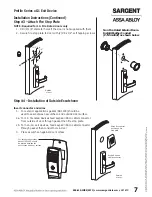
Page 9: ... self tapping screws Outside of door Wires connector go through fire stop plate Keypad ribbon cable connector 1 2 3 4 5 6 7 8 9 0 Step 4 Installation of Outside Escutcheon Insert connector and wires 1 For exterior applications gasket 68 1400 should be used to seal between escutcheon and outside door surface 2a For 12 fire rated devices feed keypad ribbon cable connector from outside of door throug...

Page 10: ...s to motor connector Fig 3 2 Place extra wire inside door hole and or outside escutcheon being careful not to pinch wires 3 Connectors go on only one way do not offset connector and be sure they are completely seated 4 Insert 8 32 x 1 1 4 screws through inside escutcheon and thread into outside escutcheon Straighten escutcheons and tighten securely Ground wire ET Motor harness Keypad harness Outsi...

Page 11: ...ts Top tab Tabs Top slots Step 6 Rail Assembly Attach rail assembly according to exit installation instructions A6770 Fig 4 Fig 5 Fig 6 Fig 7 1 Place 6 AA batteries into the compartment being careful to align polarity properly Fig 5 2 Install battery keeper clip by inserting tabs into bottom slots first Fig 6 To remove keeper pull on top tab For RF Technology version refer to Section 9 3 Attach ba...

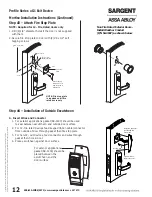
Page 12: ...rify box label for size of exit device function and hand Step 1 Exit Hardware Door Prep Prep door according to Exit installation instructions A6705 and template 4641 metal and wood doors Step 2 Install Outside Trim Exit Chassis and Cylinder A Outside Trim 1 Slide mortise lock into door and securely fasten with 2 flat head screws 2 For exterior applications gasket 52 0263 should be used to seal bet...

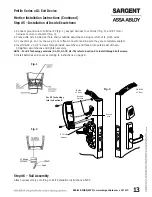
Page 13: ...Lever Latchbolt Lever arm Inside of door 4 10 Wood screws or 10 24 machine screws B Exit Chassis 1 Route ET harness along track cutout for wood doors and access hole for metal doors 2 Mount exit chassis carefully Do not pinch harness wires 3 Position exit chassis on door with lever arm under rear section of mortise lock 4 Using 2 1 4 20 x 2 3 8 flat head screws attach chassis to ET control 5 Faste...

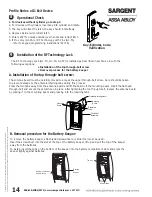
Page 14: ...upplied with them 2 Secure fire stop plate to door with 2 8 x 1 2 self tapping screws Mortise Installation Instructions Continued A Insert Wires and Connector 1 For exterior applications gasket 68 1400 should be used to seal between escutcheon and outside door surface 2 For 12 fire rated devices feed keypad ribbon cable connector from outside of door through gasket then fire stop plate 3 For non 1...

Page 15: ...cutcheon being careful not to pinch wires 3 Connectors go on only one way do not offset connector and be sure they are completely seated 4 Insert 8 32 x 1 1 4 screws through inside escutcheon and thread into outside escutcheon Straighten escutcheons and tighten securely NOTE For RF Technology versions G1 TU G1 TP G1 TA refer to Section 9 to install through bolt screws 5 Install batteries and cover...

Page 16: ...taining tabs during this process Press the two tabs away from the antenna board and lift the board off the mounting posts Insert the flat head through bolt and secure the escutcheon in place After tightening the top through bolt replace the antenna board by placing it on the mounting posts and pressing into the retaining tabs A Installation of the top through bolt screw To remove the battery keepe...

Reviews: