page 16
diff outdrive hub, which could damage parts or reduce the
performance of the diff. Slide the diff spring into the left diff
outdrive hub. It should slide in or go in with very light pressure
until the spring reaches the bottom of the outdrive hub cavity.
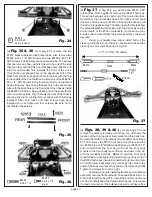
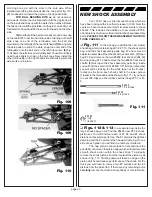
(4) Next align the T-nut with the slots in the outdrive hub and
push it in. Make sure the steel insert side goes in first. This
will place the T-nut "ears" on the outside away from the diff
spring. Slide the T-nut all the way down against the spring.
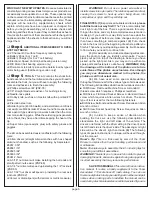
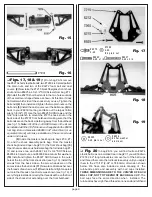
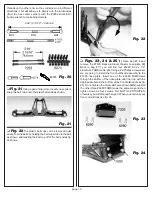
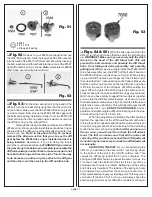
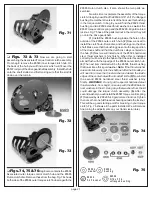
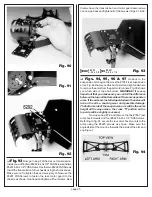
(5) (Fig. 48) The ears on the T-nut should be approxi-
mately 3/32" or a little less than .100" from the bottom of the
slot. Take your X-acto knife and trim off any of the plastic T-
nut that extends outside both sides of the slot in the outdrive
hub. The diff outdrive hub will not fit through the ball bearing
in the case if we do not take care of this now.
WARNING!! Be
careful here so that you do not cut yourself, since you
will be cutting towards your thumb.
Fig. 46
Fig. 47
Fig. 48
Fig. 49
❏
Fig. 50
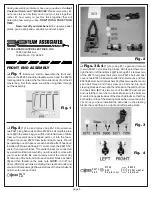
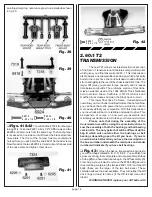
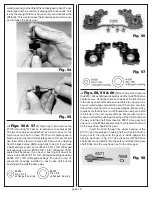
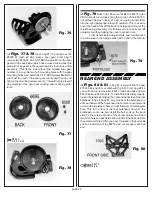
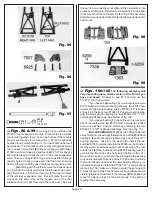
(1)In bag A you will also find a little bag
containing the six smaller #6574 5/64" precision thrust balls.
In another little bag you will find the #6575 2-56 diff thrust bolt
and the two #6573 (special hardened steel washers) diff
thrust washers.
WARNING! NEVER replace your thrust
balls with any other balls except our #6574 thrust balls
The tolerances we use are tighter than most other
companys'. Due to these tight tolerances and careful
packaging of matched balls, when replacing lost or worn
5/64" thrust balls, you MUST replace ALL 5/64" balls at
the same time with new balls from the same package.
This means you cannot even mix balls from two separate
#6574 packages.
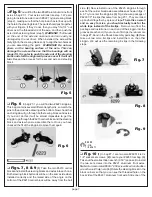
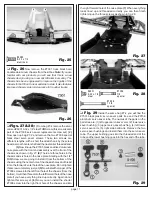
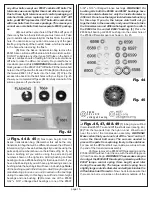
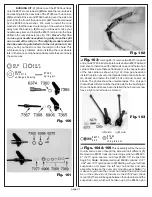
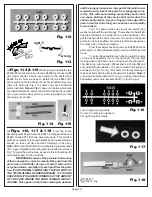
(2) Slip one of the #6573 diff thrust washers onto the
#6575 diff thrust bolt as shown.
Racer's Tip: Carefully look
at the center hole of the first thrust washer; you will be
see that each side is beveled. One side is beveled more
than the other; This side is installed towards the head of
the thrust bolt. This will help to insure that the thrust
assembly will work as smoothly as possible. (3) Go back
to the Assoc. main bag and locate the tube of #6588 black
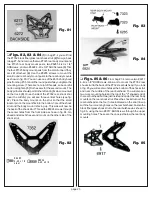
grease. (4) Open the tube and place a small amount on the
washer. Use just enough grease to hold the six balls in place
on the washer.
WARNING! Do Not use the #6591
Assoc.
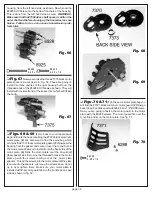
diff lube on the six #6574 5/64" diff thrust balls. (5) Now
carefully place the six #6574 balls in the grease around the
washer. (6) Slide the second washer onto the bolt until it
contacts the balls.
WARNING!! Make sure that you have
exactly six thrust balls installed between the washers.
More than six will cause the diff to back off and less than
six can cause the thrust washers to crack.
Fig. 50
❏
Fig. 51
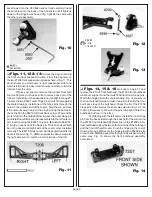
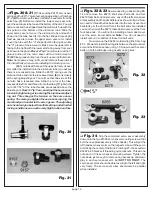
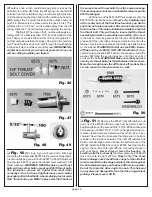
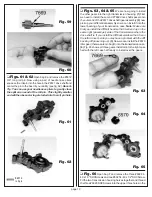
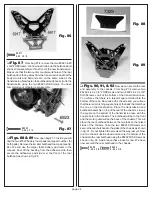
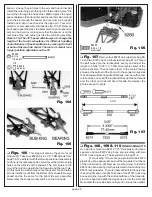
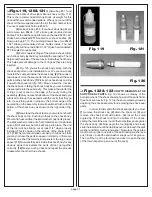
(1) Remove the #7667 right diff outdrive hub
and one of the #7666 diff drive rings from bag A. Go back to
bag B and take out the second 5/32" x 5/16" #6589 unflanged
ball bearing or #6597 5/32" x 5/16" unflanged bushing (re-
member these parts are determined by which kit you pur-
chased). Now check to make sure that there are no burrs or
residue on the inside or outside of the right diff outdrive hub
which could damage parts or reduce the performance of the
diff. (2) Install the #6589 bearing or #6597 bushing into the
cavity in the center of the right diff hub. It should just push in
with your finger. Never drive or force the bearing or
bushing into the hub cavity! (3) Now place the #7666 diff
drive ring onto the right diff hub.
Racer’s Tip: The Team
Drivers always check the diff drive rings for the side that
is more rounded on the edge and place this side against
the hub which will give you the best diff action possible.
Do not try to pin the drive ring to the hub. This hub and
ring system are designed to lock the drive ring without
pinning. Please leave it AS IS.


