page 17
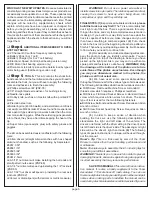
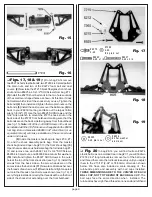
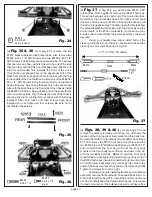
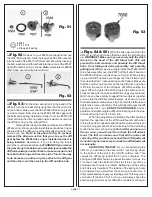
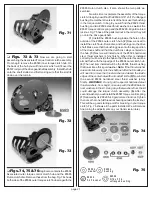
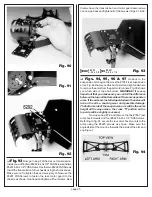
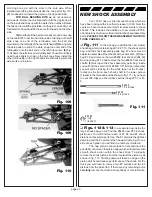
Fig. 51
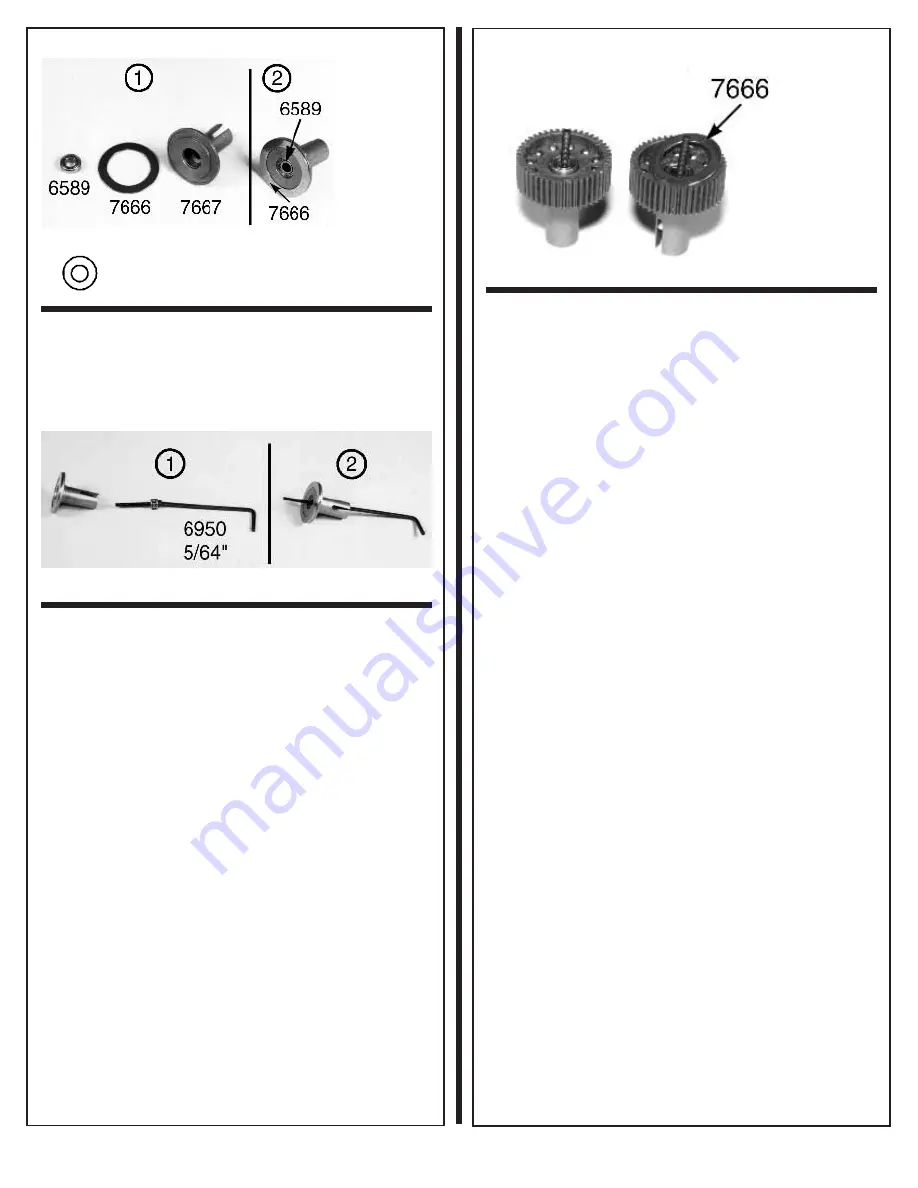
#6 589
5 /3 2 x 5/1 6
u nfla ng ed b ea rin g
❏
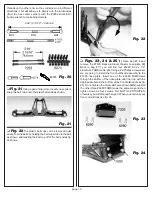
Fig. 52
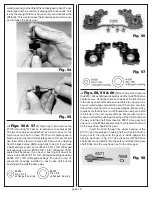
Go back to your #6950 tool bag and remove
the 5/64" Allen wrench. Slide the long end of the Allen wrench
into the head of the #6575 diff thrust bolt. We will be inserting
the bolt, washers, and thrust balls into the center of the #7667
right diff outdrive hub, as shown.
Note: Associated’s #6959
5/64" Allen wrench will work well here.
Fig. 52
❏
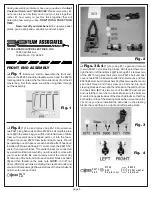
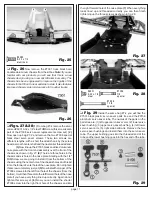
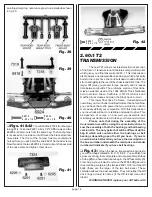
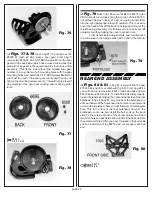
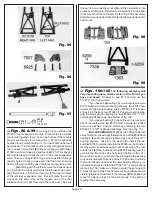
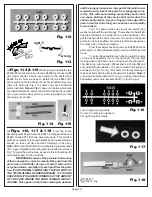
Fig. 53
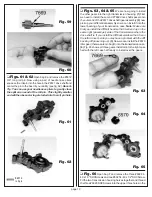
With the Allen wrench still in the head of the
diff bolt, turn the hub assembly upright so that the wrench is
on the bottom. Make sure that the #7666 diff drive ring is still
on and centered. Now pick up the #7664 diff drive gear with
the balls and bearing installed and slip it over the #6575 diff
thrust bolt onto the drive ring and hub. We want to center it on
the diff drive ring on the right diff hub.
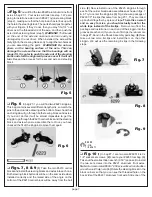
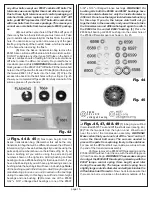
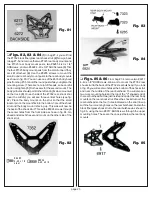
Now go back to bag A and take out the second #7666
diff drive ring. We are going to install this second drive ring on
the top side of the diff gear over the diff balls and center it as
best as you can. Note: In the photo for fig. 53 we have
removed the Allen wrench so that you can see the diff
gear before the #7666 drive ring is installed and as it is
being installed. Remember, if you are doing the racers
setup the rounded side will be up.
WARNING! If you remove
the gear at any time before you completely assemble the
diff halves always double check to make sure you do not
have both drive rings on the same side. This can be easy
to do because one drive ring may stick to the diff gear
and the other could be stuck to the diff outdrive hub.
Fig. 53
❏
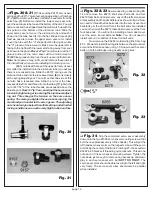
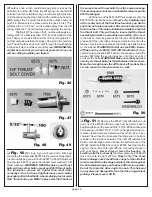
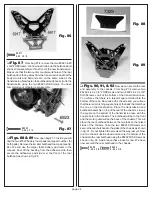
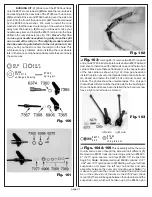
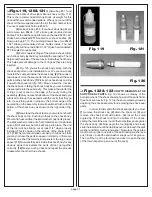
Figs. 54 & 55
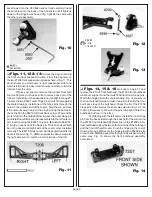
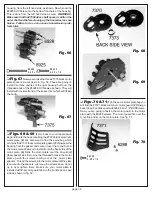
(1) With the Allen wrench still in the
diff bolt, turn the right hub so that the end of the bolt is facing
up.
WARNING!!: Make sure you securely hold the Allen
wrench in the head of the diff thrust bolt. This will
prevent the bolt, washers and possibly the diff thrust
balls from falling out during assembly and possibly
getting lost. (2)Now we are going to install the #7668 left diff
drive hub assembly over the #6575 diff bolt until it seats on
the #7666 diff drive ring (as shown in fig. 54). When picking
up your left diff hub place your finger over the slotted end of
the hub so that the T-nut and spring cannot fall out. Make sure
that the outdrive hub centers on the top diff drive ring when
it fits into the center of the diff gear. (3) While holding the
upper diff hub, tighten the diff bolt using the Allen wrench.
Please make sure the hubs and diff drive rings stay centered.
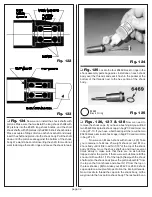
(4) Once you have lightly snugged the two halves together
you can turn the diff assembly sideways, as shown, to make
the final adjustment easier (see fig. 55). Hold the left hub and
tighten the screw until it stops. This will fully compress the diff
spring under the T-nut. DO NOT OVERTIGHTEN. Correct
adjustment is tightening the diff bolt and spring until the stop,
then backing the bolt off 1/8 of a turn.
When the adjustment is finished the diff should be
tight but the operation of the diff should feel smooth when
turning the hubs in opposite directions. Remember this is not
a free spinning component. We are looking for the ball rolling
motion to feel smooth not rough.
Note: After you have run
the car once, you will need to recheck the diff adjust-
ment. The first run makes sure that all the parts seat
correctly. After you have rechecked the diff adjustment
it should only be necessary to check the diff adjustment
occasionally.
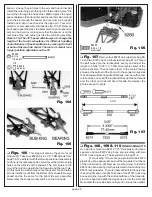
ADJUSTING THE DIFF: As you are tightening the
diff bolt, you will notice the ears on the T-nut moving closer
to the bottom of the slot in the left diff outdrive hub. This
causes the diff spring (under the T-nut) to compress. The
spring and diff bolt should stop about the same time as the
T-nut ears reach the bottom of the slot. If it is only off by a
small amount, there is no problem. Bottoming out the spring
and bolt is very important. The tension of the spring can only
be consistent if you start from the same point each time. A
fully compressed spring is your starting point. This way, when
you back off the bolt 1/8 of a turn you will always have the
same spring tension, so your diff will be consistent. We again


