page 26
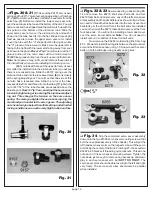
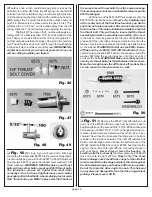
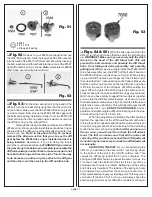
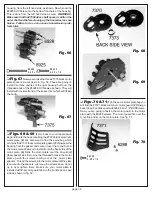
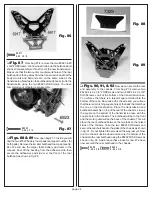
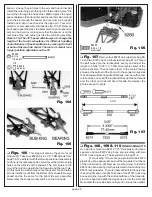
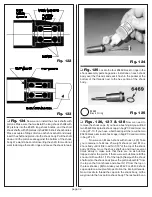
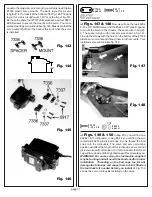
Fig. 95
Fig. 96
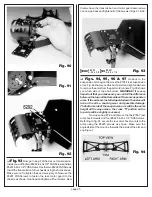
Fig. 97
# 69 25
4 -4 0 x 1 /2
#62 99
e-c lip
1/8 sh aft
❏
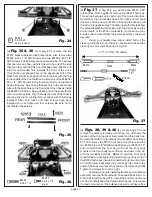
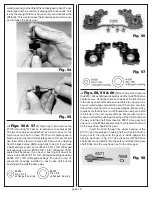
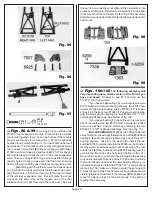
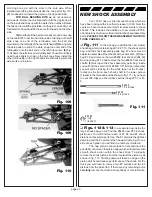
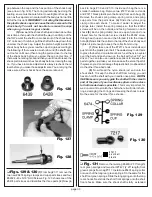
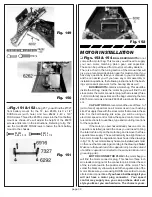
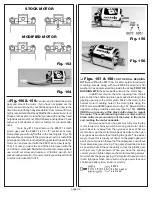
Figs. 98 & 99
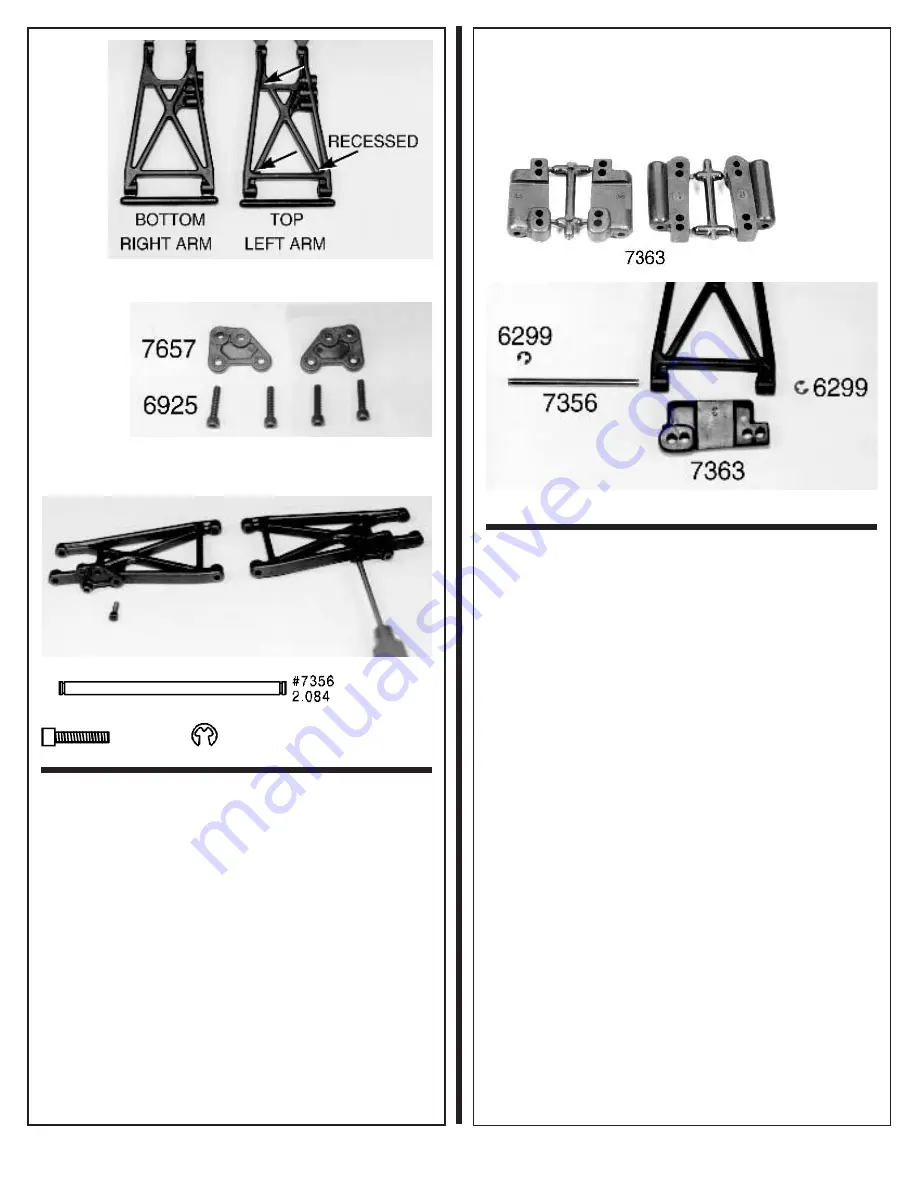
(1) In bag #7-8 you will find the
#7363 3° rear suspension mounts. The mounts are normally
connected together. If you look at the bottom of the mounts
you will see that one is marked with an “R” for the right side
and the other is marked with an “L”. On top of both of them will
be molded a “3”, which tells you the number of degrees of rear
toe-in on each mount has. (2)In the same bag you will find two
#7356 rear inner hinge pins and four #6299 1/8" E-clips. (3)
We will first need to check the pin fit in the rear suspension
arms. Take one of the #7356 hinge pins and slide it through
the arm holes. Check to make sure that the arm can swing
freely on the pin on both ends of both rear suspension arms.
(4) Starting with the left rear mount and suspension
arm (fig. 94 will remind you which is the left suspension arm),
align the pin hole in the left rear mount with the inner pin holes
of the left rear suspension arm. This will place the shock
mount on the same side as the square end of the rear
suspension mount. (5) Now slide the rear inner hinge pin
through the arm and the mount (6) and then install an E-clip
on each end of the pin. Remember, we want the pin to be tight
in the mount but free on the arm. Refer to fig. 99 for assembly
detail. Now go ahead and assemble the right suspension arm
and mount.
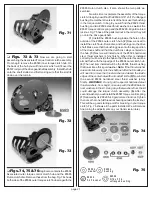
Fig. 98
Fig. 99
❏
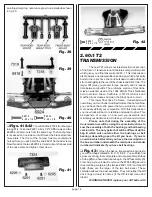
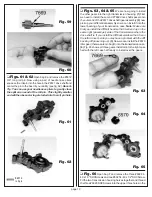
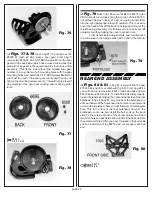
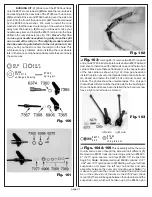
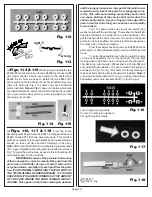
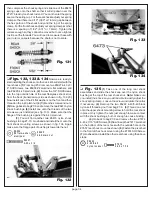
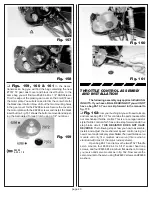
Figs. 100-102
The following assembly will
vary depending upon which version of the T2 that you
have purchased. Go back to bag #7-8 and remove the
#7365 0° rear hub carriers.
If you have a ball bearing T2 you will also remove two
#7377 aluminum rear axle bearing spacers, two #7367 new
universal dogbone rear axles, twelve #7368 3/16" rear axle
shims (14 in the bag), two #7369 1/16" rear axle spring pins,
and the small bag containing the four #6906 3/16" x 3/8"
unflanged ball bearings. See bottom of fig. 100.
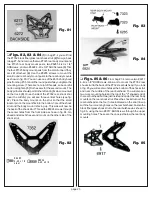
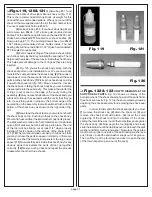
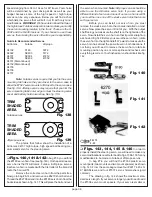
If you have a bushing T2 you will need to remove two
#6374 rear stub axles, two #6375 3/32" roll pins, two #6388
axle cone washers, and the small bag containing the four
#7360 1/4" x 3/8" unflanged bushings. See top of fig. 101.
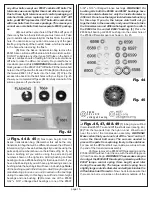
BALL BEARING KIT: (1) Slide one of the #7368 rear
axle shims onto the axle, (2) followed by one of the #6906 ball
bearings, (3) and this will be followed by one of the #7377
bearing spacers. (4) From the back side install the as-
sembled #7367 universal axle into the #7365 rear hub carrier.
Use the axle to seat the bearing into the back side of the rear
hub carrier. (5) Now install a second #6906 bearing over the
axle into the front side of the hub carrier (bottom of fig. 101).
Be careful to seat it correctly without damaging the bearing
race dust shield. (6) Take five of the #7368 shims and slide
them onto the axle up against the outer bearing. (7) Use your
needlenose pliers to install the #7369 1/16" rear axle spring
pin (see fig. 102). Make sure that you center the spring pin to
the best of your ability.This will prevent any problems when
installing the rear wheel later in the manual. (8) Go ahead and
repeat the above steps for the second axle. They both go
together the same way.

