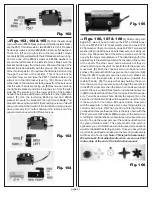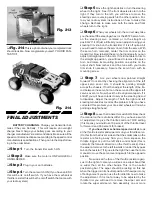
splines on the servo. Remount and then recheck the
position of the wiper arm. Remember you can use the trim
knob to fine tune the adjustment to get it correct. Next test
the throttle by squeezing the trigger. Does the wiper arm go
all the way over and under the throttle bypass tab? Every-
thing is correct if you contact the bypass and the wiper arm
does not come off the resistor on the brake side.
Note: If
you have a radio system that does not have the 70/30
setting or switch but only the older 50/50 setting, it can
still be made to work. This system just requires a little
more time and effort to setup correctly. For this sys-
tem you will have to have the wiper arm slightly to the
left of the neutral band. You will use the throttle trim to
adjust the wiper arm back over the neutral band. You
will have to use almost all of the trim to accomplish
this so that the wiper arm should not slip off the
resistor when full brake is applied.
If you have an electronic speed control (ESC)
follow the speed control manufacturers' manual to make all
settings and adjustments.
❑
Step 9
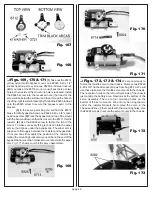
Now turn the car switch OFF. A word of
caution here. Have the truck sitting up on a block or work
stand so the rear wheels cannot touch anything before you
turn the car switch back on to check the speed control and
motor operation. If you have not connected your motor
plug during the testing of your speed control settings your
motor into the speed control motor plug. Recheck the
speed control settings with the motor now connected.
❑
Step 10
When you are done setting the speed
control (and probably playing with the throttle) turn the on/
off switch OFF.
❑
Step 11
The transmitter switch must always be the
FIRST SWITCH TURNED ON and THE LAST SWITCH
TURNED OFF.
YOUR TRUCK IS NOW READY TO RUN!
RC10T2 TRUCK
MAINTENANCE
You will find your RC10T2 truck will give you many
more hours of trouble-free operation. Even so you should
periodically check all the moving parts: front and rear A-arms,
steering blocks, steering linkage, shocks, and so on for wear,
missing or loose parts. Also if any of the moving parts should
get dirt in them (lets say in the arm hinge pins) then the truck's
handling can suffer greatly. Replacing, tightening or cleaning
of the parts in questions will greatly improve the performance
of your truck.
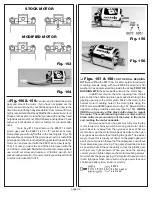
MOTOR TROUBLESHOOTING. Because the truck is
designed to run in the dirt it is possible the dirt can cause motor
problems. This means that if you are having problems with
your motor you will need to check this things first:
1) If the motor does not run at all you should check the
wiring connections first. Are all the wires and capacitors
connected properly? Are all the solder connections in good
shape? A bad solder connection will have dull finish or it will
be rounded under the edges. (This means the solder has not
properly bonded the parts together.) Pull on the wires to make
sure that the connections are really solid.
2) A sticking brush could be caused by dirt or the
brush braided wire getting caught or hung up on the brush
holder. Either of these can prevent the brush from being axle
to slide in and out inside the brush holder so that it is making
contact with the commutator at all times. You can normally
correct either problem by pulling the brush out of the brush
holder a very small distance and then letting it snap back into
the brush holder from the spring pressure of the brush spring.
To prevent these problems in the future you should clean the
brushes, holder and commutator. You should also re-route
the brush wire over the top of the brush holder and then down
into the spring slot on the right side of the brush holder (behind
the spring). This way the brush wire cannot get caught or bent
over the outer edge of the holder. Always keep in mind that the
brushes need to be able to move freely in the brush holder.
3) To check for a shorted motor, you will want to remove
the motor pinion from the motor. This will prevent the the
vehicle from getting away from you or causing any damage.
With a fully charged battery pack, turn on the radio transmitter
followed by the car. Now give the car full throttle. Does the
motor seem to reach full speed? If you are using a high
revolution motor, it should sound like it is turning at a very high
speed. Next, with the motor still running, place one finger on
each side of the motor end bell so that one finger is contacting
the positive side and the other is contacting the negative side.
We are not trying to make electrical contact, we are just going
to be looking for excessive heat. If the motor is shorted it will
get extremely hot on one of both sides of the end bell in less
than a minute. This means it will become hot enough to burn
your finger at the end of the minute. If this is the case then you
would need to send us the motor along with a copy of the
purchase receipt (that shows the date of purchase) so that we
can inspect the motor for defects. We will then test the motor
to confirm your problem Upon confirmation of the defect we
will send you a replacement motor. Following the above
proceedures will help to prevent your losing unnecessary time
in being able to enjoy your new car kit.
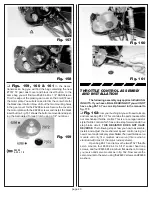
MOTOR MAINTENANCE. After every 2 to 3 runs,
remove the brushes from the holders and inspect the tips for
wear and/or burning. If you notice any wear, replace the brush
with a new pair. To inspect for a burnt tip, look at the side of
the brush on the contact end. If it is a burnt blue color, then the
lubricant in the brush has been burnt away; new brushes
should be installed. These are important steps, for worn or
burnt brushes can cause irreparable damage to the motor
commutator. Changing brushes frequently will help maintain
the life of your motor. For stock motors we recommend our
#738 motor brush; for standard brush modified motors we
recommend our #737 motor brush. And for laydown brush
modified motors use our #760 motor brush.These are off road
compounds, giving you excellent motor life and good power,
but we do have other compounds for different applications. At
the same interval you should carefully clean the motor. One

