DO NOT ROUTE WIRES IN PATH OF MOVING OBJECTS.
11. Now Place SureLock back into the Unlocked position – by shifting the
Red Release Lever away from Door Track.
12. Next you will need to carefully route SureLock's Wiring(E) from
SureLock all the way to the garage door opener. Making sure wire is
free from any moving objects, simply secure in place using the supplied
staples as needed along the wall, and route to the Garage
Door Opener along the ceiling. It may be possible to route along rail if
wire securing system / slot is provided on rail.
Make sure you use care not to pinch or cut wires when securing.
(Often times you can simply follow the same route as the Photo-Beam
wires originally installed with your garage door).
We will come back and complete the connections a little later.
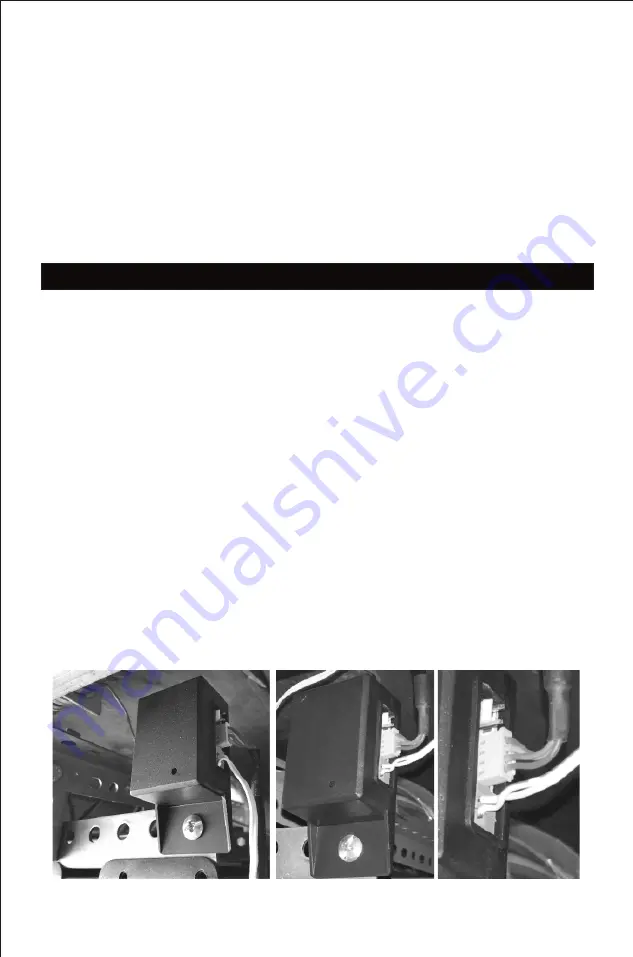
13. Now you are ready to mount the Surelock Sensor onto the Garage Door
Opener's metal mounting brackets (those used to secure the opener to
the ceiling mount straps).
Use supplied 1/4" Bolt(F) and 1/4” Nut(G) to secure Surelock Sensor
(see photo).
14. You can now connect the Surelock's Wiring(E) (you previously routed
to the Garage Door Opener) to the Surelock Sensor. Trim to length and
pull apart the two wire leads and strip back ½” of insulation.
Insert either lead into each of the two holes in the Surelock Sensor's
green 2-position connector
(To insert or remove use a small flat screwdriver and press orange tabs
above terminal).
Note:
Red LED Only Activates Upon Vibration


