background image

-5-


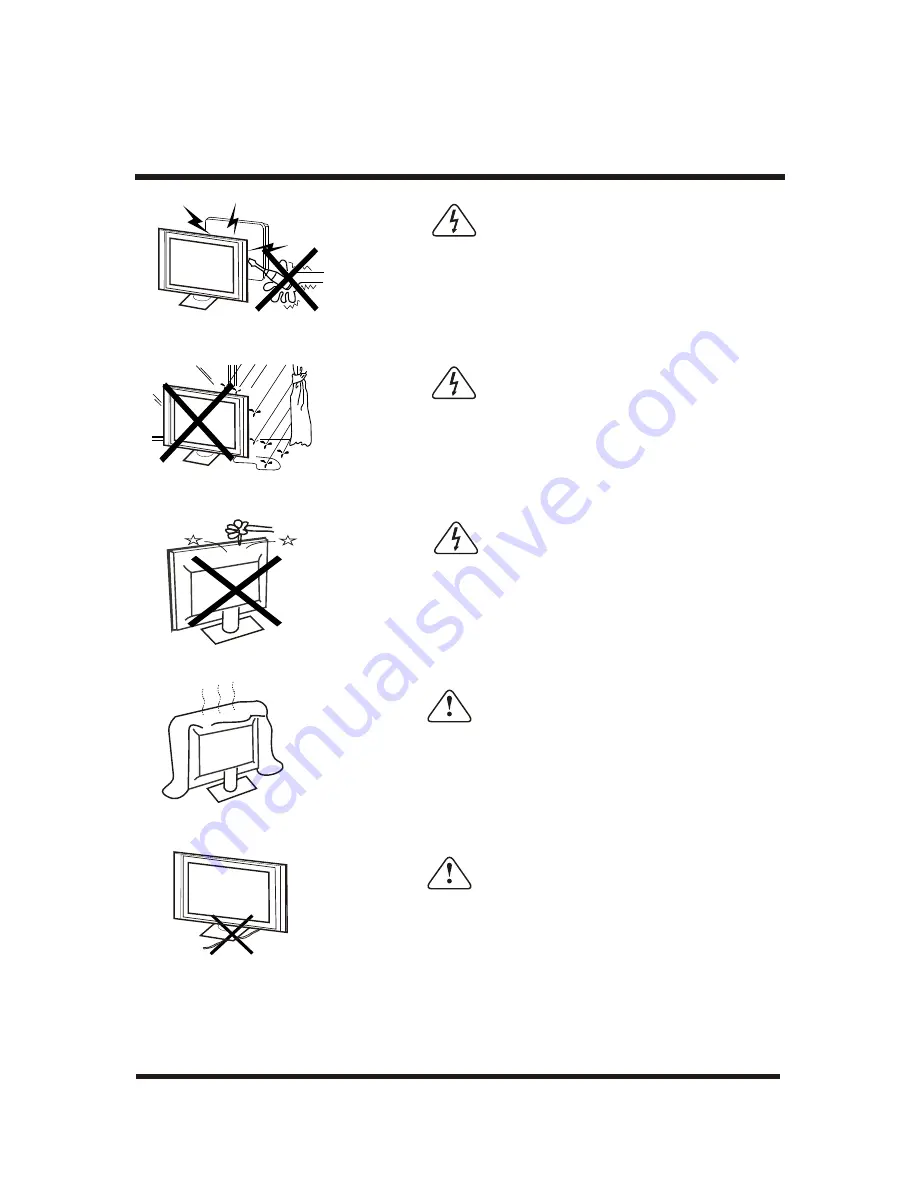
Warning

High voltages are used in the operation of this television receiver. 
Do not remove the cabinet back from your set.Refer servicing to 
qualified service personnel.


Warning

To prevent fire or electrical shock hazard, do not expose the television 
receiver to rain or moisture.


Warning

Do not drop or push objects into the televisiion cabinet slots or 
openings. Never spill any kind of liquid on the television receiver.


Caution

Do not block the ventilation holes in the back cover. Adequate 
ventilation is essential to prevent failure of electrical components.


Caution

Do not squash power supply cord under the television receiver.

WARNINGS AND CAUTIONS

Summary of Contents for LTV-1501

Page 1: ...INSTRUCTION MANUAL INSTRUCTION MANUAL MODEL LTV 1501 MODEL LTV 1501 15 TFT LCD TV 15 TFT LCD TV ...

Page 2: ...INSTRUCTIONS PREFACE WARNINGS AND CAUTIONS SPECIFICATIONS ASSEMBLY DRAWINGS INSTALLATION REMOTE CONTROLLER DESCRIPTION BATTERY INSTALLATION REMOTE CONTROLLER UNIT OPERATION INSTRUCTIONS TROUBESHOOTING 2 3 4 5 6 7 8 9 12 13 14 15 23 24 25 1 ...

Page 3: ...by the manufacturer 12 Unplug this apparatus during lightning storms or when unused for long periods of time 13 Refer all servicing to qualified service personnel Servicing is required when the apparatus has been damaged in any way such as power supply cord or plug is damaged liquid has been spilled or objects have fallen into apparatus the apparatus has been exposed to rain or moisture does not o...

Page 4: ...t e s t h a t t h e r e a r e i m p o r t a n t o p e r a t i n g a n d m a i n t e n a n c e i n s t r u c t i o n s i n t h e l i t e r a t u r e a c c o m p a n y i n g t h i s u n i t TO PREVENT FIRE OR SHOCK HAZARD DO NOT EXPOSE THISAPPLIANCE TO RAIN OR MOISTURE Connect a adaptor with 12VDC 4A output to this unit s power socket The core of the cosket is positive pole Sheet metal outside is ca...

Page 5: ...to the cabinet or premature component failure This TV s adapter can be connected to AC 110 240 Volts 50 60 Hz Never connect to a DC supply or any other power supply Do not cover the ventilation openings when using theTV directly Never tamper with any components inside the TV or any other adjustment controls not mentioned in this manual All LCD TVs are high voltage instruments When you clean up dus...

Page 6: ...not expose the television receiver to rain or moisture Warning Do not drop or push objects into the televisiion cabinet slots or openings Never spill any kind of liquid on the television receiver Caution Do not block the ventilation holes in the back cover Adequate ventilation is essential to prevent failure of electrical components Caution Do not squash power supply cord under the television rece...

Page 7: ...e it is advisable to disconnect the AC power cord from the AC outlet Caution Avoid exposing the television receiver to direct sunlight and other sources of the heat Do not stand the television receiver directly on other produces which give off heat E g video cassette players and audio amplifiers Do not place naked flame sources such as lighted candles on the television Caution If the television is...

Page 8: ...20 H 100 V English French Italian Portuguese Spanish AC 100 240V 50 60Hz 48W 3W 3W 50 000 hours RF input Cable antenna RFx1 VIDEO input VIDEOx1 S VIDEOx1 YCbCrx 1 GRAPHIC input Analog RGB 15pin x1 AUDIO input 3 VIDEO YCbCr PC 101 199 MHz 195 499MHz 501 933 MHz Remote control AC adapter AC cord Instruction Manual batteries Accessories for hanging A B C D Accessories One Remote Control Two size AAA ...

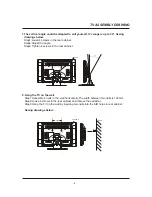
Page 9: ...rews in the rear cabinet Step2 Adjust the angle Step3 Tighten 4 screws in the rear cabinet Step1 Assemble 2 nails in the wall horizontally The width between two nails is 120mm Step2 Loose 4 screws in the rear cabinet and remove the pedestal Step3 Hang the TV on the wall by inserting two nails into the A B holes in rear cabinet Seeing drawings below 1 4 3 2 4 SCREWS 120mm A B Nail Wall ...

Page 10: ... main menu or change channel in TV mode 3 VOL VOL Adjust the item you select or adjust volume 4 AUTO EXIT Act as AUTO adjustment hot key when OSD is not displayed Otherwise perform erase OSD 5 Video source select or power off Press this key longer than 3 seconds to turn off the TV FRONT INSTALLATION BACK CH CH ANTENNA ...

Page 11: ... Connect the AC ADAPTOR to the TV then to a properly grounded AC outlet 4 Power ON the TV first then Power ON the computer This sequence is very important 5 If the TV still does not function properly please refer to the troubleshooting section to diagnose the Problem Hold on to the connector lug when you unplug any one of the connectors Do not direct pull on the cord as it is prone to damage CAUTI...

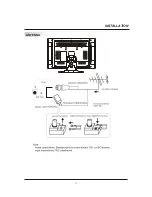
Page 12: ...ANTENNA 11 INSTALLATION ...

Page 13: ...Cr for convenient connection to VCR DVD or other video equipment Please refer to the owner s manual of the equipment to be connected as well You can use theAV and YCbCr input terminals on TV set rear as follows AV EQUIPMENT You can also the S VIDEO terminal if your video equipment has S VIDEO INSTRUCTION Please keep AC cord unplugged when connecting TV system To audio outputs with terminal VIDEO E...

Page 14: ...ure in PC mode DIRECT PROGRAM SELECTION 0 9 BUTTONS 1 To select one digit channel Press 0 9 digit buttons and wait for 2 seconds For example you need channel 5 please input 5 button and the screen displays 5 the TV set goes to channel 5 in 3 seconds 2 To select two digit channel Press two digit buttons in order to input the channel number For example you need channel 10 please input 1 button follo...

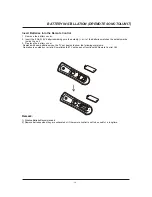
Page 15: ...with new batteries when the TV set begins to show the following symptoms Operation is unsteady or erratic Sometimes the TV set does not function with Remote Control Unit Remark BATTERY INSTALLATION DREMOTE SONCTOLUNIT 1 Alkaline Batterie Recommended 2 Remove batteries when they are exhausted or if the remote control is not to be used for a long time Insert Batteries Into the Remote Control ...

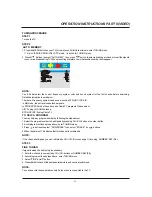
Page 16: ... 15 All MENUs are shown below OPERATION INSTRUCTIONS PART I PC ...

Page 17: ... 16 OPERATION INSTRUCTIONS PART I PC AUTO CONFIG ...

Page 18: ...RUCTIONS PART I PC There are 12 items listed in the main menu Step1 Press menu to enter the main menu Step2 press to select an item Step3 press menu to enter this item Step4 press to adjust this item To reduce the need for adjustment for different modes the TV has default setting modes that are most commonly used These are shown in the table below For optimum adjustment the user is suggested to pe...

Page 19: ...signals in your area broadcasting TV When presetting complete the initial position number will reappear TO SKIP A PROGRAM You may skip any program number by following the steps below 1 Select the program number to be skipped by pressing CH CH button or number button 2 According to mentioned steps above enter TUNING menu 3 Press buttons to select ADD ERASE then select ERASE by buttons 4 When the sk...

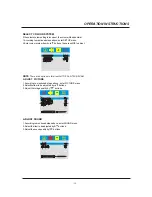
Page 20: ...ccording to mentioned steps above enter PICTURE menu 2 Selecttheitem to be adjusted by buttons 3 Adjust the image quality by buttons ADJUST PICTURE NOTE There are 4 options in this item AUTO PAL NTSC SECAM ADJUST SOUND 1 According to mentioned steps above enter SOUND menu 2 Select the item to be adjusted by buttons 3 Adjust the sound quality by buttons 19 COLOR TEMP COLOR TEMP WARM WARM CC V CHIP ...

Page 21: ...re are 5 languages ENGLISH and SPANISH PORTUGUESE ITALIAN FRENCH SELECT TEMPERATURE 1 According to mentioned steps above enter SETUP menu 2 Select the COLOUR TEMP item to be adjusted by buttons 3 Adjust the colour temperature you want by buttons COLOR TEMP COLOR TEMP WARM WARM CC V CHIP CC V CHIP COLOUR TEMP COLOUR TEMP WARM WARM CC V CHIP CC V CHIP COLOUR SYS COLOUR SYS COLOUR SYS COLOUR SYS ...

Page 22: ... one channel caption one channel text or only caption without text 3 You can only use this function in TV and VIDEO mode for it can t display in other mode I Setting Closed Caption CCD II Setting V CHIP 1 Press buttons to select Vchip password item 2 Press buttons to enter PASSWORD menu 3 Use buttons to move cursor use buttons to change number the preset password is111111 4 Press CC V CHIPbutton t...

Page 23: ...3 Use to select the desired rating 4 Press button to block the rating will appear or unblock will appear Movie Ratings Unblocked G and Above general audience PG and Above parental guidance suggested PG 13 and Above 13 years and up R and Above restricted NC 17 and Above 18 years and up X adult V Chip enables parents to prevent their children from watching inappropriate material on TV V Chip reads t...

Page 24: ...V S L D If you want to exit the menu please press CCD V CHIP button Repeatedly TV Ratings Unblocked TV Y and Above all children individual content categories do not apply TV Y7 7 years and up TV G and above general audience individual categories do not apply TV PG and Above parental guidance suggested TV 14 and above 14 years and up TV MA mature audience Content Categories F Violence fantasy viole...

Page 25: ...e s no picture on the LCD TV please perform the following steps 1 Make sure the power indicator on the LCD TV is ON all connections are secured and the system is running on the correct timing 2 Turn off the LCD TV and then turn it back on again If there is still no picture press the Adjustment Control button several times 3 If step 2 doesn t work connect your PC system to another external CRT If y...

Page 26: ...tr o l C h e ck if sy st e m sw itc h is co rr e ct C h e ck if o n o ff sw itc h is o n C h e ck B a tt e ri e s in R e m o te co n tr o l S o lu ti o n Symptoms 25 PART II Incorporated in your TV receiver are the most up to date devices to eliminate interference Local radiation however can create disturbances which visibly affect your picture Proper installation and a good aerial are your best s...

Reviews: