Revision 1.1
AT110 Quick Start Guide
1.
An ASCII terminal is useful for initial testing and configuration. If you already
have one, skip to step 2, otherwise :
a.
We recommend TeraTerm, which can be downloaded free of charge from:
http://logmett.com/index.php?/download/tera-term-467.html
b.
Once downloaded, install TeraTerm and start up a session
c.
Select
Setup
and then choose
Serial Port
from the drop down options
d.
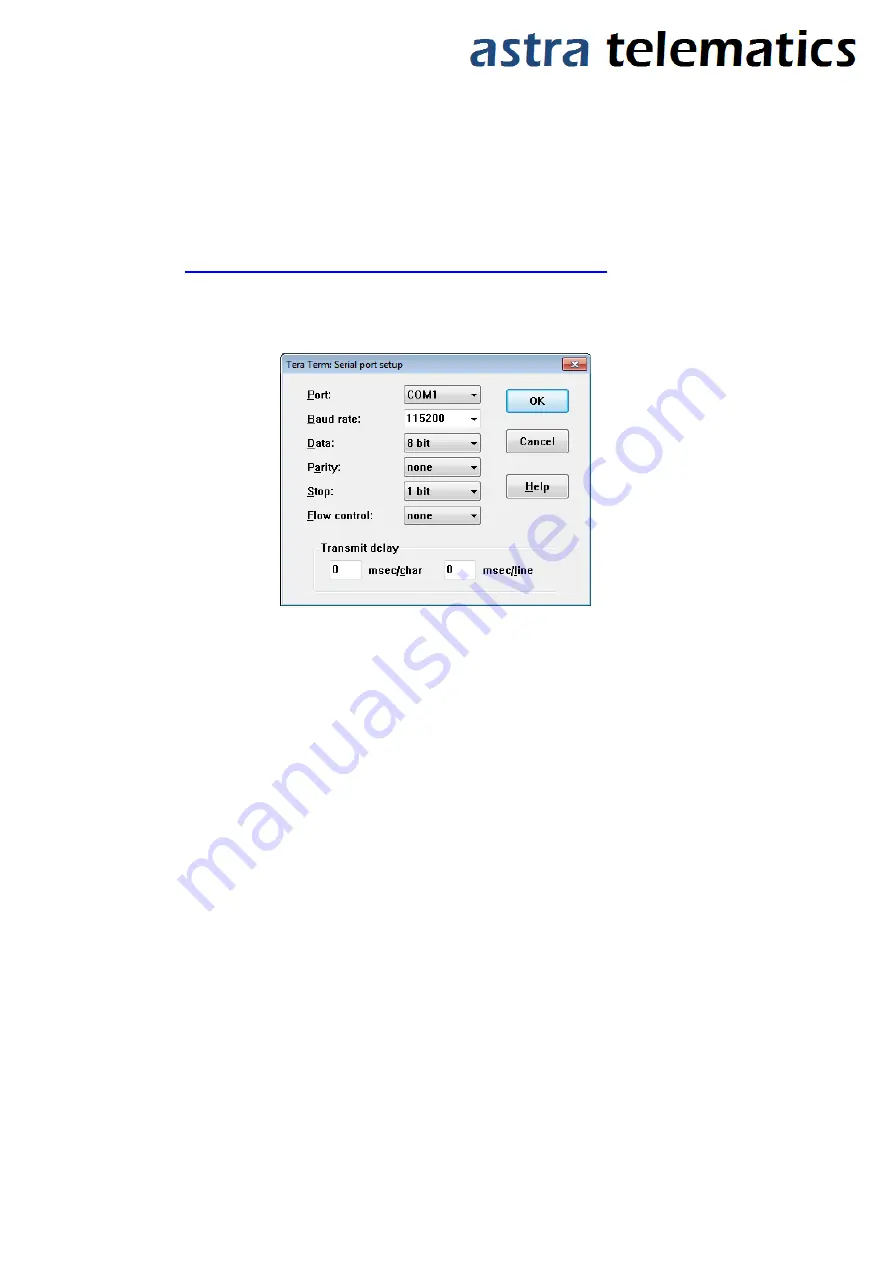
Configure your serial connection as follows:
e.
Choose the
Port
to suit your available COM ports on your PC. This will usually be
COM1 if you have a built in RS232 port. If using a USB-RS232 adapter, go to the
Windows® Device Manager and check which COM port has been assigned to your USB
adapter (note: the assigned COM port will change if you plug into a different USB
socket on your PC).
f.
Select
Setup
and then
Save Setup
from the drop down menu list to save this
configuration
g.
Leave the TeraTerm window open whilst you now set up and connect the AT110
2.
Connect the Antennas
a.
Plug in the GPS and GSM antennas to the SSMB and MCX coaxial connectors on the
front edge of the AT110
b.
Position the GPS antenna with a direct ‘view’ of the sky and the ‘SKY SIDE’ label facing
up.
3.
Connect the CB113 cable to the AT110 30-pin data connector
a.
The CB113 cable has a DB9 female RS232 connector for convenient access to the main
RS232 port of the AT110, which is useful for configuration, diagnostics and debugging
etc.
b.
Connect the DB9 serial connector to your PC COM port or USB-RS232 adapter

