background image

Foreword

This is a new type of multifunctional hi-tech product with integration of
high-definition camera shooting, photographing, recording and outlay TF card
memorizer. It carries High-Definition Multimedia Interface (HDMI) which can transit
in high quality uncompressed high-definition video and multichannel voice data. It is
mainly used for on-vehicle shooting to improve the efficiency of taking evidence of
traffic accident, and also can bring wonderful experiences to daily life, traveling, and
outdoor activities.

Product Feature

With the mini size and a 120 Degree A+ bugeye lens of high resolution, it highly facilitates
high-definition multiangle shooting and photographing under various situations.

Built-in 1million 1/3.2 inch photosensitive element of low noise and high definition, it can
capture ultra definition pictures under dark surroundings.

2.0 inch high-resolution LCD that allows screen viewing along side with video recording.

HDMI Export Support that can be connected to high definition TV;

It provides the watermark function of time and date that can synchronously display the time
and date while shooting and photographing.

It adopts cyclic covering record mode that allows continuous rolling record through the
coverage of new frames over old ones.

It support micro SD card that interchange of file copy can be achieved.

Powerful file protection that can fully save video files even when sudden power loss or
machine breakdown occurs during recording.

Built-in lithium battery that allows video recording under battery charging.

It provides preview function under auto photographing for the selection of ideal image.

Built-in microphone / loudspeaker

TF card support as large as 32 GB

motion detection videoing function

180°inversion videoing/ photographing

Summary of Contents for BDVR-01

Page 1: ...ion it can capture ultra definition pictures under dark surroundings 2 0 inch high resolution LCD that allows screen viewing along side with video recording HDMI Export Support that can be connected to high definition TV It provides the watermark function of time and date that can synchronously display the time and date while shooting and photographing It adopts cyclic covering record mode that al...

Page 2: ...set button 3 indicator light 4 Holder Screw Hole 5 display screen 6 video photograph button 7 Mode Switch button 8 Menu Button 9 SOS button 10 Microphone 11 lens ring 12 lens 13 Loudspeaker 14 USB Interface 15 HDMI Interface 16 On Off Button ...

Page 3: ...files during videoing 3 Short press to enter different selections in the menu 4 Short press to play suspend under video replay On Off Button Short press to start 2 second long press to shut Indicator Light Instruction Name Instruction Charging Indicator Light Red indicator light means charging state while the light will be off upon charge completion working indicator A green indicator will be on w...

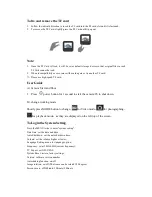
Page 4: ...econd to start the camera 2S to shut down B change working mode Shortly press MODE button to change for Video mode for photographing for playback mode as they are displayed on the left top of the screen To Login the System Setting Press the MENU twice to enter system setting Date time set the date and time Auto Shutdown set the auto shutdown time Volume set the volume higher or lower Language Sett...

Page 5: ...ton to switch camera mode then this icon will appear on the top left device enter into camera mode 2 Focusing on the Object to take photos and its will can be adjust the zoom via press up down button 3 Press the OK button camera will start to take photo 4 Self snapshot function In camera mode press the Menu button to select the photo taking mode press Down button to select single shot two seconds ...

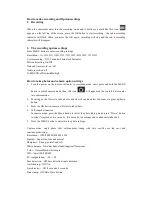
Page 6: ...nt file and delete all then press OK button to enter into delete file press OK again to confirm delete file Press the Up Down button to select formatting option press OK to enter formatting options then press OK button format file and press OK again to confirm format file Information Backup USB Backup Mode Use USB cable to connecting with PC press the power button you will can see the following se...

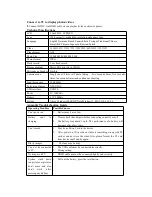
Page 7: ...e USB 2 0 Power 5V 1000MA Battery 3 7V 500MA System Above Windows 2000 XP Vista Windows 7 MAC OS x 10 3 6 Appendix Troubleshooting Guide Operating Troubles Possible Causes Can t power on 1 Battery may be too low Battery can t to charging 1 Please check the charger whether connecting correctly or not 2 The battery may doesn t work The performance of a battery will decrease after a few years Can t r...

Reviews: