
9
Viron e-Quilibirum Series Chlorinator
Installation Manual
8
Viron e-Quilibirum Series Chlorinator
Installation Manual
3.3
Connecting the PVC Acid Tube
3.3.1
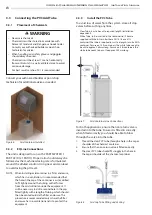
Placement of Chemicals
WARNING
• Never mix chemicals
• Chemicals must be stored in accordance with
Relevant Standards and Dangerous Goods Codes.
Consult your authorized builder or pool shop
technician for advice.
• When handling acid, safety gloves and goggles
should always be used.
• Chemicals must be at least 1 metre horizontally
from control unit in a well ventilated area to avoid
corrosive damage.
• For best results a ratio of 2:1 is recommended.
Consult your authorized builder or pool shop
technician for additional advice as needed.
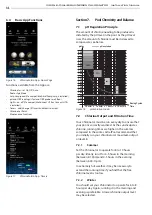
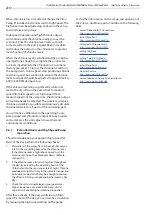
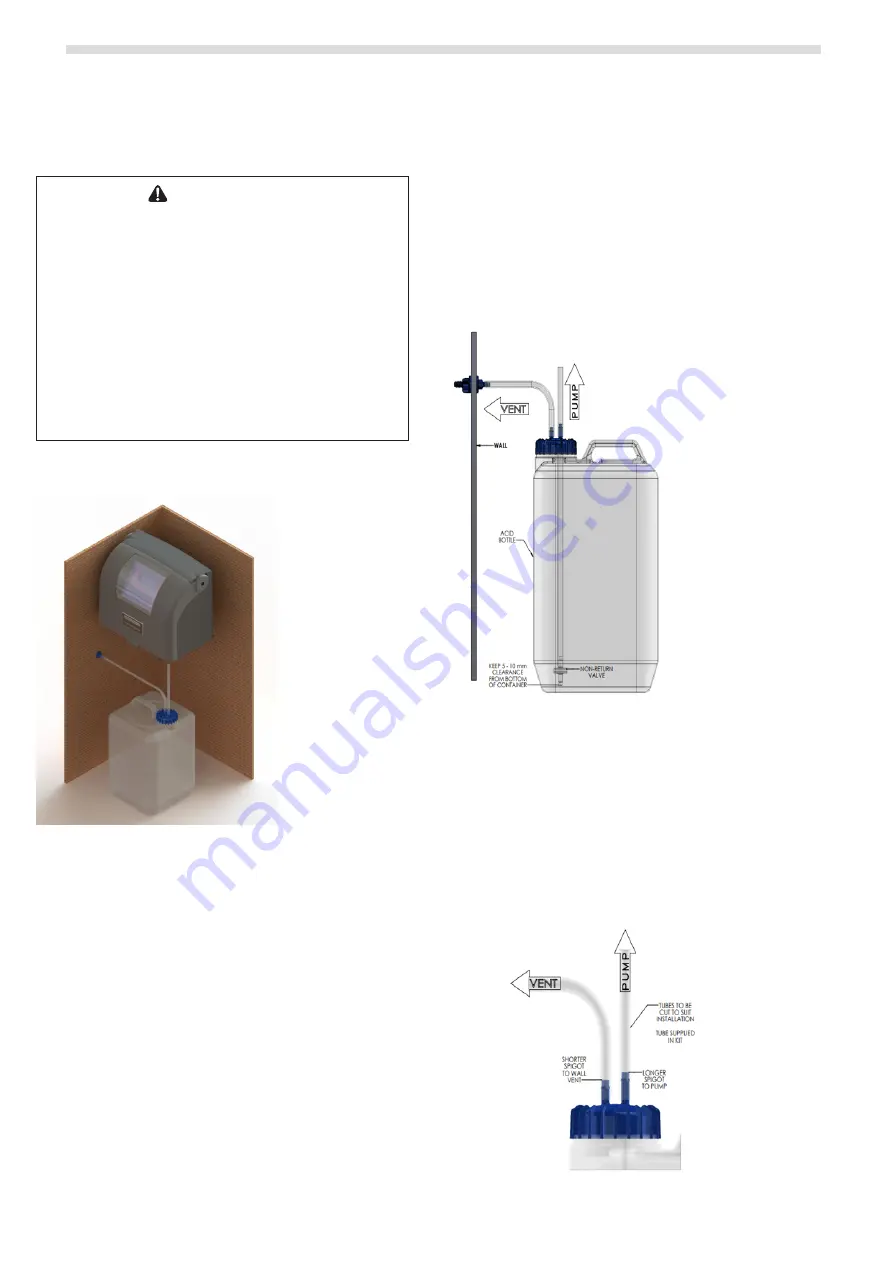
Figure 6.
Acid Container Installed
3.3.2
EQ Line Connections
The unit is designed to run with 2 PARTS WATER, 1
PART ACID (2.1 RATIO). Proper ratio should always be
followed as the machines dosing rate is formulated
around the diluted solution. Using neat acid can lead
to overdosing the pH level.
NOTE: When installing acid container in a filter enclosure,
which has no ventilation, it is recommended that
the hole in the cap of the container is cut or drilled
to fit tightly around the tubing, so that fumes
from the acid will not corrode the equipment. It
will be necessary to drill a second hole in the cap
fitted tightly with a length of tubing which should
then be vented outside the filter enclosure. This
procedure is recommended only where the filter
enclosure has no ventilation and is to protect the
equipment.
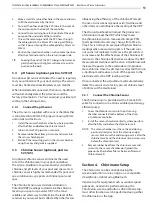
3.3.3
Install the PVC Tube
To avoid loss of water from the system, close all stop
valves before cutting any lines.
• Clear Tube - 4m to be cut to required length (installation
dependant)
• White Tube -to be inserted in the Container lid (2 lids are
supplied with the kit to suit either a 25/15 ltr or a 5 ltr
container) The tube is supplied to suit to a length to suit a 25ltr
container. For use on 15 ltr containers, the white tube needs to
be cut to approx. 265mm long. For use on 5 ltr containers the
white tube needs to be cut to approx. 250mm long.
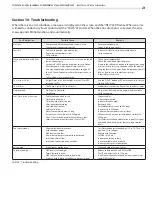
Figure 7.
Acid Container LIne Connections
For both applications, ensure the non return valve is
inserted into the tube. Ensure it is fitted in correctly,
when fitted correctly you should be able to blow
through the valve into the tube.
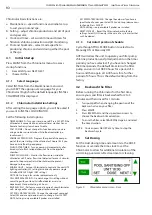
1.
Thread the clear PVC tube through a hole in the cap or
shoulder of the chemical container.
2.
Ensure that the non-return valve is fitted correctly.
3.
The clear PVC tube should fit snuggly in the hole in
the cap or shoulder of the chemical container.
Figure 8.
Acid Cap Tube Fitting and Venting