


9
VIRON™ QT 1000 robotic cleaner
owner’s Manual
8
VIRON™ QT 1000 robotic cleaner
owner’s Manual
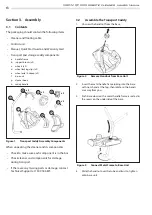
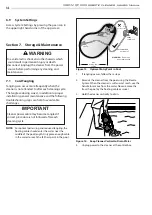
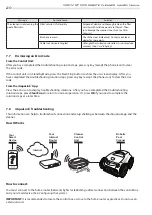
2.
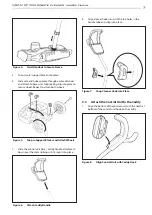
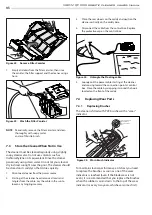
Press control unit onto the caddy hook until it snaps
and locks into position.
Figure 9.
Attach the Control Unit onto Caddy
3.4
Connect to a Power Source
WARNING
Failure to comply with the following warnings
can increase risk of fire or electrocution
which can result in property damage and
serious injury, including loss of life.
PREVENT ELECTRICAL SHOCK
• Keep the control unit at least 3.5 m from the
edge of the pool.
• The cleaner is to be installed in accordance
with the relevant requirements of the Australian
wiring rules AS/NZS 3000. Also refer to the in-
stallation instructions relating to the swimming
pool equipment for which the cleaner will be
an integral part. The cleaner is to be supplied
through a Residual Current Device (RCD) with
a rated residual operating current of 30mA.
• Do not use an extension cord to connect the
control unit.
• Do not allow anyone to swim while the cleaner
is in the pool.
• The control unit is water-resistant, not water-
proof. In order to prevent electrocution, never
submerge the control unit or leave exposed to
inclement weather.
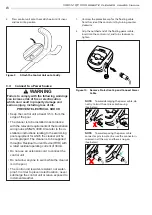
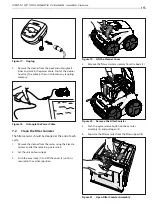
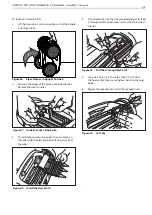
1.
Unscrew the protective cap for the floating cable
from the side of the control unit by turning counter-
clockwise.
2.
Grip the notched end of the floating power cable,
insert into the control unit, and turn clockwise to
tighten.
Figure 10. Remove Protective Cap and Connect Power
Cable
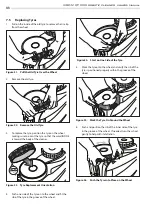
NOTE:
To avoid damaging the power cable, do
not try to twist the entire cable housing.
(See below)
X
X
X
X
NOTE:
To avoid exposing the power cable
connector pins to water, be sure the connector is
screwed in all the way and there is no gap.
(See below)
X
X
X
X


