18
unplug the connectors when the PV module is in
live state. When it is necessary to remove the
connectors, ensure that the PV module is not in
working condition and that professional unlocking
tools and safety measures are used. Direct dragging
and pulling is forbidden.
The junction box of the PV module contains bypass
diodes connected in parallel to the string of the PV
module. The bypass diode in the junction box
prevents module degradation due to shading or
covering. Refer to the junction box diode
specification provided in the relevant product
datasheet for more details. I When the localized hot
spot phenomenon occurs in the PV module due to
partial shading or coverage, the diode in the
junction box will start to work, so that the module
current will no longer flow through the hot spot cell,
so as to limit the heat and loss of the PV module.
When a diode failure is suspected or found, please
contact Chint Solar and do not attempt to open the
junction box cover.
6.3
Grounding
The PV modules are designed with an anodised,
corrosion-resistant aluminum alloy frame as a rigid
support. To ensure safety and to avoid lightning strikes
and electrostatic damage to the PV modules, the PV
module frame must be earthed. The earthing device
must be in full contact with the interior of the
aluminum alloy of the frame, penetrating the surface
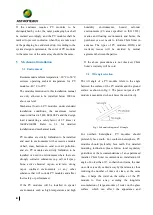
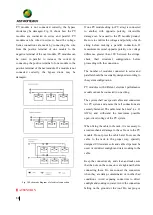
oxide film.The following is the specific grounding
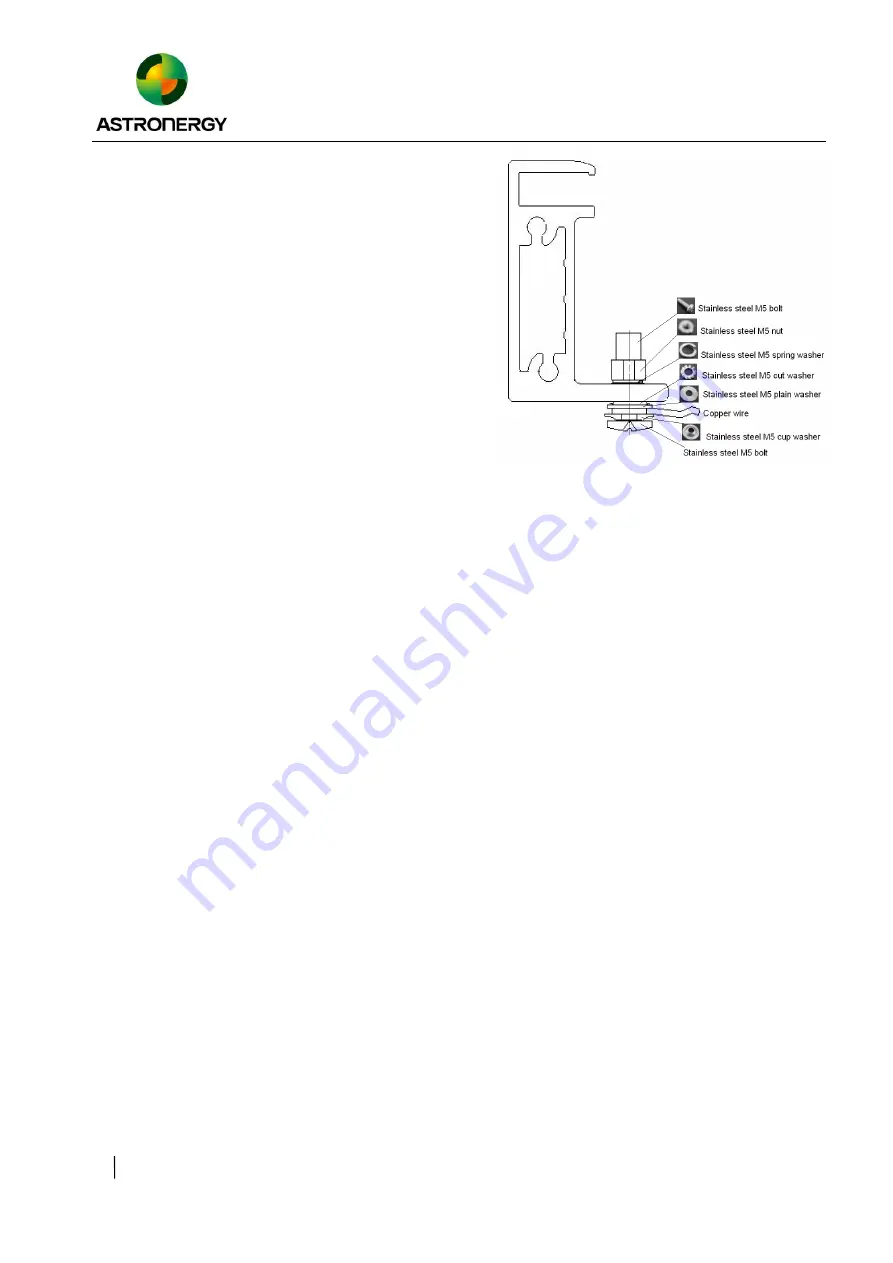
method, as shown in Fig. 15.
Fig. 15 Grounding the aluminum frame with copper
wire
The grounding requirements must be checked in
accordance with the applicable regulations and
standards before work is started.
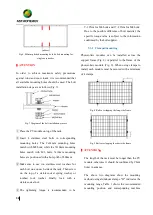
Use the marked 5.5 mm grounding holes to ground
the anodized frame. Use one M5 nut, two M5 cut
washers, one M5 plain washer, one M5 spring
washer, and one M5 bolt and the copper wire. All
nuts, bolts, and washers shall be of type M5 and
made of stainless steel (Fig. 15).
Insert the bolt through the cup washer and wrap the
copper wire around the bolt. (Note that the copper
wire cannot be attached directly to the aluminum.)
Insert the bolt through the cut washer and then
through the hole in the aluminum frame.
Add the spring washer and nut on the other side of
the bolt and tighten to secure all parts. The
tightening torque should be 4~4.5N•m.
!
ATTENTION


