9
The PV module must be securely fastened to the
mounting system. If the PV module is mounted in a
snowy area, the height of the mounting system
should be designed in a way that the lowest end of
the PV module is not covered by snow. In addition,
it should be ensured that the lowest end of the PV
module is not shaded by surrounding trees or other
vegetation.
When the PV module is mounted on a rack parallel
to the roof, the minimum clearance between the PV
module frame and the roof is 10cm, which is
necessary for air circulation to prevent wiring
damage of the PV module.
The PV module frame will suffer thermal
expansion and contraction effect, therefore the
space between two adjacent PV module frames
should be no less than 10mm when mounted.
For detailed installation methods, please refer to the
following specifications:
5.3.1
Bolted mounting
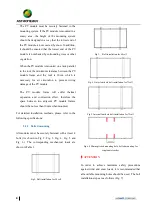
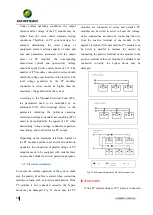
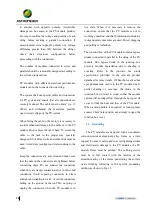
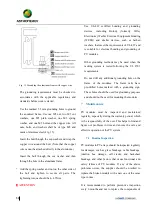
All modules must be securely fastened with at least 4
bolts (As shown in Fig. 2, Fig. 3, Fig. 4 , Fig. 5 and
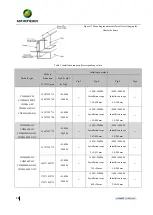
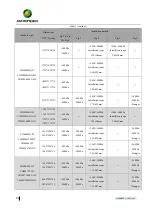
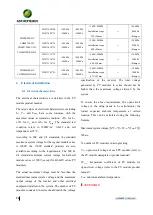
Fig. 6). The corresponding mechanical loads are
shown in Table 1.
Fig 2. Bolt installation for 54cell
Fig 3. Bolt installation for 60cell
Fig 4. Outer four-hole bolt installation for 72cell
Fig 5. Internal four-hole bolt installation for 72cell
Fig 6. 400mm-pitched mounting hole, bolted mounting for
single axis tracker
!
ATTENTION
In order to achieve maximum safety precautions
against wind and snow loads, it is recommended that
all available mounting holes should be used. The bolt
installation steps are as follows (Fig. 7).


