background image


14  

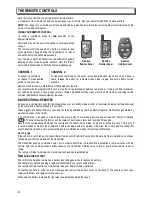
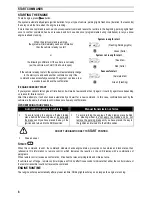
DURING DISARMING

 Indicator flashes code for last zone that generated the alarm condition. 

Code is shown when you press  


button.  

This code is repeated until you apply the brakes. 
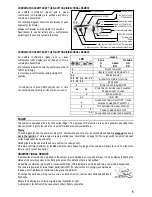
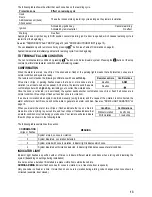
The following table shows the meaning of zone codes (number of flashes). 

ZONE CODES  

FLASHES


ZONE INDICATED 

System is armed. 

A door is/was open. 

Hood is/was open. 

Alarm condition is/was detected on shock sensor input. 

Key is/was in ignition position (RUN). 

Alarm condition is/was detected on additional sensor input. 
Additional sensor monitors status of ___________________________________________________  

Loss of power (+12V battery supply was removed). 

Alarm status is/has been detected on pre-shock sensor input. 

Indicator can show two other conditions: 
CONSTANT DIM LIGHT


Indicates that alarm is permanently disarmed. 


See "VALET MODE" on page 14. 

RAPID FLASHES


Indicates that system is in rearming cycle.   
See " SEMI-PASSIVE REARMING" and "PASSIVE REARMING" on page  12. 

SECONDARY FUNCTIONS  

ANTI-LOCK 

When connected, this function prevents system from locking the doors during automatic rearming if key is in the ignition. 
It can also be connected to a switch to select automatic locking as ACTIVE or INACTIVE. 

TEMPORARY VALET MODE (ALARM) 

This mode is used to cancel automatic rearming for an indefinite period.  
You will find this mode useful when fuelling up or working on your vehicle. 

To activate Temporary Valet Mode, press  


button during rearming cycle (indicator light flashes rapidly). 

When light stops flashing, it confirms that Temporary Valet Mode has been activated.  
To cancel this mode, place ignition key in RUN position then remove it; passive rearming is reactivated when you open a 
door.  

You can also arm the system using the remote, which cancels Temporary Valet Mode. 

VALET MODE 

This mode is used to deactivate alarm permanently when you take your vehicle in for servicing for 
example. It can be de/activate by the remote (see table of commands, page 6) or by the Valet switch. 
See also Pager on page 5. 
Valet switch activates Valet Mode or terminates alarm condition when your 

remote control is not 

available

 (lost, batteries dead, etc.).  

This switch must be installed in a hidden place known only to regular users of the vehicle. 
Ask your installer to tell you where it is. 

T

O ACTIVATE 

V

ALET 

M

ODE

, place ignition key in RUN position (do not start engine) then press Valet switch (for about 3 

seconds) until indicator light comes on at half-brightness for 15 seconds or less, parking lights flash four times to confirm that 
mode was enabled. The indicator light comes on again when engine is stopped or when certain commands are received to 
remind you that Valet Mode is active. 

T

O DEACTIVATE 

V

ALET 

M

ODE

, place ignition key in RUN position (do not start engine) then press Valet switch (for about 3 

seconds) until indicator light goes out, parking lights flash twice to confirm that mode was disabled. 

Notes:  

If you perform both sequences one after the other, you need to pause for 3 seconds between the two sequences. 
Valet Mode is automatically deactivated when key is turned to the RUN position and/or the engine is remote started for the 
tenth time. This is to prevent Valet Mode from being left on for long periods. 

Summary of Contents for 2205A

Page 1: ...acturedinCanadaby Printed in Canada All rights reserved Astroflex 2006 2 WAY REMOTE CONTROL ENGINE STARTER U S E R M A N U A L For all gas and diesel powered vehicles FRAN AIS AU VERSO CONSULT SAFETY...

Page 2: ...against harmful interference in a residential installation This equipment generates uses and can radiate radio frequency energy and if not installed and used in accordance with the instruction manual...

Page 3: ...rter to which an alarm kit has been added Both models offer a keyless entry feature allowing the user to operate the door locks as well as access to the trunk of the vehicle These features are optiona...

Page 4: ...starter checked annually Contact a dealer in your area All users of the vehicle should be aware of the safety precautions and operation procedures Make sure that the warning sticker is present on the...

Page 5: ...that the Turbo Mode is unavailable with this option The parking lights will blink once to confirm that the sequence is valid vehicle is ready for a remote start command The end of sequence option is...

Page 6: ...n the vehicle These signals are transmitted only once and could be neutralized by radio or electromagnetic interferences generated by electronic devices in the vicinity If no confirmation is received...

Page 7: ...hile engine is stopped and key is not in the ignition or while engine is remote started see Valet Mode on page 14 The valet switch is a small red push button hided under the dash board Parking lights...

Page 8: ...H ORN P ARKING LIGHTS SIREN 4 BUTTON 5 BUTTON S TART C ONTINUOUS MODE 1 1 S TOP 1 L OCK A RMING 1 1 3 1 3 X P ANIC 5 sec or 5 sec 30 60 SEC U NLOCK D ISARMING 2 4 2 4 X T RUNK _ 5 sec 3 3 A CTIVATE C...

Page 9: ...TRUNK IS OPEN THIS CONFIRMATION WILL REPEAT ITSELF EVERY 5 MINUTES UNTIL THE TRUNK IS CLOSED W HEN THE DOOR AND TRUNK ZONE ARE IN VIOLATION AT THE SAME TIME THE LCD DISPLAY WILL SHOW THE D OOR ZONE EX...

Page 10: ...twice depending on reason for failure to start After three attempts it will shut down automatically and wait for a new command In this case confirmations sent by the vehicle are the same but remote co...

Page 11: ...If Turbo Mode is on it will be activated when the safety sequence is executed Remove the key exit vehicle and lock all doors All safety devices will remain active If you return to your vehicle before...

Page 12: ...preset temperature at which you want your Remote Starter to start engine press and buttons simultaneously lights 1 4 Parking lights will flash from 1 to 4 times to indicate selected start temperature...

Page 13: ...or horn PREVENTIVE Depending on the system s configuration the indicator light shows different alarm conditions see ZONE CODES on page 14 It can also act as a deterrent if installed in a place visible...

Page 14: ...on this vehicle Following table shows effect of each zone on rearming cycle Protection zone Effect on rearming cycle Hood Additional sensor trunk Shock sensor These three zones prolong rearming cycle...

Page 15: ...ed the system sends another confirmation one chirp or flash if all zones are in normal condition three chirps or flashes if another zone is in violation If a zone is in violation when system is armed...

Page 16: ...confirms that Temporary Valet Mode has been activated To cancel this mode place ignition key in RUN position then remove it passive rearming is reactivated when you open a door You can also arm the sy...

Page 17: ...onged by the number of seconds during which dome light is kept on by vehicle s factory system Special condition If during dome light duration a Lock command is sent while a door is opened system arms...

Page 18: ...ry installed security system and that this system is neutralized by the trunk release command remember to rearm it after trunk is closed Lock command SYSTEM EQUIPPED WITH AN ADDITIONAL SENSOR If your...

Page 19: ...ped additional optional equipment required The message is sent again after 30 seconds and then every two minutes for as long as the lights remain on This function is only available on gas powered vehi...

Page 20: ...g by ignition key Use the stop command to abort panic mode START FAIL CODES When a remote start attempt fails it is possible to determine what caused the failure to start Press the and buttons simulta...

Page 21: ...be present and operational See Safety checks on page 19 Place key in the ignition and turn to the RUN position Apply the brakes once You now have 10 seconds to turn the key from RUN to the OFF positi...

Page 22: ...pply the brakes 2 Release the parking brake The engine must stop immediately upon releasing the parking brake If the engine does not stop which is not safe place the main switch in OFF position until...

Reviews: