


3-3
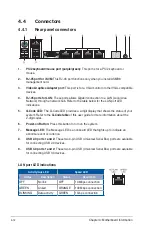
ASUS RS300-E9 Series
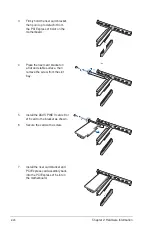
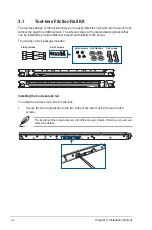
2.
Select a desired space and place the appropriate rack rail (left and right) on opposite
positions on the rack.
A 1U space is consists of three square mounting holes with two thin lips on the top and the
bottom.
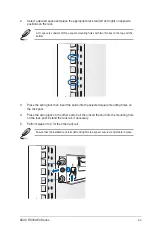
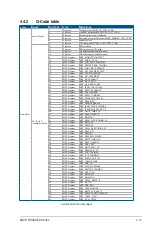
3.
Press the spring lock then insert the studs into the selected square mounting holes on
the rack post.
4.
Press the spring lock on the other end of rail then insert the stud into the mounting hole
on the rack post. Extend the rack rail, if necessary.
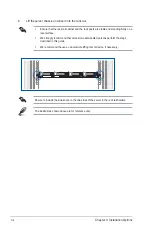
5.
Perform steps 3 to 4 for the other rack rail.
Ensure that the installed rack rails (left and right) are aligned, secured, and stable in place.
Summary of Contents for 90SV038A-M34CE0
Page 1: ...1U Rackmount Server RS300 E9 PS4 RS300 E9 RS4 User Guide ...
Page 22: ...Chapter 1 Product Introduction 1 10 ...
Page 48: ...Chapter 2 Hardware Information 2 26 ...
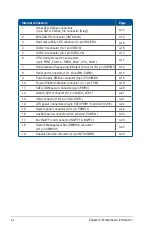
Page 54: ...Chapter 4 Motherboard Information 4 2 4 1 Motherboard layout ...
Page 97: ...5 19 ASUS RS300 E9 Series Intel Server Platform Services Intel TXT Information ...
Page 146: ...6 18 Chapter 6 RAID Configuration ...
Page 157: ...ASUS RS300 E9 Series 7 11 8 Press Restart Now to complete the setup process ...
Page 163: ...Appendix A Appendix ...
Page 164: ...A 2 Appendix P10S C 4L SYS block diagram ...
Page 168: ...A 6 Appendix ...


