background image

7-12

Chapter 7: Driver Installation

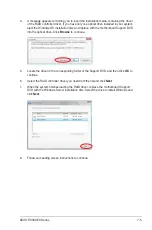
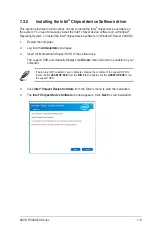
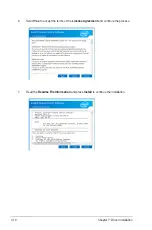
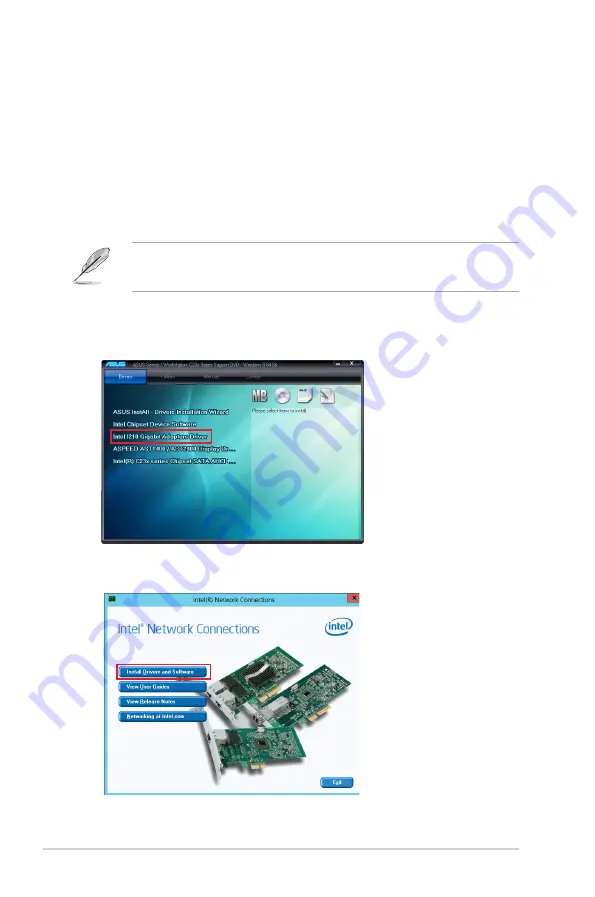
5. Click 

Install Drivers and Software

 option to begin installation.

7.4 

Installing the Intel

®

 I210 Gigabit Adapters driver

This section provides the instructions on how to install the 

Intel

®

 I210 Gigabits Adapter 

Driver 

on the system.

To install the 

Intel

®

 I210 Gigabit Adapters Driver

 on the Windows

®

 operating system:

1. 

Restart the computer.

2. 

Log on with 

Administrator

 privileges.

3. 

Insert the motherboard/system support DVD to the optical drive.

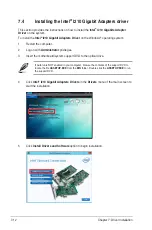
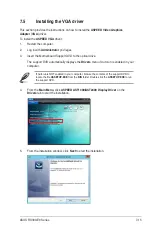
4. Click 

Intel

®

 I210 Gigabit Adapters Drivers

 in the 

Drivers

 menu of the main screen to 

start the installation.

If Autorun is NOT enabled in your computer, browse the contents of the support DVD to 

locate the file 

ASSETUP.EXE

 from the 

BIN

 folder. Double-click the 

ASSETUP.EXE

 to run 

the support DVD.

Summary of Contents for 90SV038A-M34CE0

Page 1: ...1U Rackmount Server RS300 E9 PS4 RS300 E9 RS4 User Guide ...

Page 2: ... of business and the like even if ASUS has been advised of the possibility of such damages arising from any defect or error in this manual or product Specifications and information contained in this manual are furnished for informational use only and are subject to change at any time without notice and should not be construed as a commitment by ASUS ASUS assumes no responsibility or liability for ...

Page 3: ... LAN RJ 45 LEDs 1 8 1 7 3 HDD status LED 1 9 Chapter 2 Hardware Information 2 1 Chassis cover 2 2 2 2 Central Processing Unit CPU 2 3 2 2 1 Installing the CPU 2 3 2 2 2 Installing the CPU heatsink and airduct 2 6 2 3 System memory 2 8 2 3 1 Overview 2 8 2 3 2 Memory configurations 2 8 2 3 3 Installing a DIMM on a single clip DIMM socket 2 9 2 4 Hard disk drives 2 10 2 5 Expansion slot 2 12 2 5 1 I...

Page 4: ...ion Rail Kit 3 2 Chapter 4 Motherboard Information 4 1 Motherboard layout 4 2 4 2 Onboard LEDs 4 5 4 3 Jumpers 4 8 4 4 Connectors 4 12 4 4 1 Rear panel connectors 4 12 4 4 2 Q Code table 4 13 4 4 3 Internal connectors 4 15 Chapter 5 BIOS Setup 5 1 Managing and updating your BIOS 5 2 5 1 1 ASUS CrashFree BIOS 3 utility 5 2 5 1 2 ASUS EzFlash Utility 5 3 5 1 3 BUPDATER utility 5 4 5 2 BIOS setup pro...

Page 5: ...5 9 Save Exit menu 5 45 5 10 Server Mgmt menu 5 46 5 11 Event Logs menu 5 49 Chapter 6 RAID Configuration 6 1 Setting up RAID 6 2 6 1 1 RAID definitions 6 2 6 1 2 Installing hard disk drives 6 3 6 1 3 Setting the RAID item in BIOS 6 3 6 1 4 RAID configuration utilities 6 3 6 2 Intel Rapid Storage Technology enterprise SATA SSATA Option ROM Utility 6 4 6 2 1 Creating a RAID set 6 5 6 2 2 Deleting a...

Page 6: ... 7 2 7 1 2 Installing the RAID controller driver 7 4 7 2 Management applications and utilities installation 7 6 7 3 Running the Support DVD 7 6 7 3 1 Drivers menu tab 7 7 7 3 2 Utilities menu tab 7 7 7 3 3 Manual menu tab 7 8 7 3 4 Contact information menu 7 8 7 3 5 Installing the Intel Chipset device Software driver 7 9 7 4 Installing the Intel I210 Gigabit Adapters driver 7 12 7 5 Installing the...

Page 7: ...connection of the monitor to the graphics card is required to assure compliance with FCC regulations Changes or modifications to this unit not expressly approved by the party responsible for compliance could void the user s authority to operate this equipment Compliance Statement of Innovation Science and Economic Development Canada ISED This device complies with Innovation Science and Economic De...

Page 8: ...he product electrical and electronic equipment should not be placed in municipal waste Check local regulations for disposal of electronic products DO NOT throw the mercury containing button cell battery in municipal waste This symbol of the crossed out wheeled bin indicates that the battery should not be placed in municipal waste Australia statement notice From 1 January 2012 updated warranties ap...

Page 9: ...yourself Contact a qualified service technician or your dealer Operation Safety Any mechanical operation on this server must be conducted by certified or experienced engineers Before operating the server carefully read all the manuals included with the server package Before using the server ensure all cables are correctly connected and the power cables are not damaged If any damage is detected con...

Page 10: ...DUCT Optical Drive Safety Information Laser Safety Information Heavy System CAUTION This server system is heavy Ask for assistance when moving or carrying the system Lithium Ion Battery Warning CAUTION Danger of explosion if battery is incorrectly replaced Replace only with the same or equivalent type recommended by the manufacturer Dispose of used batteries according to the manufacturer s instruc...

Page 11: ...on Options This chapter describes how to install optional components into the barebone server 4 Chapter 4 Motherboard Information This chapter gives information about the motherboard that comes with the server This chapter includes the motherboard layout jumper settings and connector locations 5 Chapter 5 BIOS Setup This chapter tells how to change system settings through the BIOS Setup menus and ...

Page 12: ...emphasize a word or a phrase Key Keys enclosed in the less than and greater than sign means that you must press the enclosed key Example Enter means that you must press the Enter or Return key Key1 Key2 Key3 If you must press two or more keys simultaneously the key names are linked with a plus sign Example Ctrl Alt Del Command Means that you must type the command exactly as shown then supply the r...

Page 13: ...This chapter describes the general features of the chassis kit It includes sections on front panel and rear panel specifications 1 Product Introduction Chapter 1 Product Introduction ...

Page 14: ...r Supply RS300 E9 PS4 1 1 450W Redundant Power Supply RS300 E9 RS4 4 x Hot swap 3 5 HDD trays 1 x SAS SATA Backplane BP4LX12G 35 R10E 1 x PCI Riser Card RE16LE8R R10A 1 x Front I O Board FPB R20D 4 x System Fans 40 mm x 28 mm Accessories 1 x RS300 E9 Series Support DVD with User s Guide 1 x ASWM Enterprise DVD 1 x Bag of Screws 1 x AC Power Cable RS300 E9 PS4 2 x AC Power Cable RS300 E9 RS4 Option...

Page 15: ...must take note of the product s serial number containing 12 characters such as xxS0xxxxxxxx shown as the figure below With the correct serial number of the product ASUS Technical Support team members can then offer a quicker and satisfying solution to your problems xxS0xxxxxxxx RS300 E9 RS4 1 2 3 4 xxS0xxxxxxxx RS300 E9 PS4 ...

Page 16: ...test update Expansion Slots Total PCI PCI X PCI E Slots 2 Slot Type 1 x PCI E x16 x8 Gen3 link 1 x PCI E x8 x8 Gen3 link Disk Controller SATA Controller Intel C232 6 x SATA 6Gb s ports 4 by miniSAS HD with 2 x M 2 NGFF 2280 2260 2242 PCIE or SATA signal gray SATA port will disable when M 2 is SATA signal Intel RSTe Windows Linux Supports software RAID 0 1 10 5 SAS Controller Optional ASUS PIKE II ...

Page 17: ... Management Solution Software ASUS ASWM Enterprise Out of Band Remote Management Optional ASMB8 iKVM for KVM over IP Dimension HH x WW x DD 615 mm x 444 mm x 43 4 mm Net Weight Kg CPU DRAM HDD not included 8 98 Kg 10 64 Kg Power Supply Single 400W 80PLUS Gold Power Supply 1 1 Redundant 450W 80PLUS Gold Power Supply Power Rating 100 240VAC 6 3A 50 60Hz Class I 100 127 200 240V 5 5 3A x2 50 60Hz Cla...

Page 18: ...ctors on the motherboard 4 3 2 1 Optical drive optional Asset tag Rack screw Rack screw USB 3 0 ports VGA port LAN 2 LED LAN 1 LED LAN 4 LED LAN 3 LED Message LED Power button Location switch Reset button HDD LED HDD 1 HDD 2 HDD 3 HDD 4 This port is for ASUS ASMB8 iKVM controller card only 4 3 2 1 VGA port USB 3 0 ports USB 2 0 ports LAN port 5 PS 2 keyboard mouse port Gigabit LAN port 3 Gigabit L...

Page 19: ...r panel if you need to use a floppy disk WARNING HAZARDOUS MOVING PARTS KEEP FINGERS AND OTHER BODY PARTS AWAY 1 Power supply and power fan 2 PCI Express slot Riser Card 3 ASUS P10S C 4L SYS Server Board 4 System fans 5 SAS SATA backplane hidden 6 HDD tray 1 4 7 Front I O boards hidden 8 Slim type optical drive 9 SSD Cage 10 Asset Tag Turn off the system power and detach the power supply before re...

Page 20: ...Description Power LED ON System power ON HDD Access LED OFF Blinking No activity Read write data into the HDD Message LED OFF ON System is normal no incoming event A hardware monitor event is indicated Location LED OFF ON Normal status Location switch is pressed Press the location switch again to turn off LAN LEDs OFF Blinking ON No LAN connection LAN is transmitting or receiving data LAN connecti...

Page 21: ...S HDD LED Description HDD Status LED GREEN ON SATA SAS HDD power ON RED ON HDD has failed and should be swapped immediately GREEN RED Blinking RAID rebuilding GREEN RED OFF HDD not found HDD Activity LED GREEN Blinking Read write data from into the SATA SAS HDD HDD Activity LED ...

Page 22: ...Chapter 1 Product Introduction 1 10 ...

Page 23: ...This chapter lists the hardware setup procedures that you have to perform when installing or removing system components 2 Hardware Information Chapter 2 Hardware Information ...

Page 24: ...nch until it is disengaged from the chassis 4 Lift the cover from the chassis 5 To reattach the rear cover reverse step 1 to 4 2 Loosen the two thumbscrews on the rear panel to release the rear cover from the chassis Thumbscrews A protection film is pre attached to the system cover before shipping Please remove the protection film before turning on the system for proper heat dissipation Front side...

Page 25: ... load lever is on your right Upon purchase of the motherboard ensure that the PnP cap is on the socket and the socket contacts are not bent Contact your retailer immediately if the PnP cap is missing or if you see any damage to the PnP cap socket contacts motherboard components ASUS will shoulder the cost of repair only if the damage is shipment transit related The product warranty does not cover ...

Page 26: ...tention tab 3 Lift the load lever until the load plate is completely lifted Load plate 4 Position the CPU above the socket ensuring that the gold triangle mark is on the bottom left corner of the socket then fit the CPU notches to the socket s alignment keys The CPU fits in only one orientation DO NOT force the CPU into the socket to prevent bending the pins on the socket and damaging the CPU Gold...

Page 27: ...n tab Load lever 7 Apply some Thermal Interface Material to the exposed area of the CPU that the heatsink will be in contact with ensuring that it is evenly spread in a thin layer Some heatsinks come with pre applied Thermal Interface Material If so skip this step The Thermal Interface Material is toxic and inedible DO NOT eat it If it gets into your eyes or touches your skin wash it off immediate...

Page 28: ...atsink 3 Twist each of the four screws with a Phillips cross screwdriver just enough to attach the heatsink to the motherboard When the four screws are attached tighten them one by one to completely secure the heatsink 2 Place the heatsink on top of the installed CPU ensuring that the four fasteners match the holes on the motherboard 1 Remove the protection sticker on the back of the CPU heatsink ...

Page 29: ...e the heat pipe and air duct to the server with two screws 5 Insert the system fan mylar into the system fan as shown in the right figure 6 Insert the two tips of the system fan mylar into the CPU heatsink as shown in the right figure ...

Page 30: ... of the DDR4 DIMM sockets 2 3 2 Memory configurations You may install Unbuffered DDR4 DIMMs into the DIMM sockets using the memory configurations in this section UDIMM DIMM Slot Per Channel DIMM Populated per Channel DIMM Type Speed Rank per DIMM 2 1 Unbuffered DDR4 2133 Single Rank Dual Rank 2 2 Unbuffered DDR4 2133 Single Rank Dual Rank Always install DIMMs with the same CAS latency For optimum ...

Page 31: ... socket Unlocked retaining clip DIMM notch DIMM slot key 1 Press the retaining clip outward to unlock the DIMM 2 Remove the DIMM from the socket Removing a DIMM from a single clip DIMM socket To install two or more DIMMs refer to the user guide bundled in the motherboard package Refer to the user guide for qualified vendor lists of the memory modules Support the DIMM lightly with your fingers when...

Page 32: ...he SATA SAS backplane To install a hot swap SATA SAS HDD 1 Push the spring lock to the right A then pull the tray lever outward B to release the drive tray The drive tray ejects slightly after you pull out the lever 2 Firmly hold the tray lever and pull the drive tray out of the bay 3 Place the drive tray on a flat and stable surface 4 Prepare the SATA SAS HDD and the bundled set of screws spring ...

Page 33: ... bay until just a small fraction of the tray edge protrudes 7 Push the tray lever until it clicks and secures the drive tray in place The drive tray is correctly placed when its front edge aligns with the bay edge 8 Repeat steps 1 to 7 to install the other SATA SAS HDDs When installed the SATA SAS connector on the drive connects to the SATA SAS interface on the backplane ...

Page 34: ...xpansion card to the PCIE1 slot The pre installed riser card bracket on the PCIE1 slot supports Full Height FH Half Length HL PCIE x16 expansion cards To install a PCIE x16 Gen3 x16 link FH HL card on the riser card bracket 2 Place the riser card bracket on a flat and stable surface then remove the screw from the slot bay 1 Firmly hold the riser card bracket then pull it up to detach it from the P...

Page 35: ... IRQ Holder for PCI Steering 12 7 PS 2 Compatible Mouse Port 13 8 Numeric Data Processor 14 9 Primary IDE Channel 15 10 Secondary IDE Channel 2 5 2 Configuring an expansion card After installing the expansion card configure the it by adjusting the software settings 1 Turn on the system and change the necessary BIOS settings if any See Chapter 5 for information on BIOS setup 2 Assign an IRQ to the ...

Page 36: ...ormation 2 14 No Slot location Short Description 1 slot 7 MIO1 MIO slot 2 slot 6 PCIE6 PCI E x16 x16 Gen3 link Auto switch to x8 link if slot 5 is occupied 3 slot 5 PCIE5 PCI E x8 x8 Gen3 link 4 slot 1 PCI1 PCI 32 bit 33 MHz ...

Page 37: ...w 3 Prepare the M 2 card 4 Align and insert the M 2 card into the M 2 connector NGFF1 5 Secure the M 2 card with the screw you removed in step 2 Please pay attention when removing the screw the stand screw might be removed together with it Ensure that the M 2 card is positioned between the screw and the stand screw before securing it Stand screw Screw hole Screw NGFF1 ...

Page 38: ...n ATX power connector from power supply to motherboard 2 8 pin 12V power connector from power supply to motherboard 3 System fan connector from system fan to motherboard 4 USB connector from motherboard to front I O board 5 SATA connectors system default from motherboard to SATA SAS backplane 6 System auxiliary panel connector from motherboard to front I O board 7 System panel connector from mothe...

Page 39: ...2 17 ASUS RS300 E9 Series 2 7 SATA SAS backplane cabling RS300 E9 PS4 RS300 E9 RS4 Connects the SATA SAS HDDs Connects the data cable connected to the motherboard Connects a 8 pin plug from power supply ...

Page 40: ...nents 1 System fans 2 ASUS PIKE RAID card optional 3 ASUS ASMB8 iKVM optional 4 SSD cage Ensure that the system is turned off before removing any components You may need to remove previously installed component or factory shipped components when installing optional components 2 8 1 System fans To uninstall the system fans 1 Remove the two tips of the system fan mylar out of the CPU heatsink as sho...

Page 41: ...then set aside 5 Repeat steps 3 to 4 to uninstall the other system fans 2 8 2 Installing ASUS PIKE II RAID card optional Follow the steps below to install an optional ASUS RAID card on your motherboard 1 Remove the default mini SAS HD cable from the motherboard 2 Connect the mini SAS HD cable to the ASUS PIKE II card ...

Page 42: ... bracket then pull it up to detach it from the PCI Express x16 slot on the motherboard 5 Install the ASUS PIKE II card x8 or x16 card to the bracket as shown 6 Secure the card with a screw 2 5 Q Code 1 2 5 Q Code 1 2 5 Q Code 1 2 5 Q Code 1 Q Code 1 7 Install the riser card bracket and PCI Express card assembly back into the PCI Express x16 slot on the motherboard ...

Page 43: ...ule 1 Hold the power supply module lever and press the PSU latch A then pull the power supply module B out of the system chassis 2 Get the replacement power supply module 3 Insert the replacement power supply module into the chassis then push it inwards until the latch locks into place module lever PSU latch ...

Page 44: ...n optional ASMB8 Management Card on your motherboard 1 Locate the Baseboard Management Card header on the motherboard 2 Orient and press the Management Card in place The motherboard illustration is for reference only The motherboard layout and appearance may vary depending on the model but the installation steps remain the same ...

Page 45: ...ctor to the SSD card 3 With the SSD cage resting on a flat surface insert the SSD card into the SSD cage 4 Secure the SSD card into the SSD cage with the bundled screws The SSD Card fits in one orientation only You can place two SSD cards into the SSD cage SATA Power cable SATA connector 1 Remove the three screws on the side of the SSD cage 2 Lift the SSD cage and set aside ...

Page 46: ...ing the bundled screws 7 Connect the SATA cable connector to the onboard SATA connector 8 Connect the Power cable to the connector on the motherboard You can install a second SSD Card by removing the optical drive and connecting the SATA cable connector to its onboard SATA connector ...

Page 47: ...cks and secures the drive tray in place The drive tray is correctly placed when its front edge aligns with the bay edge 8 Secure the optical drive with the screw that you removed in step 1 5 Carefully insert the replacement optical disk drive module into the drive bay until it is securely seated in place 4 Pull the optical drive module 3 Hold the tray lever and pull the drive tray out of the bay 2...

Page 48: ...Chapter 2 Hardware Information 2 26 ...

Page 49: ...This chapter describes how to install the optional components and devices into the barebone server 3 Installation Options Chapter 3 Installation Options ...

Page 50: ...d to provide additional support and stability to the server The tool less rail kit package includes Tool less rack rails Installing the tool less rack rail To install the tool less rack rails into the rack 1 Secure the two fixing latches to the two sides of the server using the set of latch screws The locations of the screw holes vary with different server models Refer to your server user manual f...

Page 51: ...n the top and the bottom 3 Press the spring lock then insert the studs into the selected square mounting holes on the rack post 4 Press the spring lock on the other end of rail then insert the stud into the mounting hole on the rack post Extend the rack rail if necessary 5 Perform steps 3 to 4 for the other rack rail Ensure that the installed rack rails left and right are aligned secured and stabl...

Page 52: ...able and standing firmly on a level surface We strongly recommend that at least two able bodied persons perform the steps described in this guide We recommend the use an appropriate lifting tool or device if necessary Ensure to include the side knots on the two sides of the server in the rack rail holders The illustrations shown above are for reference only ...

Page 53: ...This chapter includes the motherboard layout and brief descriptions of the jumpers and internal connectors 4 Motherboard Information Chapter 4 Motherboard Information ...

Page 54: ...Chapter 4 Motherboard Information 4 2 4 1 Motherboard layout ...

Page 55: ...1_PWR1 DOM2_PWR2 4 11 7 Smart Ride Through setting 3 pin SMART_PSU1 4 11 Rear panel connectors Page 1 PS 2 keyboard mouse port 4 12 2 RJ 45 port for iKVM 4 12 3 Video Graphics Adapter port 4 12 4 RJ 45 ports for LAN 4 12 5 Power on Button 4 12 6 Message LED 4 12 7 USB 2 0 ports 1 and 2 4 12 8 USB 3 0 ports 1 and 2 4 12 Onboard LEDs Page 1 Standby Power LED SB_PWR1 4 5 2 Baseboard Management Contro...

Page 56: ...nector 6 1 pin SGPIO1 4 18 8 Serial port connectors 10 1 pin COM1 COM2 4 18 9 Power Supply SMBus connector 5 pin PSUSMB1 4 19 10 Trusted Platform Module connector 14 1 pin TPM 4 19 11 SATA DOM power connector 4 pin PWR3 4 20 12 LAN34_LED connector 5 1 pin LAN34_LED1 4 21 13 VGA connector 16 1 pin VGA_HDR1 4 21 14 ATX power connectors 24 pin EATXPWR1 8 pin EATX12V1 4 22 15 System panel connector 20...

Page 57: ...nboard LED 2 Baseboard Management Controller LED BMC_LED1 The green heartbeat LED blinks per second to indicate that the ASMB8 is working normally The BMC LED works with the ASUS ASMB8 management device and indicates its initiation status When the PSU is plugged and the system is OFF ASUS ASMB8 management device starts system initiation for about one 1 minute The BMC LED blinks after system initia...

Page 58: ...as occurred The warning LED functions only when you install the ASUS ASMB8 Management card 4 Location LED LOCLED1 This onboard LED lights up when the Location button on the server is pressed or when triggered by a system management software The Location LED helps visually locate and quickly identify the server in error on a server rack ...

Page 59: ...ASUS RS300 E9 Series 4 7 5 CATT ERR LED CATTERR1 The CATT ERR LED indicates that the system has experienced a fatal or catastrophic error and cannot continue to operate ...

Page 60: ... the computer and unplug the power cord 2 Move the jumper cap from pins 1 2 default to pins 2 3 Keep the cap on pins 2 3 for about 5 10 seconds then move the cap back to pins 1 2 3 Plug the power cord and turn ON the computer 4 Hold down the Del key during the boot process and enter BIOS setup to re enter data Except when clearing the RTC RAM never remove the cap on CLRTC jumper default position R...

Page 61: ...s you to enable or disable the onboard VGA controller Set to pins 1 2 to activate the VGA feature 3 LAN controller setting 3 pin LAN_SW1 4 These jumpers allows you to enable or disable the onboard Intel I210 Gigabit LAN controllers Set to pins 1 2 to activate the Gigabit LAN feature ...

Page 62: ...firmware force recovery setting 3 pin ME_RCVR1 This jumper allows you to force Intel Management Engine ME boot from recovery mode when ME become corrupted 5 PCH_MFG1 setting 3 pin PCH_MFG1 This jumper allows you to update the BIOS ME block select ...

Page 63: ... or disable the Smart Ride Through SmaRT function This feature is disabled by default Set to pins 1 2 to enable it When enabled SmaRT allows uninterrupted operation of the system during an AC loss event 6 SATA DOM power setting 3 pin DOM1_PWR1 DOM2_PWR2 This jumper allows you to configure the DOM power setting ...

Page 64: ...s a 2 digit display that shows the status of your system Refer to the Q Code table of this user guide for more information about the 2 digit codes 6 Power on Button Press this button to turn on the system 7 Message LED The Message LED is an onboard LED that lights up to indicate an abnormal event occurrence 8 USB 2 0 ports 1 and 2 These two 4 pin USB Universal Serial Bus ports are available for co...

Page 65: ...ress MRC_EARLY_COMMAND 29 MRC Progress MRC_SENSE_AMP_OFFSET 2A MRC Progress MRC_READ_MPR 2B MRC Progress MRC_RECEIVE_ENABLE 2C MRC Progress MRC_JEDEC_WRITE_LEVELING 2D MRC Progress MRC_LPDDR_LATENCY_SET_B 2E MRC Progress MRC_WRITE_TIMING_1D 2F MRC Progress MRC_READ_TIMING_1D 30 MRC Progress MRC_DIMM_ODT 31 MRC Progress MRC_EARLY_WRITE_TIMING_2D 32 MRC Progress MRC_WRITE_DS 33 MRC Progress MRC_WRIT...

Page 66: ...rogress NB Init 70 Progress SB Init 71 Progress SB Init 72 Progress SB Init 78 Progress ACPI Init 79 Progress CSM Init BDS Boot Device Selection phase 90 Progress BDS started 91 Progress Connect device event 92 Progress PCI Bus Enumeration 93 Progress PCI Bus Enumeration 94 Progress PCI Bus Enumeration 95 Progress PCI Bus Enumeration 96 Progress PCI Bus Enumeration 97 Progress Console outout conne...

Page 67: ...f you installed Serial ATA hard disk drives you can create a RAID 0 RAID 1 RAID 10 or RAID 5 configuration 2 Mini SAS HD connector SATA1234 This motherboard comes with a mini Serial Attached SCSI SAS HD connector the storage technology that supports Serial ATA The connector supports up to four devices The actual data transfer rate depends on the speed of Serial ATA hard disks installed When the M ...

Page 68: ...or SAS add on card The read or write activities of any device connected to the SATA or SAS add on card causes the front panel LED to light up 4 USB 2 0 connector 10 1 pin USB78 These connectors are for USB 2 0 ports Connect the USB module cables to these connectors These USB connectors comply with USB 2 0 specification that supports up to 480 Mbps connection speed ...

Page 69: ...ficiency and backward compatibility with USB 2 0 DO NOT forget to connect the fan cables to the fan connectors Insufficient air flow inside the system may damage the motherboard components These are not jumpers DO NOT place jumper caps on the fan connectors All fans feature the ASUS Smart Fan technology 6 CPU front and rear fan connectors 4 pin FRNT_FAN1 4 REAR_FAN1 CPU_FAN1 The fan connectors sup...

Page 70: ...rage Technology Enterprise SGPIO interface that controls the LED pattern generation device information and general purpose data 8 Serial port connectors 10 1 pin COM1 COM2 These connectors are for the serial COM ports Connect the serial port module cable to one of these connectors then install the module to a slot opening at the back of the system chassis ...

Page 71: ...SMBus host and or other SMBus devices using the SMBus interface This connector functions only when you install the ASUS ASMB8 10 Trusted Platform Module connector 14 1 pin TPM This connector supports a TPM Trusted Platform Module system which can securely store keys digital certificates passwords and data A TPM system also helps enhance network security protects digital identities and ensures plat...

Page 72: ...is 4 pin connector is for 5V power of a certain SATA DOM Disk on Module device when using an appropriate cable The SATA DOM power connector is for output power only It has a maximum output current of 1A Ensure that the power of the SATA DOM device that you will use is less than 1A ...

Page 73: ...pin VGA_HDR1 This connector supports the VGA High Dynamic Range interface 12 LAN34_LED connector 5 1 pin LAN34_LED1 These LEDs are for Gigabit LAN activity LEDs on the front panel Connect the LAN LED cable to the backplane for LAN activity indication ...

Page 74: ...em may become unstable or may not boot up if the power is inadequate This motherboard supports ATX2 0 PSU or later version Ensure that your PSU can provide at least the minimum power required by your system 14 ATX power connectors 24 pin EATXPWR1 8 pin EATX12V1 These connectors are for the ATX power supply plugs The power supply plugs are designed to fit these connectors in only one orientation Fi...

Page 75: ...EAKER This 4 pin connector is for the chassis mounted system warning speaker The speaker allows you to hear system beeps and warnings 4 Hard disk drive activity LED 2 pin HDLED This 2 pin connector is for the HDD Activity LED Connect the HDD Activity LED cable to this connector The IDE LED lights up or flashes when data is read from or written to the HDD 5 Power button soft off button 2 pin PWRSW ...

Page 76: ...activity LED 2 pin LAN1LINK and 2 pin LAN2LINK These connectors are for Gigabit LAN activity LEDs on the front panel 3 Locator LED 2 pin AUX_LOCLED1 and 2 pin AUX_LOCLED2 These connectors are for the locator LED1 and LED2 on the front panel Connect the Locator LED cables to these 2 pin connectors The LEDs will light up when the Locator button is pressed 4 Locator Button Switch 2 pin AUX_BMCLOCBTN ...

Page 77: ...connector 5 1 pin SMBUS1 This connector controls the system and power management related tasks This connector processes the messages to and from devices rather than tripping the individual control lines This connector supports type 2242 2260 2280 devices on both PCI E and SATA interface When the M 2 connector is operating in SATA mode SATA connector 5 and 6 SATA 6 Gbps_5 6 will be disabled ...

Page 78: ... sensor or switch cable to this connector The chassis intrusion sensor or switch sends a high level signal to this connector when a chassis component is removed or replaced The signal is then generated as a chassis intrusion event By default the pin labeled Chassis Signal and Ground are shorted with a jumper cap Remove the jumper caps only when you intend to use the chassis intrusion detection fea...

Page 79: ...5 BIOS Setup This chapter tells how to change the system settings through the BIOS Setup menus Detailed descriptions of the BIOS parameters are also provided Chapter 5 BIOS Setup ...

Page 80: ...atically recover the BIOS It resets the system when the BIOS recovery finished DO NOT shut down or reset the system while recovering the BIOS Doing so would cause system boot failure The recovered BIOS may not be the latest BIOS version for this motherboard Visit the ASUS website at www asus com to download the latest BIOS file Save a copy of the original motherboard BIOS file to a bootable USB fl...

Page 81: ... USB flash disk that contains the latest BIOS file to the USB port 2 Enter the BIOS setup program Go to the Tool menu to select ASUS EzFlash Utility and press Enter to enable it Download the latest BIOS from the ASUS website at www asus com before using this utility 5 1 2 ASUS EzFlash Utility The ASUS EzFlash Utility feature allows you to update the BIOS using a USB flash disk without having to us...

Page 82: ... motherboard Save the BIOS file to a bootable USB flash disk drive 2 Download the BUPDATER utility BUPDATER exe from the ASUS support website at https www asus com support to the bootable USB flash disk drive you created earlier 3 Boot the system in DOS mode then at the prompt type BUPDATER i filename CAP where filename is the latest or the original BIOS file on the bootable USB flash disk drive t...

Page 83: ...urns to the DOS prompt after the BIOS update process is completed The BIOS update is finished Please restart your system C 4 Reboot the system from the hard disk drive Current Platform Platform P10S C 4L SYS Version 0200 Build date 12 04 2014 New Platform Platform P10S C 4L SYS Version 0206 Build date 07 01 2015 ASUS Tek EzFlash Utility Start Programming Flash DO NOT SHUTDOWN THE SYSTEM Write 75 ...

Page 84: ...to run this program Press Del during the Power On Self Test POST to enter the Setup utility otherwise POST continues with its test routines If you wish to enter Setup after POST restart the system by pressing Ctrl Alt Del or by pressing the reset button on the system chassis You can also restart by turning the system off then back on Do this last option only if the first two failed The Setup progr...

Page 85: ...Monitor For displaying the system temperature power status and changing the fan settings Tool For configuring options for special functions Save Exit For selecting the save exit options Server Mgmt For changing the server mgmt settings Event Logs For changing the event log settings 5 2 1 BIOS menu screen To select an item on the menu bar press the right or left arrow key on the keyboard until the ...

Page 86: ... show the values for the menu items If an item is user configurable you can change the value of the field opposite the item You cannot select an item that is not user configurable A configurable field is enclosed in brackets and is highlighted when selected To change the value of a field select it and press Enter to display a list of options 5 2 8 Pop up window Select a menu item and press Enter t...

Page 87: ...system information and allows you to set the system date and time 5 3 1 System Date Allows you to set the system date to Day mm dd yyyy Day Day of the week mm month numeric value dd day numeric value yyyy year numeric value 5 3 2 System Time Allows you to set the system time to hh mm ss hh hour numeric value mm minutes numeric value ss seconds numeric value ...

Page 88: ...dvanced menu The Advanced menu items allow you to change the settings for the CPU and other system devices Take caution when changing the settings of the Advanced menu items Incorrect field values can cause the system to malfunction ...

Page 89: ...Security Device Support Enable Allows you to enable or disable the BIOS support for security device Configuration options Disable Enable Device Select Auto Allows you to restrict support to selected device Auto will support both devices Configuration options TPM 1 2 TPM 2 0 Auto ...

Page 90: ... you to enable virtualization technology function on memory control hub Configuration options Enabled Disabled Above 4GB MMIO BIOS assignment Disabled Allows you to enable or disable above 4GB MemoryMappedIO BIOS assignment When aperture size is set to 2048 MB this is disabled automatically Configuration options Enabled Disabled ...

Page 91: ...c1 Control Disabled Allows you to enable or disable DMI Vc1 Configuration options Enabled Disabled DMI Vcm Control Enabled Allows you to enable or disable DMI Vcm Configuration options Enabled Disabled DMI Link ASPM Control L1 This item is for the control of the Active State Power Management on SA side of the DMI link Configuration options L1 Disabled ...

Page 92: ...Auto Allows you to force PEG link to retrain to X1 2 4 8 Configuration options Auto Force X1 Force X2 Force X4 Force X8 Power Down Unused Lanes Auto Allows you to power down unused lanes When set to Auto Bios will power down unused lanes based on the max possible link width Configuration options Disabled Auto ASPM Auto Allows you to control ASPM support for the PEG 0 This has no effect if PEG is n...

Page 93: ...unused lanes based on the max possible link width Configuration options Disabled Auto ASPM Auto Allows you to control ASPM support for the PEG 1 This has no effect if PEG is not the currently active device Configuration options Disabled Auto ASPM L0s ASPM L1 ASPM L0sL1 PEG0 Max Payload size Auto Allows you to set the PEG0 max payload size Configuration options Auto 128 TLP 256 TLP PEG1 Max Payload...

Page 94: ...he maximum value of TOLUD Dynamic assignment would adjust TOLUD automatically based on largest MMIO length of installed graphic controller Configuration options Dynamic 1 GB 1 25 GB 1 5 GB 1 75 GB 2 GB 2 25 GB 2 5 GB 2 75 GB 3 GB 3 25 GB 3 5 GB Memory Scrambler Enabled Set this item to enable or disable memory scrambler support Configuration options Disabled Enabled Memory Remap Enabled Allows you...

Page 95: ...xpress Clock Gating Enabled Allows you to enable or disable PCI Express Clock Gating for each root port Configuration options Disabled Enabled DMI Link ASPM Control Enabled Allows you to enable or disable the control of Active State Power Management on SA side of the DMI link Configuration options Disabled Enabled ...

Page 96: ...d USB Port Disable Override Disabled Allows you to enable or disable the corresponding USB port from reporting a Device Connection to the controller Configuration options Disabled Select Per Pin CLKRUN Logic Enabled Allows you to enable or disable the CLKRUN logic to stop the PCI clocks Configuration options Disabled Enabled Serial IRQ Mode Continuous Allows you to configure Serial IRQ mode Config...

Page 97: ...5 19 ASUS RS300 E9 Series Intel Server Platform Services Intel TXT Information ...

Page 98: ...PCI Bus Clocks 248 PCI Bus Clocks PERR Generation Disabled Allows you to enable or disable PCI Device to Generate PERR Configuration options Disabled Enabled SERR Generation Disabled Allows you to enable or disable PCI Device to Generate SERR Configuration options Disabled Enabled Load RT32 Image Enabled Allows you to enable or disable RT32 Image Loading Configuration options Disabled Enabled VGA ...

Page 99: ...1 ASUS RS300 E9 Series PCIe slot opROM option PCIE6 PCIE5 Option ROM Enabled Allows you to enable or disable PCIE6 PCIE5 PCIE4 Option ROM Configuration options Disabled Enabled 5 4 3 Platform Configuration ...

Page 100: ...unctions as a workaround for OSes without XHCI hand off support Configuration options Enabled Disabled USB Mass Storage Driver Support Enabled This allows you to enable or disable the USB Mass Storage driver support Configuration options Disabled Enabled Port 60 64 Emulation Enabled This allows you to enable the I O port 60h 64h emulation support This should be enabled for the complete USB keyboar...

Page 101: ...eset time out 20 sec Allows you to select the USB device reset time out value Configuration options 10 sec 20 sec 30 sec 40 sec Device power up delay Auto This allows you to set the maximum time the device will take before it properly reports itself to the Host Controller Configuration options Auto Manual Onboard LAN Configuration This allows you to enable or disable the onboard LAN ...

Page 102: ...I Super IO Configuration Serial Port 1 Configuration Allows you to set the parameters of Serial Port 1 Serial Port Enabled Allows you to enable or disable Serial Port COM Configuration options Disabled Enabled Change Settings Auto Allows you to choose the setting for Super IO device Configuration options Auto IO 3F8h IRQ 4 IO 3F8h IRQ 3 4 5 6 7 9 10 11 12 IO 2F8h IRQ 3 4 5 6 7 9 10 11 12 IO 3E8h I...

Page 103: ...llows you to choose the setting for Super IO device Configuration options Auto IO 2F8h IRQ 3 IO 3F8h IRQ 3 4 5 6 7 9 10 11 12 IO 2F8h IRQ 3 4 5 6 7 9 10 11 12 IO 3E8h IRQ 3 4 5 6 7 9 10 11 12 IO 2E8h IRQ 3 4 5 6 7 9 10 11 12 Change Settings Standard Serial Port Mode Allows you to choose the setting for Super IO device Configuration options Standard Serial Port Mode IrDA Active pulse 1 6 uS IrDA Ac...

Page 104: ...ions Disabled Enabled The Console Redirection Settings becomes configurable when Console Redirection is set to Enabled Serial Port Console Redirection Console Redirection Settings The settings specify how the host computer and the remote computer which the user is using will exchange data Both computers should have the same or compatible settings ...

Page 105: ...l Hardware RTS CTS Flow control can prevent data loss from buffer overflow When sending data if the receiving buffers are full a stop signal can be sent to stop the data flow Once the buffers are empty a start signal can be sent to re start the flow Hardware flow control uses two wires to send start stop signals Configuration options None Hardware RTS CTS VT UTF8 Combo Key Support Enabled This all...

Page 106: ...le Redirection Settings Out of Band Mgmt Port COM1 Allows remote management of a Windows Server OS through a serial port Configuration options COM1 COM2 Terminal Type VT UTF8 Allows you to set the terminal type for out of band management Configuration options VT100 VT100 VT UTF8 ANSI Bits per second 115200 Selects serial port transmission speed The speed must be matched on the other side Long or n...

Page 107: ...spend to RAM This option may be not be effective with some OS Restore AC Power Loss Last State Allows you to set the state the system will go to after an AC power loss Configuration options Power Off Power On Last State Power On By PCI Disabled You can use this option to enable or disable the Wake on LAN feature of the IntelLAN Configuration options Disabled Enabled Power On By PCIE Disabled This ...

Page 108: ... Date Days and Hour Minute Second becomes user configurable where you can set values Configuration options Disabled Enabled This item functions only if there is a serial port COM1 connector on a motherboard SMART Settings SMART Self Test Enabled Allows you to run SMART Self Test on all HDDs during POST Configuration options Disabled Enabled WHEA Support Enabled Allows you to enable or disable the ...

Page 109: ...Some items may not appear if your CPU does not support the related functions To quickly go to the last item of the second page press the Page Down button Press the Page Up button to go back to the first item in the first page Navigate to the second page of the screen to see the rest of items in this menu by pressing the Up or Down arrow keys ...

Page 110: ... 2 3 Intel Virtualization Technology Enabled When enabled a VMM can utilize the additional hardware capabilities provided by Vanderpool Technology Configuration options Disabled Enabled Hardware Prefetcher Enabled Allows you to enable or disable the MLC streamer perfetcher Configuration options Disabled Enabled Adjacent Cache Line Prefetch Enabled Allows you to enable or disable prefetching of adj...

Page 111: ...led Enabled Intel R SpeedStep tm Enabled Allows your system to adjust the CPU s voltage and cores frequency resulting in decreased power consumption and heat production Configuration options Disabled Enabled The following item appear only when you set the Intel R SpeedStep tm to Enabled Turbo Mode Enabled This item allows you to automatically set the CPU cores to run faster than the base operating...

Page 112: ...ed C1 C3 C1 and C3 Package C state demotion Disabled Allows you to enable or disable the Package C state demotion Configuration options Disabled Enabled Package C state undemotion Disabled Allows you to enable or disable the Package C state undemotion Configuration options Disabled Enabled CState Pre Wake Enabled Allows you to enable or disable the CState Pre Wake Selecting Disabled will set bit 3...

Page 113: ...troller s Enabled Allows you to enable or disable the SATA Device Configuration options Enabled Disabled SATA Mode Selection AHCI This allows you to choose how SATA controller s should operate Configuration options AHCI RAID Software Feature Mask Configuration ...

Page 114: ...abled OROM UI is shown HDD Unlock Enabled Selecting Enabled will indicate that the HDD password unlock in the OS is enabled Configuration options Disabled Enabled LED Locate Enabled Selecting Enabled will indicate that the LED SGPIO hardware is attached and ping to locate feature is enabled on the OS Configuration options Disabled Enabled IRRT Only on eSATA Enabled Disabled Any RAID volume can spa...

Page 115: ...t from 0 to 1 Configuration options Disabled Enabled SATA Device Type Hard Disk Drive Allows you to set whether the SATA port is connected to Solid State Drive or Hard Disk Drive Configuration options Hard Disk Drive Solid State Drive Device Sleep Disabled Allows you to enable or disable the mSata for RTD3 Configuration Options Disabled Enabled SATA DEVSLEP Idle Timeout Config Disabled Allows you ...

Page 116: ... Enabled GateA20 Active Upon Request This allows you to set the GA20 option Upon Request GA20 can be disabled using BIOS services Always Do not allow disabling GA20 this option is useful when any RT code is executed above 1MB Option ROM Messages Force BIOS This allows you to set the display mode for Option ROM Configuration options Force BIOS Keep Current ...

Page 117: ...OMs priority Configuration options UEFI and Legacy Legacy only UEFI only Network Storage Video Legacy This option allows you to control the execution of UEFI and Legacy PXE Storage Video OpROM Configuration options UEFI Legacy Other PCI devices Legacy This item determines the OPROM execution policy for devices other than Network Storage or Video Configuration options UEFI Legacy ...

Page 118: ...e confirm the password Administrator Password To set an Administrator Password 1 Select the Administrator Password item and press Enter 2 From the Create New Administrator Password box key in a password then press Enter 3 Confirm the password when prompted To change an administrator password 1 Select the Administrator Password item and press Enter 2 From the Enter Current Administrator Password bo...

Page 119: ...ssword box key in a new password then press Enter 4 Confirm the password when prompted Secure Boot Disabled This item allows you to enable or disable the Secure Boot flow control Configuration options Disabled Enabled Secure Boot Mode Custom This item allows you to select the mode of the Secure Boot to change Image Execution policy and manage Secure Boot Keys Configuration options Standard Custom ...

Page 120: ...you want to install all Factory Default secure variables Select Yes if you want to load the default secure variables otherwise select No Platform Key PK Configuration options Set New Key Delete Key Key Exchange Keys Authorized Signatures Forbidden Signatures Authorized TimeStamps Configuration options Set New Key Append Key Delete Key 5 6 Boot menu The Boot menu items allow you to change the syste...

Page 121: ...e Auto Auto adjustment for Windows requirements Full Screen Maximize the boot logo size Disabled Hide the logo during POST POST Report 5 sec Allows you to set the desired POST Report waiting time from 1 to 10 seconds Configuration options 1 sec 10 sec Until Press ESC Chassis Intrusion Message Warning Allows you to set an action when chassis intrusion has occurred Warning Warning beep and pause at ...

Page 122: ...art Fan feature that smartly adjusts the fan speeds for more efficient system operation Configuration options Generic Mode High Speed Mode Full Speed Mode 5 8 Tool menu The Tool menu items allow you to configure options for special functions Select an item then press Enter to display the submenu ASUS EZ Flash Allows you to run the Start EzFlash utility For more information see section 5 1 2 ASUS E...

Page 123: ...ving any changes Save Changes and Reset Reset the system setup after saving the changes Restore Defaults Restore Load default values for all the setup options Boot Override These items display the available devices The device items that appear on the screen depend on the number of devices installed in the system Click an item to start booting from the selected device Launch EFI Shell from filesyst...

Page 124: ...OS loads Configuration options Enabled Disabled The following items is configurable only when the OS Watchdog Timer is set to Enabled OS Wtd Timer Timeout 10 minutes Allows you to configure the length for the OS Boot Watchdog Timer Configuration options 5 minutes 10 minutes 15 minutes 20 minutes OS Wtd Timer Policy Reset This item allows you to configure how the system should respond if the OS Boo...

Page 125: ...Disabled Enabled Erase SEL No Allows you to choose options for erasing SEL Configuration options No Yes On next reset Yes On every reset When SEL is Full Do Nothing Allows you to choose options for reactions to a full SEL Configuration options Do Nothing Erase Immediately Log EFI Status Codes Error code Disable the logging of EFI Status Codes or log only error code or only progress code or both Co...

Page 126: ...s item allows you to configure the parameter settings of IPv6 BMC network IPv6 Display Full Field Enable Displays the Full or Brief IPv6 Field Configuration options Disable Enable IPv6 Display Full Formula Enable Displays the Full or Brief IPv6 Formula Configuration options Disable Enable IPv6 Display Letter Case Upper Case Displays the uppercase or lowercase letters of the alphabet Configuration ...

Page 127: ... or disable all features of Smbios Event Logging during boot Configuration options Disabled Enabled Erase Event Log No Choose options for erasing Smbios Event Log Erasing is done prior to any logging activation during reset Configuration options No Yes Next reset Yes Every reset When Log is Full Do Nothing Allows you to choose options for reactions to a full Smbios Event Log Configuration options ...

Page 128: ...s 1 255 METW 60 Allows you to set the value for the number of minutes which must pass between duplicate log entries which utilize a multiple event counter Use the and keys to adjust the value Configuration options 0 99 Log OEM Codes Enabled Allows you to enable or disable the logging of EFI Status Codes as OEM codes if not already converted to legacy Configuration options Disabled Enabled Convert ...

Page 129: ...6 RAID Configuration This chapter provides instructions for setting up creating and configuring RAID sets using the available utilities Chapter 6 RAID Configuration ...

Page 130: ... existing drive and a new drive for this setup The new drive must be of the same size or larger than the existing drive RAID 10 is data striping and data mirroring combined without parity redundancy data having to be calculated and written With the RAID 10 configuration you get all the benefits of both RAID 0 and RAID 1 configurations Use four new hard disk drives or use an existing drive and thre...

Page 131: ...ID set using the utilities embedded in each RAID controller For example use the Intel Rapid Storage Technology enterprise SATA Option ROM Utility if you installed Serial ATA hard disk drives on the Serial ATA connectors supported by the Intel C232 chipset 6 1 2 Installing hard disk drives The motherboard supports Serial ATA for RAID set configuration For optimal performance install identical drive...

Page 132: ...rl I to display the utility main menu Before you proceed ensure that you have installed the Serial ATA hard disk drives have set the correct jumper settings of the motherboard and have set the correct SATA mode in the BIOS setup You can refer to the Installing hard disk drives Setting Jumpers and Setting the RAID mode sections in BIOS for more information ESC Exit ENTER Select Menu Select Intel R ...

Page 133: ...you are done ESC Previous Menu ENTER Select Change Intel R Rapid Storage Technology enterprise SATA Option ROM 3 6 0 1023 Copyright C 2003 12 Intel Corporation All Rights Reserved CREATE VOLUME MENU HELP Name RAID Level Disks Strip Size Capacity Syne Create Volume Enter a unique volume name that has no special characters and is 16 characters or less Volume0 RAID0 Strips Select Disks 128KB 0 0 GB N...

Page 134: ...gher stripe size for multimedia computer systems used mainly for audio and video editing 7 In the Capacity field item key in the RAID volume capacity that you want to use and press Enter The default value field indicates the maximum allowed capacity 8 Press Enter to start creating the RAID volume 9 From the following warning message press Y to create the RAID volume and return to the main menu or ...

Page 135: ...rn to the utility main menu or press N to return to the DELETE VOLUME menu ESC Previous Menu Select Intel R Rapid Storage Technology enterprise SATA Option ROM 3 6 0 1023 Copyright C 2003 12 Intel Corporation All Rights Reserved DELETE VOLUME MENU HELP Deleting a volume will reset the disks to non RAID WARNING ALL DISK DATA WILL BE DELETED This does not apply to Recovery volumes DEL Delete Volume ...

Page 136: ...ace A small triangle before the Port number marks the selected drive Press Enter when you are done 3 Press Y in the confirmation window to reset the drive s or press N to return to the utility main menu Port Drive Model Serial Size Status 0 ST3300656SS HWAS0000991753TR 279 3GB Member Disk 1 ST3300656SS 37VN00009846RAJ1 279 3GB Member Disk Select the disks that should be reset Resetting RAID disk w...

Page 137: ...Hard Disk available the utility will prompt you to rebuild the RAID Press the up down arrow keys to select the destination disk then Press Enter to start the rebuilding process or press ESC to exit 6 2 4 Exiting the Intel Rapid Storage Technology enterprise SATA SSATA Option ROM utility To exit the utility 1 From the utility main menu select 4 Exit then press Enter 2 Press Y to exit or press N to ...

Page 138: ...ded during POST You may replace the disk drive and rebuild the RAID array To rebuild the RAID with a new hard disk 1 Remove the failed SATA hard disk and install a new SATA hard disk of the same specification into the same SATA Port Select a destination disk with the same size as the original hard disk 2 Reboot the system then follow the steps in section Rebuilding the RAID with other non RAID dis...

Page 139: ...ray in the BIOS Set at least one of the arrays bootable to boot from the hard disk 1 Reboot the system and press Del to enter the BIOS setup utility during POST 2 Go to the Boot menu and select the boot option priority 3 Use up down arrow keys to select the boot priority and press Enter See the Boot menu section of Chapter 4 for more details 4 From the Exit menu select Save Changes Exit then press...

Page 140: ...on the system and go to the windows desktop 2 Click the Intel Rapid Storage Technology enterprise icon to display the main menu Your storage system is configured for data protection increased performance and optimal data storage capacity You can create additional volumes to further optimize your storage system To enter the Intel Rapid Storage Technology enterprise utility under Windows operating s...

Page 141: ...lume type 2 Click Next 3 Enter a name for the RAID set then select the array disks 4 Select Volume Size tab you can drag the bar to decide the volume size 5 Click Next If you do not want to keep the data on one of the selected disks select NO when prompted If you want to Enable volume write back cache or Initialize volume click Advanced ...

Page 142: ... number and size of the disks You can continue using other applications during this time 7 Wait until the process is completed then click OK when prompted You still need to partition your new volume using Windows Disk Management before adding any data The RAID set is displayed in the Volumes list and you can change the settings in Volume Properties ...

Page 143: ...pe size for server systems and a higher stripe size for multimedia computer systems used mainly for audio and video editing 3 You can change the Name Select the new volume type and Select additional disks to include in the new volume if needed 4 Select the Data stripe size for the RAID array for RAID 0 10 and 5 only and click OK The available stripe size values range from 4 KB to 128 KB The follow...

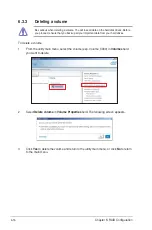
Page 144: ...that you back up all your important data from your hard drives To delete a volume 1 From the utility main menu select the volume exp Volume_0000 in Volumes field you want to delete 3 Click Yes to delete the volume and return to the utility main menu or click No to return to the main menu 2 Select Delete volume in Volume Properties field The following screen appears ...

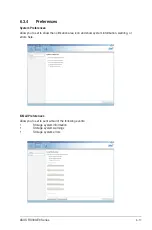
Page 145: ...rences Allow you to set to show the notification area icon and show system information warning or errors here E Mail Preferences Allow you to set to sent e mail of the following events Storage system information Storage system warnings Storage system errors ...

Page 146: ...6 18 Chapter 6 RAID Configuration ...

Page 147: ... Driver Installation This chapter provides the instructions for installing the necessary drivers for different system components in both Linux and Windows Operating Systems Chapter 7 Driver Installation ...

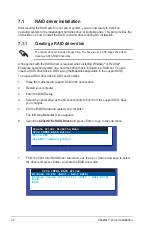
Page 148: ...AHCI RAID Back Exit 7 1 1 Creating a RAID driver disk The system does not include a floppy drive You have to use a USB floppy drive when creating a SATA RAID driver disk A floppy disk with the RAID driver is required when installing Windows or Red Hat Enterprise operating system on a hard disk drive that is included in a RAID set You can create a RAID driver disk in DOS using the Makedisk applicat...

Page 149: ...kette into the disk drive and press Enter to write the image to the disk 11 Press any key to continue when prompted The Create Driver Diskette Menu appears after the creation of the diskette is finished To create a RAID driver disk in Windows environment 1 Start Windows 2 Place the motherboard support DVD into the optical drive 3 Go to the Make disk menu then select the type of RAID driver disk yo...

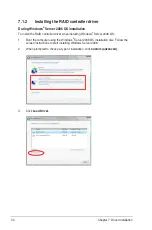
Page 150: ...lation To install the RAID controller driver when installing Windows Server 2008 OS 1 Boot the computer using the Windows Server 2008 OS installation disc Follow the screen instructions to start installing Windows Server 2008 2 When prompted to choose a type of installation click Custom advanced 3 Click Load Driver ...

Page 151: ...erboard Support DVD into the optical drive Click Browse to continue 5 Locate the driver in the corresponding folder of the Support DVD and then click OK to continue 6 Select the RAID controller driver you need from the list and click Next 7 When the system finishes loading the RAID driver replace the motherboard Support DVD with the Windows Server installation disc Select the drive to install Wind...

Page 152: ...he support DVD are subject to change at any time without notice Visit the ASUS website www asus com for the latest updates on software and utilities 2 The support DVD is supported on Windows Server 2008 R2 and Windows Server 2012 The support DVD that is bundled with your motherboard contains drivers management applications and utilities that you can install to maximize the features of your motherb...

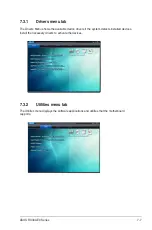
Page 153: ...able device drivers if the system detects installed devices Install the necessary drivers to activate the devices 7 3 2 Utilities menu tab The Utilities menu displays the software applications and utilities that the motherboard supports 7 3 1 Drivers menu tab ...

Page 154: ... 4 Contact information menu You need an internet browser installed in your OS to view the User Guide The Contact menu displays the ASUS contact information e mail addresses and useful links if you need more information or technical support for your motherboard ...

Page 155: ...u need to manually install the Intel chipset device software on a Windows Operating System To install the Intel chipset device software on Windows Server 2008 R2 1 Restart the computer 2 Log in with Administrator privileges 3 Insert the Motherboard Support DVD to the optical drive The support DVD automatically displays the Drivers menu if Autorun is enabled in your computer If Autorun is NOT enabl...

Page 156: ...7 10 Chapter 7 Driver Installation 6 Select Yes to accept the terms of the License Agreement and continue the process 7 Read the Readme File Information and press Install to continue the installation ...

Page 157: ...ASUS RS300 E9 Series 7 11 8 Press Restart Now to complete the setup process ...

Page 158: ...el I210 Gigabit Adapters Driver on the Windows operating system 1 Restart the computer 2 Log on with Administrator privileges 3 Insert the motherboard system support DVD to the optical drive 4 Click Intel I210 Gigabit Adapters Drivers in the Drivers menu of the main screen to start the installation If Autorun is NOT enabled in your computer browse the contents of the support DVD to locate the file...

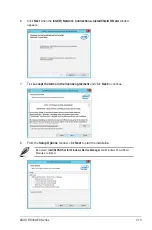
Page 159: ... InstallShield Wizard window appears 7 Tick I accept the terms in the license agreement and click Next to continue 8 From the Setup Options window click Next to start the installation By default Intel R PROSet for Windows Device Manager and Windows PowerShell Module are ticked ...

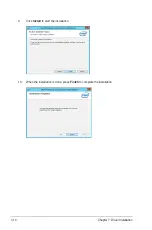
Page 160: ...7 14 Chapter 7 Driver Installation 9 Click Install to start the installation 10 When the installation is done press Finish to complete the installation ...

Page 161: ...rt DVD to the optical drive The support DVD automatically displays the Drivers menu if Autorun is enabled in your computer 4 From the Main Menu click ASPEED AST1400 AST2400 Display Driver on the Drivers tab to start the installation 5 From the installation window click Next to start the installation If Autorun is NOT enabled in your computer browse the contents of the support DVD to locate the fil...

Page 162: ...7 16 Chapter 7 Driver Installation 7 Click Finish to complete the installation 6 Click Install to proceed with the installation ...

Page 163: ...Appendix A Appendix ...

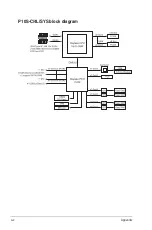
Page 164: ...A 2 Appendix P10S C 4L SYS block diagram ...

Page 165: ...dress 4F No 150 Li Te Rd Peitou Taipei 112 Taiwan Telephone 886 2 2894 3447 Fax 886 2 2890 7798 Web site https www asus com tw Technical Support Telephone 886 2 2894 3447 0800 093 456 Online Support https www asus com support Product ContactUs Services questionform lang zh tw ASUSTeK COMPUTER INC China Address No 5077 Jindu Road Minhang District Shanghai China Telephone 86 21 5442 1616 Fax 86 21 5...

Page 166: ...Harkort Str 21 23 40880 Ratingen Germany Fax 49 2102 959911 Web site https www asus com de Technical Support Telephone 49 1805 010923 Support Fax 49 2102 959911 Online support https www asus com support Product ContactUs Services questionform lang de de ASUS Czech Service s r o Europe Address Na Rovince 887 720 00 Ostrava Hrabová Czech Republic Telephone 420 596766888 Web site https www asus com c...

Page 167: ...ionform lang nl nl ASUS Polska Sp z o o Poland Address Ul Postępu 6 02 676 Warszawa Poland Web site https www asus com pl Technical Support Telephone 48 225718033 Online Support https www asus com support Product ContactUs Services questionform lang pl pl ASK Service Russia and CIS Address г Москва ул Орджоникидзе д 10 Россия Telephone 495 640 32 75 Web site https www asus com ru Technical Support...

Page 168: ...A 6 Appendix ...
Reviews: