2 - 1 1
2 - 1 1
2 - 1 1
2 - 1 1
2 - 1 1
A S U S A P 1 6 0 0 R - E 2 ( A A 2 / A I 2 )
A S U S A P 1 6 0 0 R - E 2 ( A A 2 / A I 2 )
A S U S A P 1 6 0 0 R - E 2 ( A A 2 / A I 2 )
A S U S A P 1 6 0 0 R - E 2 ( A A 2 / A I 2 )
A S U S A P 1 6 0 0 R - E 2 ( A A 2 / A I 2 )
2.4.2
2.4.2
2.4.2
2.4.2
2.4.2
Installing an IDE HDD
Installing an IDE HDD
Installing an IDE HDD
Installing an IDE HDD
Installing an IDE HDD (AI2 model)
(AI2 model)
(AI2 model)
(AI2 model)
(AI2 model)
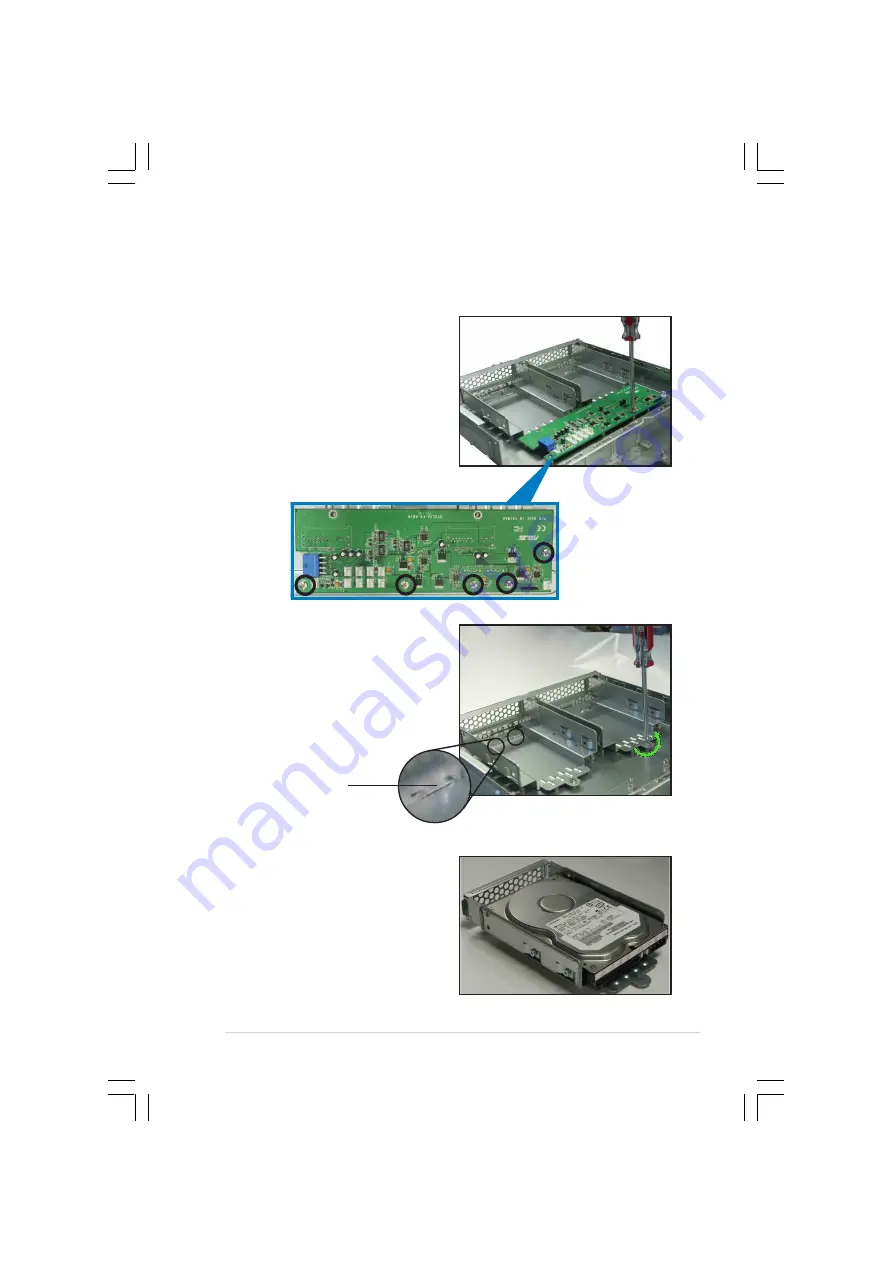
To install an IDE HDD:
1.
Disconnect all the cables from
the fan control board. Use a
Phillips (cross) screwdriver to
remove the five screws that
secure the fan control board.
3.
Place a hard disk drive on the
drive tray, and secure it with
four screws.
Lock tab
2.
Remove the screw that secures
the hard disk tray to the chassis.
Slide the tray backward until the
two tray lock tabs are
disengaged. Lift the tray from
the bay.
F a n c o n t r o l b o a r d s c r e w s
F a n c o n t r o l b o a r d s c r e w s
F a n c o n t r o l b o a r d s c r e w s
F a n c o n t r o l b o a r d s c r e w s
F a n c o n t r o l b o a r d s c r e w s
Summary of Contents for AP1600-R-E2
Page 10: ...x ...


