


EN
GL
IS
H
EN
GL
IS
H
ASUS BT6130
35
Chapter 4
Using your computer
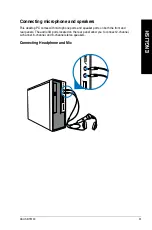
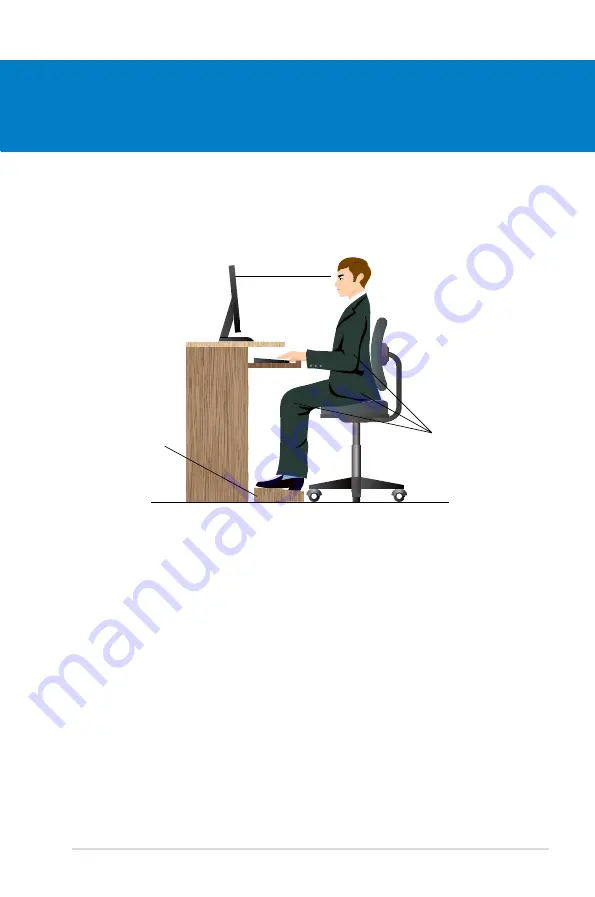
Proper posture when using your Desktop PC
When using your Desktop PC, maintaining the proper posture is necessary to prevent strain to
your wrists, hands, and other joints or muscles. This section provides you with tips on avoiding
physical discomfort and possible injury while using and fully enjoying your Desktop PC.
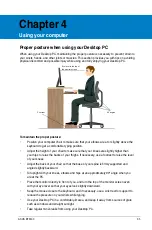
Eye level to the top of
the monitor screen
Foot rest
90˚ angles
To maintain the proper posture:
•
Position your computer chair to make sure that your elbows are at or slightly above the
keyboard to get a comfortable typing position.
•
Adjust the height of your chair to make sure that your knees are slightly higher than
your hips to relax the backs of your thighs. If necessary, use a footrest to raise the level
of your knees.
•
Adjust the back of your chair so that the base of your spine is firmly supported and
angled slightly backward.
•
Sit upright with your knees, elbows and hips at an approximately 90º angle when you
are at the PC.
•
Place the monitor directly in front of you, and turn the top of the monitor screen even
with your eye level so that your eyes look slightly downward.
•
Keep the mouse close to the keyboard, and if necessary, use a wrist rest for support to
reduce the pressure on your wrists while typing.
•
Use your Desktop PC in a comfortably-lit area, and keep it away from sources of glare
such as windows and straight sunlight.
•
Take regular mini-breaks from using your Desktop PC.
Summary of Contents for BT6130
Page 1: ...ASUS Desktop PC User Manual BT6130 ...
Page 10: ...10 ...
Page 18: ...18 Chapter 1 Getting started ENGLISH ...
Page 28: ...28 Chapter 2 Using Windows 7 ENGLISH ...
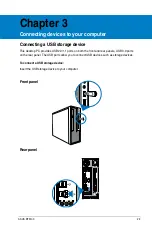
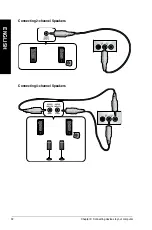
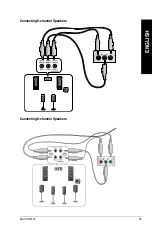
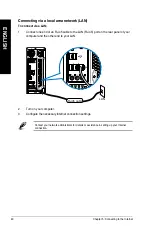
Page 33: ...ENGLISH ASUS BT6130 33 ENGLISH Connecting 6 channel Speakers Connecting 8 channel Speakers ...
Page 34: ...34 Chapter 3 Connecting devices to your computer ENGLISH ...


