315
Chapter 8: Maintenance
See ―Replacing a RAID Controller‖ on page 312.
4. Lay the RAID Controller on a non-static surface and remove the cover
attaching screws, one on each side, then remove the cover. See Figure 5.
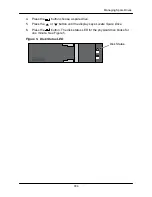
Figure 5. RAID controller cover and attaching screw
Cover
Attaching screw
(one each side)
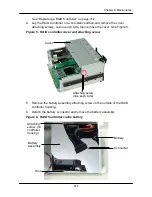
5. Remove the battery assembly attaching screw on the outside of the RAID
controller housing.
6. Detach the battery connector and remove the battery assembly.
Figure 6. RAID Controller cache battery
Attaching
screw (on
controller
housing)
Battery
assembly
Battery
Connector
Slot
Summary of Contents for DS300f
Page 1: ...ASUS Storage DS300f DS300i User Manual Version 1 0 ...
Page 10: ...x Language 178 Closing Smart NAS Console 178 ...
Page 27: ...8 Chapter 1 Introduction to ASUS Storage ...
Page 57: ...3 8 Chapter 2 ASUS Storage Installation ...
Page 73: ...54 Chapter 3 ASUS Storage Setup ...
Page 164: ...14 5 Chapter 4 Management with ASUS Storage Management ...
Page 221: ...202 Chapter 5 SmartNAVI ...
Page 235: ...216 Chapter 6 Management with the CLU Figure 4 Controller Status LED Controller Status ...
Page 337: ...318 Chapter 8 Maintenance ...
Page 425: ...406 Chapter 11 Support ...
Page 433: ...414 Appendix A Setting up NAS Network Drives ...
Page 449: ...430 Index ...


