Chapter 2: Getting Started
2-2
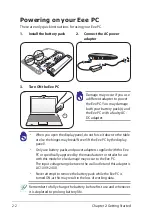
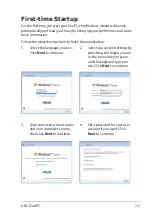
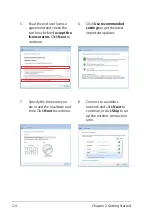
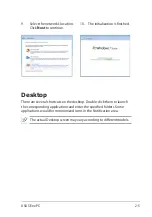
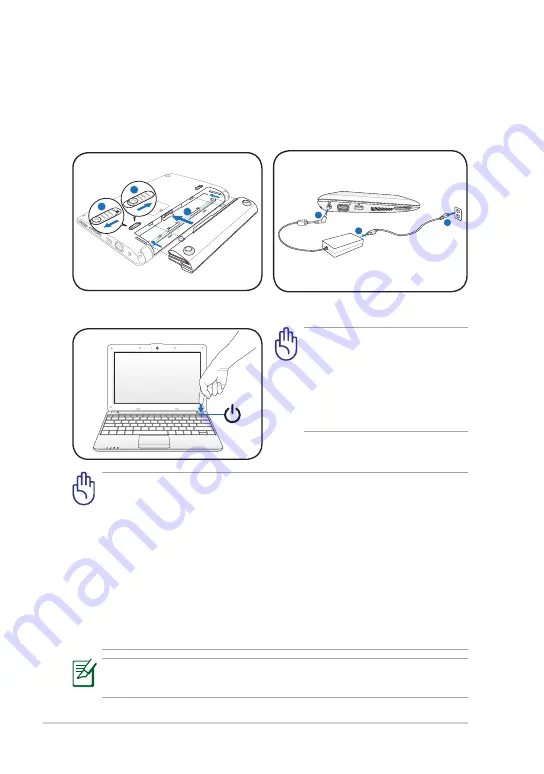
Powering on your Eee PC
These are only quick instructions for using your Eee PC.
1.
Install the battery pack
2.
Connect the AC power
adapter
•
When you open the display panel, do not force it down to the table
or else the hinges may break! Never lift the Eee PC by the display
panel!
•
Only use battery packs and power adapters supplied with this Eee
PC or specifically approved by the manufacturer or retailer for use
with this model or else damage may occur to the Eee PC.
The input voltage range between the wall outlet and this adapter is
AC 100V~240V.
•
Never attempt to remove the battery pack while the Eee PC is
turned ON, as this may result in the loss of working data.
Remember to fully charge the battery before first use and whenever
it is depleted to prolong battery life.
3.
Turn ON the Eee PC
Damage may occur if you use
a different adapter to power
the Eee PC. You may damage
both your battery pack(s) and
the Eee PC with a faulty AC-
DC adapter.
1
2
3
110V-2
20V
3
1
2
1
2
3
110V-2
20V
3
1
2
1
2
3
110V-2
20V
3
1
2
Summary of Contents for Eee PC 1001PQ Series
Page 1: ...Eee PC User Manual Windows Win7 Edition Eee PC 1001PQ E5836 ...
Page 8: ...viii Table of Contents ...
Page 50: ...Chapter 3 Using the Eee PC 3 20 ...
Page 51: ...System Recovery Boot Booster 4 Chapter 4 System Recovery ...
Page 56: ...Chapter 4 System Recovery 4 6 ...
Page 71: ...ASUS Eee PC A 15 ...


