3-22
Chapter 3: BIOS setup
Chapter 3
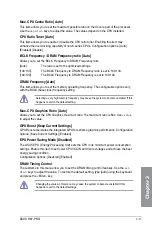
CPU Cache Voltage [Auto]
This item allows you to set the amount of voltage fed to the CPU uncores including its cache.
Increase the voltage when setting a high CPU cache frequency.
Configuration options: [Auto] [Manual Mode] [Offset Mode]
The following item appears only when you set the CPU Cache Voltage to
[Manual Mode]
.
CPU Cache Voltage Override [Auto]
This item allows you to set the CPU Cache Voltage override. By default, this item takes
the standard value of the installed CPU. You can use the <+> or <-> keys to adjust the
value. The values range from 0.001V to 1.920 V with a 0.001 V interval.
The following items appear only when you set the CPU Cache Voltage to
[Offset Mode]
.
Offset Mode Sign [+]
[+]
To offset the voltage by a positive value.
[–]
To offset the voltage by a negative value.
CPU Cache Voltage Offset
Allows you to set the CPU cache voltage offset. By default, this item takes
the standard value of the installed CPU. You can use the <+> or <-> keys
to adjust the value. The values range from 0.001V to 0.999 V with a 0.001
V interval.
CPU Graphics Voltage [Auto]
This item allows you to set the amount of voltage fed to the CPU graphics. Increase the
voltage when setting a high CPU graphics frequency.
Configuration options: [Auto] [Manual Mode] [Offset Mode] [Adaptive Mode]
•
The following item appears only when you set the CPU Graphics Voltage to
[Manual
Mode]
.
•
[Adaptive Mode] is available for some specific CPU types.
CPU Graphics Voltage Override [Auto]
This item allows you to set the CPU Graphics Voltage override. By default, this item
takes the standard value of the installed CPU. You can use the <+> or <-> keys to
adjust the value. The values range from 0.001V to 1.920 V with a 0.001 V interval.
The following items appear only when you set the CPU Graphics Voltage to
[Offset Mode]
.
Summary of Contents for H-97-PRO
Page 1: ...Motherboard H97 PRO ...
Page 38: ...1 24 Chapter 1 Product introduction Chapter 1 ...
Page 43: ...ASUS H97 PRO 2 5 Chapter 2 To uninstall the CPU heatsink and fan assembly ...
Page 44: ...2 6 Chapter 2 Basic installation Chapter 2 To remove a DIMM 2 1 4 DIMM installation ...
Page 45: ...ASUS H97 PRO 2 7 Chapter 2 2 1 5 ATX Power connection OR ...
Page 46: ...2 8 Chapter 2 Basic installation Chapter 2 2 1 6 SATA device connection OR OR ...
Page 54: ...2 16 Chapter 2 Basic installation Chapter 2 ...
Page 134: ...4 22 Chapter 4 Software support Chapter 4 ...
Page 148: ...A 6 Appendices Appendices ...


