2.8.2
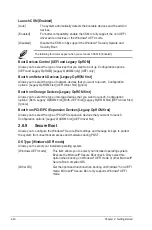
Boot Logo Display [Auto]
[Auto]
Adjusts logo automatically based on Windows
®
display requrements.
[Full Screen]
Maximize the boot logo size.
[Disabled]
Hide the logo during POST.
POST Delay Time [3 sec]
This item appears only when you set Boot Logo Display to [Auto] and [Full Screen]. This item
allows you to select the desired additional POST waiting time to easily enter the BIOS setup.
You can only execute the POST delay time during Normal Boot. The values range from 0 to
10 seconds.
This feature will only work under normal boot.
Post Report [5 sec]
This item appears only when you set Boot Logo Display to [Disabled]. This item allows you to
select a desired post report waiting time. Configuration options: [1 sec] ~ [10 sec] [Until Press
ESC].
2.8.3
Bootup NumLock State [Enabled]
This item allows you to enable or disable power‑on state of the NumLock. Configuration
options: [Disabled] [Enabled]
2.8.4
Wait for ‘F1’ If Error [Enabled]
When this item is set to [Enabled], the system waits for the F1 key to be pressed when error
occurs. Configuration options: [Disabled] [Enabled]
2.8.5
Option ROM Messages [Enabled]
[Enabled]
The third‑party ROM messages will be displayed during POST.
[Disabled]
Disables the ROM messages and displays only the ASUS logo during
POST.
2.8.6
Interrupt 19 Capture [Disabled]
This item allows you to trap Interrupt 19 by the option ROMs. Configuration options:
[Disabled] [Enabled]
2.8.7
Setup Mode [EZ Mode]
[Advanced Mode] This item allows you to go to Advanced Mode of the BIOS after POST.
[EZ Mode]
This item allows you to go to EZ Mode of the BIOS after POST.
2.8.8
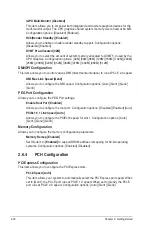
CSM (Compatibility Support Module)
Allows you to configure the CSM (Compatibility Support Module) items to fully support the
various VGA, bootable devices and add‑on devices for better compatibility.
ASUS H170I-PLUS D3
2‑39
Summary of Contents for H170I-PLUS D3
Page 1: ...Motherboard H170I PLUS D3 ...
Page 10: ...x ...
Page 15: ...ASUS H170I PLUS D3 1 5 Top of CPU Bottom of CPU Bottom of CPU Top of CPU ...
Page 19: ...ASUS H170I PLUS D3 1 9 2 3 To remove a DIMM B A ...
Page 34: ...1 24 Chapter 1 Product introduction ...

