


ASUS Tablet E-Manual
0
Using Bluetooth
Enabling or disabling Bluetooth in your device
Bluetooth is a wireless standard used for exchanging data over short distances.
Bluetooth exists in many products, such as smartphones, computers, tablet
devices, and headsets.
Bluetooth is very useful when transferring data between two or more devices that
are near each other.
The first time you connect to a Bluetooth device, you must pair it with your ASUS
Tablet.
NOTE:
Turn Bluetooth off when you are not using it to help save battery power.
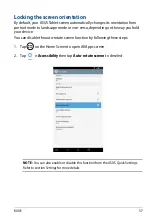
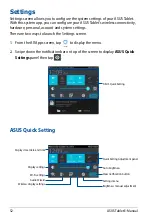
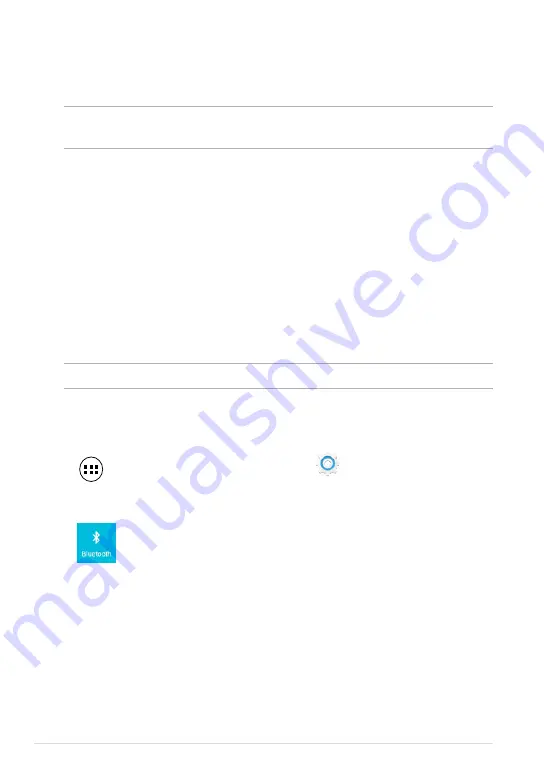
To enable or disable Bluetooth in your ASUS Tablet, you can do any of the
following:
q
Tap
to go to the All Apps screen then tap
Settings
. Slide the Bluetooth switch
to
ON
q
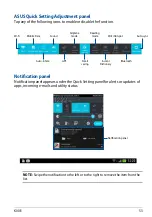
Slide down the Notification area to display
ASUS Quick Settings
panel then
tap
.
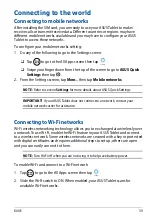
3. Tap a network name to connect to it. If the network is secured or protected,
you are prompted to key in a password or key in other credentials.
NOTE:
If your ASUS Tablet finds a network that you have connected to previously, it
automatically connects to it.
Summary of Contents for K00E
Page 1: ...USER MANUAL E8712 ASUS Tablet ...
Page 10: ...ASUS Tablet E Manual 10 ...
Page 11: ...K00E 11 Chapter 1 Hardware Setup Chapter 1 Hardware Setup ...
Page 17: ...K00E 17 Chapter 2 Using your ASUS Tablet Chapter 2 Using your ASUS Tablet ...
Page 19: ...K00E 19 3 Align and insert the micro SIM card tray back to the slot ...
Page 28: ...ASUS Tablet E Manual 28 ...
Page 29: ...K00E 29 Chapter 3 Working with Android Chapter 3 Working with Android ...
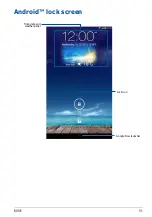
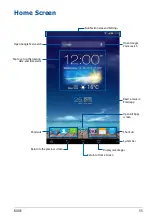
Page 31: ...K00E 31 Android lock screen Lock icon Google Now launcher Time date and weather panel ...
Page 55: ...K00E 55 Chapter 4 Pre installed Apps Chapter 4 Pre installed Apps ...
Page 90: ...ASUS Tablet E Manual 90 ...
Page 91: ...K00E 91 Appendices Appendices ...
Page 101: ...K00E 101 ...


