2-28
Chapter 2: Hardware information
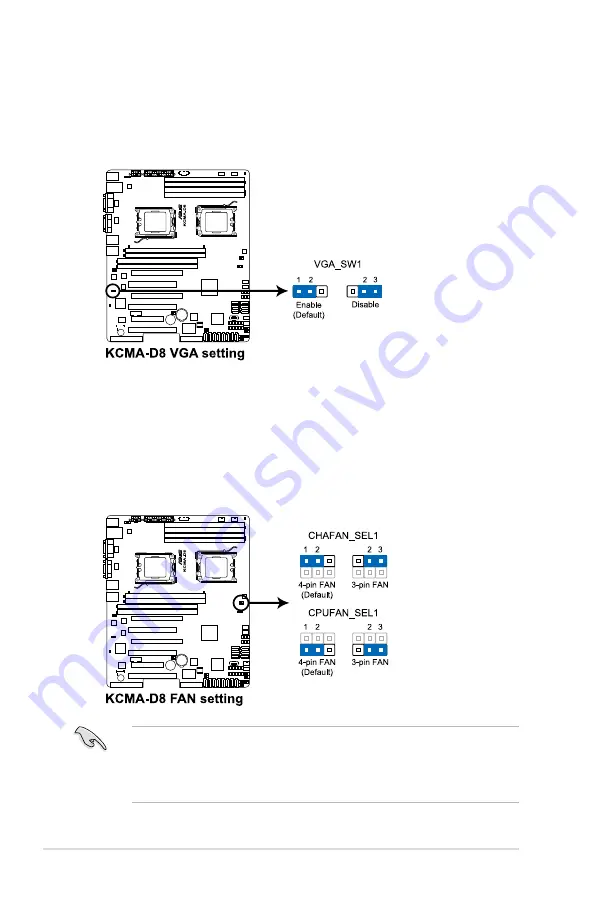
2. VGA controller setting (3-pin VGA_SW1)
This jumper allows you to enable or disable the onboard VGA controller. Set
to pins 1–2 to activate the VGA feature.
3. CPU Fan and Chassis Fan control setting
(3-pin CPUFAN_SEL1, CHAFAN_SEL1)
These jumpers allow you to switch for fan pin selection. The CPUFAN_SEL1
jumper is for the CPU fans control and the CHAFAN_SEL1 jumper is for the
front fans and rear fans control. Set to pins 1–2 when using 4-pin fans or pins
2–3 when using 3-pin fans.
• If you use a 4-pin fan but set the jumper to pin 2-3, the fan you installed
may not work.
• If you use a 3-pin fan but set the jumper for a 4-pin fan, the fan control will
not work and the fan you installed will always run at full speed.
Summary of Contents for KCMA-D8
Page 1: ...Motherboard KCMA D8 ...
Page 25: ...ASUS KCMA D8 2 7 2 2 3 Motherboard layouts ...
Page 60: ...2 42 Chapter 2 Hardware information ...
Page 106: ...4 42 Chapter 4 BIOS setup ...
Page 108: ...ASUS KCMA D8 Chapter summary 5 5 1 Setting up RAID 5 3 5 2 FastBuild Utility 5 5 ...
Page 122: ...5 16 Chapter 5 RAID configuration ...
Page 148: ...6 26 Chapter 6 Driver installation ...
Page 150: ...Appendix summary A ASUS KCMA D8 A 1 KCMA D8 block diagram A 3 ...


