ASUS MAXIMUS VII RANGER
3-15
Chapter 3
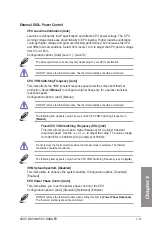
External DIGI+ Power Control
CPU Load-line Calibration [Auto]
Load-line is defined by Intel
®
specification and affects CPU power voltage. The CPU
working voltage decreases proportionally to CPU loading. Higher load-line calibration
could get higher voltage and good overclocking performance, but increases the CPU
and VRM thermal conditions. Select from levels 1 to 9 to adjust the CPU power voltage
from 0% to 125%.
Configuration options [Auto] [Level 1] - [Level 9]
The actual performance boost may vary depending on your CPU specification.
DO NOT remove the thermal module. The thermal conditions should be monitored.
CPU VRM Switching Frequency [Auto]
This item affects the VRM transient response speed and the component thermal
production. Select [
Manual
] to configure a higher frequency for a quicker transient
response speed.
Configuration options: [Auto] [Manual]
DO NOT remove the thermal module. The thermal conditions should be monitored.
The following item appears only when you set the CPU VRM Switching Frequency to
[Manual]
.
Fixed CPU VRM Switching Frequency (KHz) [300]
This item allows you to set a higher frequency for a quicker transient
response speed. Use the <+> or <-> to adjust the value. The values range
from 300 KHz to 500 KHz with an interval of 50 KHz.
Do not remove the thermal module when the manual mode is selected. The thermal
conditions should be monitored.
The following item appears only when the CPU VRM Switching Frequency is set to [
Auto
].
VRM Spread Spectrum [Disabled]
This item allows to enhance the system stability. Configuration options: [Disabled]
[Enabled]
CPU Power Phase Control [Auto]
This item allows you to set the power phase control of the CPU.
Configuration options: [Auto] [Standard] [Optimized] [Extreme]
DO NOT remove the thermal module when setting this item to
[Power Phase Response]
.
The thermal conditions should be monitored.
Summary of Contents for Maximus VII Ranger
Page 1: ...Motherboard MAXIMUS VII RANGER ...
Page 62: ...1 48 Chapter 1 Product introduction Chapter 1 ...
Page 67: ...ASUS MAXIMUS VII RANGER 2 5 Chapter 2 To uninstall the CPU heatsink and fan assembly ...
Page 68: ...2 6 Chapter 2 Basic Installation Chapter 2 1 2 3 To remove a DIMM 2 1 4 DIMM installation B A ...
Page 69: ...ASUS MAXIMUS VII RANGER 2 7 Chapter 2 2 1 5 ATX Power connection 1 2 OR ...
Page 70: ...2 8 Chapter 2 Basic Installation Chapter 2 2 1 6 SATA device connection 2 OR 1 ...
Page 78: ...2 16 Chapter 2 Basic Installation Chapter 2 Connect to 7 1 channel Speakers ...
Page 80: ...2 18 Chapter 2 Basic Installation Chapter 2 ...
Page 142: ...3 62 Chapter 3 BIOS setup Chapter 3 ...
Page 176: ...4 34 Chapter 4 Software support Chapter 4 Function Keys Shortcut ...
Page 186: ...4 44 Chapter 4 Software support Chapter 4 ...
Page 200: ...A 6 Appendices Appendices ...


