3-40
Chapter 3: BIOS setup
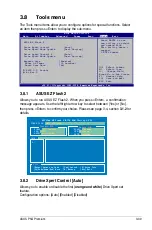
3.8.3
Drive Xpert Mode Update [Last Setting]
Set this item to [Mode change] to show further settings of the Drive Xpert feature.
Configuration options: [Last setting] [Mode change]
Update To Super Speed [Press Enter]
This item appears only when you set the
Drive Xpert Mode Update
item
to [Mode change] and allows you to use
Super Speed
function. Plug two
identical SATA hard drives in the
orange
SATA port labeled
SATA_E1
(port 0)
and the
white
SATA port labeled
SATA_E2
(port 1)
and press the
<Enter> key.
Update To EZ Backup [Press Enter]
This item appears only when you set the
Drive Xpert Mode Update
item to
[Mode change] and allows you to use
EZ Backup
function. Plug two identical
SATA hard drives in the
orange
SATA port labeled
SATA_E1 (port 0)
and the
white
SATA port labeled
SATA_E2
(port 1)
and press the <Enter> key.
• Make necessary backup before using the
Drive Xpert
function:
All original data of the SATA_E2 (white, port 1) hard drive will be erased for
EZ Backup
setup.
All original data of the two hard drives will be erased for
Super Speed
setup.
• All changes spend 5 seconds to take effect. Do not turn off the computer
before the Drive Xeprt setting is completed.
Update To Normal mode [Press Enter]
This item appears only when you set the
Drive Xpert Mode Update
item to
[Mode change] and uses the
orange
SATA port labeled
SATA_E1 (port 0)
and the
white
SATA port labeled
SATA_E2 (port 1)
as normal SATA ports.
3.8.4
Drive Xpert Control 2 [Auto]
Allows you to enable or disable the second
(blue and white)
Drive Xpert set
feature.
Configuration options: [Auto] [Enabled] [Disabled]
3.8.5
Drive Xpert Mode Update [Last Setting]
Set this item to [Mode change] to show further settings of the Drive Xpert feature.
Configuration options: [Last setting] [Mode change]
Update To Super Speed [Press Enter]
This item appears only when you set the
Drive Xpert Mode Update
item
to [Mode change] and allows you to use
Super Speed
function. Plug two
identical SATA hard drives in the
blue
SATA port labeled
SATA_E3
(port 2)
and the
white
SATA port labeled
SATA_E4
(port 3)
and press the
<Enter> key.
Summary of Contents for P5Q Premium - Motherboard - ATX
Page 1: ...Motherboard P5Q Premium ...
Page 24: ...1 8 Chapter 1 Product Introduction ...
Page 70: ...2 44 Chapter 2 Hardware information ...
Page 190: ...4 72 Chapter 4 Software support ...
Page 196: ...A 4 Appendix CPU features ...

