background image

7

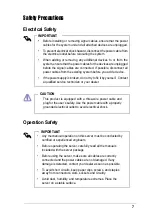
Safety Precautions

Electrical Safety

Operation Safety

IMPORTANT

Before installing or removing signal cables, ensure that the power
cables for the system unit and all attached devices are unplugged.

To prevent electrical shock hazard, disconnect the power cable from
the electrical outlet before relocating the system.

When adding or removing any additional devices to or from the
system, ensure that the power cables for the devices are unplugged
before the signal cables are connected. If possible, disconnect all
power cables from the existing system before you add a device.

If the power supply is broken, do not try to fix it by yourself.  Contact
a qualified service technician or your dealer.

Any mechanical operation on this server must be conducted by
certified or experienced engineers.

Before operating the server, carefully read all the manuals
included with the server package.

Before using the server, make sure all cables are correctly
connected and the power cables are not damaged. If any
damage is detected, contact your dealer as soon as possible.

To avoid short circuits, keep paper clips, screws, and staples
away from connectors, slots, sockets and circuitry.

Avoid dust, humidity, and temperature extremes. Place the
server on a stable surface.

IMPORTANT

This product is equipped with a three-wire power cable and
plug for the user’s safety. Use the power cable with a properly
grounded electrical outlet to avoid electrical shock.

CAUTION

Summary of Contents for Pentium 4 Pedestal Server AP130-D

Page 1: ...Pentium 4 Pedestal Server AP130 D User s Manual ...

Page 2: ... authorized in writing by ASUS or 2 the serial number of the product is defaced or missing Products and corporate names appearing in this manual may or may not be registered trademarks or copyrights of their respective companies and are used only for identification or explanation and to the owners benefit without intent to infringe The product name and revision number are both printed on the produ...

Page 3: ...el Features 15 1 3 Rear Panel Features 16 1 4 Internal Features 17 Chapter 2 Hardware Setup 19 2 1 Remove the Chassis Cover 20 Unlock the side cover 20 Remove the side cover 20 2 2 Motherboard Placement 21 Placement Direction 21 Motherboard Screws 21 2 3 Install a CPU 22 CPU Socket Location 22 CPU Orientation 22 Unlock the CPU Socket 23 Insert the CPU 23 Secure the CPU 23 Install the Fan Heatsink ...

Page 4: ...l the Cover 29 Chapter 3 Powering Up 31 3 1 Getting Started 32 Connect a Monitor 32 Connect the Power Cord 32 Power On 32 Check Power Status 32 Appendix A Power Supply 33 A 1 General Description 34 A 2 Specifications 35 Input Characteristics 35 Output Characteristics 35 Over Voltage Protection OVP 35 Appendix B Troubleshooting 37 B 1 Simple Fixes 38 ...

Page 5: ...COMPUTER INTERNATIONAL America Address 6737 Mowry Avenue Mowry Business Center Building 2 Newark CA 94560 USA General Fax 1 510 608 4555 General Email tmd1 asus com Technical Support Support Fax 1 510 608 4555 Notebook Tel 1 877 918 ASUS 2787 Web Site www asus com Support Email tsd asus com ASUS COMPUTER GmbH Europe Address Harkortstr 25 40880 Ratingen BRD Germany General Fax 49 2102 442066 Genera...

Page 6: ...e harmful interference to radio or television reception which can be determined by turning the equipment off and on the user is encouraged to try to correct the interference by one or more of the following measures Reorient or relocate the receiving antenna Increase the separation between the equipment and receiver Connect the equipment to an outlet on a circuit different from that to which the re...

Page 7: ... fix it by yourself Contact a qualified service technician or your dealer Any mechanical operation on this server must be conducted by certified or experienced engineers Before operating the server carefully read all the manuals included with the server package Before using the server make sure all cables are correctly connected and the power cables are not damaged If any damage is detected contac...

Page 8: ...8 ...

Page 9: ...ion About This Manual About This Manual introduces the contents of this document This part includes the target audience chapter description and conventions used It also lists other sources of information that are not contained in this manual ...

Page 10: ...ocedures that you have to perform when installing system components 4 Chapter 3 Powering Up This chapter tells how to get started with the AP130 D server after you have installed the basic components 5 Appendix A Power Supply Information This appendix gives information on the 200 watt switching power supply that came with the AP130 D server 6 Appendix B Troubleshooting This appendix lists the comm...

Page 11: ...g a task References Refer to the following sources for additional information and for product and software updates 1 ASUS P4B266 M Motherboard User s Manual This manual contains detailed information about the P4B266 M motherboard 2 ASUS Websites The ASUS websites worldwide provide updated information on ASUS hardware and softare products TheASUS websites are listed in theASUS Contact Information o...

Page 12: ...em package 1 ASUS AS11 chassis 2 ASUS P4B266 M motherboard 3 200W ATX power supply 4 52X CD ROM drive 5 1 44MB floppy disk drive 6 AGP 4X card optional 7 Support CD that includes drivers utilities and ASUS Server Web based Management ASWM 8 User s manuals for system and motherboard If any of the above items is missing contact your dealer ...

Page 13: ... ASUS AP130 D Pedestal Server This chapter describes the general features of the AP130 D server It includes sections on front panel rear panel and internal features of the server Chapter 1 System Overview ...

Page 14: ...e south bridge Intel I O Controller Hub 2 ICH2 are interconnected through the Intel proprietary Hub interface The MCH provides the processor interface system memory interface AGP interface and Hub Interface LAN Chipset The RealTek 8100 PCI LAN controller is a highly integrated Platform LAN Connect PLC device that allows 10BASE T and 100BASE TX networking capabilities and provides the LAN solution ...

Page 15: ...l is designed with a door secured by a keylock When locked the door prevents unauthorized access to the front panel components Front Panel Door Keylock Power Switch CD ROM Drive 5 25 inch Drive Bay Floppy Disk Drive Power LED HD Access LED Message LED Front USB Ports Reset Switch ...

Page 16: ...ltage selector switch below the power socket Use this switch to select the appropriatevoltageaccordingtothe voltage supply in your area If the voltage supply in your area is 100 127V set the switch to 115V If the voltage supply in your area is 200 240V set the switch to 230V Setting the switch to 115V in a 230V environment will seriously damage the server CAUTION USB Serial AC Power PS 2 Mouse Par...

Page 17: ...ver include the motherboard power supply floppy and CD ROM drives and cables The picture below shows the standard components of the server 1 Power Supply 2 CD ROM Drive 3 5 25 inch Drive Bay 4 Floppy Disk Drive 5 3 5 inch Internal Drive Bays 6 P4B266 M Motherboard 7 AGP 4X Card optional 1 6 2 3 4 5 7 ...

Page 18: ...18 Chapter 1 System Overview ...

Page 19: ...19 ASUS AP130 D Pedestal Server This chapter describes the hardware setup procedures that you have to perform when installing system components Chapter 2 Hardware Setup ...

Page 20: ...humbscrews secure the removable side panel cover Turn these screws counter clockwise to release the cover The screws are attached to the cover Do pull out the screws Remove the side cover Slide the cover for about an inch toward the rear panel then lif it out of the chassis Thumbscrews ...

Page 21: ...in the holes indicated by circles to secure the motherboard to the chassis Do not overtighten the screws Doing so may damage the motherboard 2 2 Motherboard Placement The motherboard and other internal components of the AP130 D server are already installed as indicated in section 1 4 Internal Features Refer to the motherboard user s manual for detailed technical information about the motherboard N...

Page 22: ...a CPU Refer to the motherboard user guide for more information CPU Socket Location The CPU socket is located beside the rear panel connectors Note the Pin 1 location on the socket CPU Orientation A CPU has a mark usually a notch oragoldmark ononecornertohelp you identify the correct orientation when inserting it to the socket MatchthemarkedcorneroftheCPU to Pin 1 on the socket Gold Mark Pin 1 ...

Page 23: ...tches the base of the socket lever 2 Carefully insert the CPU into the socket until it fits in place Socket Lever 90 100 Gold Mark Secure the CPU When the CPU is in place press it firmly on the socket while you push down the socket lever to secure the CPU The lever clicks on the side tab to indicate that it is locked Incorrect installation of the CPU into the socket may bend the pins and severely ...

Page 24: ...l the other bracket 3 When attached to the module base flip the brackets sideways to allow enough room for the fan heatsink assembly See picture in step 4 Install the Fan Heatsink Assembly Hole of rentention module base Arrow Retention module base The retention module base is already installed on the motherboard upon purchase Some CPU fan heatsink packages may also come with an extra module base N...

Page 25: ...Connect the fan cable to the CPU_FAN connector 7 Flip back the retention brackets inward so that they fit the sides of the heatsink 8 Simultaneously flip the bracket levers 180 towards the arrows until they click in place CPU fan connector CPU_FAN The fan heatsink assembly shown above is for reference only The fan heatsink assembly that you purchased may not look exactly the same as shown Refer to...

Page 26: ... the retaining clips outward Align a DIMM on the socket such that the notch on the DIMM matches the break on the socket 2 Firmly insert the DIMM into the socket until the retaining clips snap back in place and the DIMM is properly seated DIMM Sockets Location A DDR DIMM is keyed with a notch so it fits in only one direction DO NOT force a DIMM into a socket to avoid damaging the DIMM CAUTION Socke...

Page 27: ...ew that secures the HDD floppy cage Make sure to disconnect the floppy cable from the floppy disk before removing the cage out of the chassis 2 Press the retaining clip to release the cage 3 Lift the cage out of the chassis Remove the HDD Floppy Cage Retaining clip HDD Metal Cage ...

Page 28: ...ct the Cables 1 Connect one end of the IDE cable to the IDE connector at the back of the drive matching the red stripe on the cable with Pin 1 on the IDE connector 2 Connect a power cable plug marked P5 to the power connector at the back of the drive 3 Connect the other end of the IDE cable to the primary IDE connector blue connector on the motherboard IDE Cable Red Stripe to Pin 1 Power Cable P5 ...

Page 29: ... install the Cover 1 Position the cover in place aligning the tabs on the inner side of the cover to the rail holes on the chassis edge 2 Slide the cover toward the front panel until it fits in place 3 Turn the thumbscrews to secure the cover to the chassis ...

Page 30: ...30 Chapter 2 Hardware Setup ...

Page 31: ...31 ASUS AP130 D Pedestal Server This chapter tells how to get started with the AP130 D server Powering up the server basically includes connecting the cables and turning power on Chapter 3 Powering Up ...

Page 32: ...server rear panel Connect the Power Cord 1 Adjust the voltage selector to the correct voltage in your area 2 Connect a power cord to the power connector on the rear panel 3 Plug the power cord to a grounded wall socket Power On Turn on the server by pressing the power switch on the front panel Check Power Status After turning on the power the power LED lights up If it doesn t check the power conne...

Page 33: ...33 ASUS AP130 D Pedestal Server This appendix gives information on the 200W switching power supply that comes with the AP130 D server Appendix A Power Supply ...

Page 34: ...tput cables and connectors The power supply has an internal cooling fan The power supply has seven plugs labeled PS1 P2 P3 P4 P5 P6 and P7 The picture below shows the specific device assignments for the plugs P2 P4 P3 PS1 P5 P7 P6 PS1 Motherboard ATX Power P2 CD ROM Drive P3 Internal Device P4 Internal Device P5 IDE HDD P6 Floppy Disk Drive P7 Internal Device ...

Page 35: ... 90A cold start 120A warm start Efficiency 65 min at nominal input maximum load Output Load Range Regulation Ripple Voltage Min Max Min Max Max 5V 1 5A 25 0A 5 5 50mVp p 12V 0 2A 8 0A 5 5 120mVp p 12V 0A 0 8A 10 10 120mVp p 5Vsb 0A 2 0A 5 5 50mVp p 3V3 0A 14 0A 5 5 50mVp p Output Voltage Maximum Voltage 5V 6 5V 12V 15 6V 3 3V 4 3V NOTE The power supply will shut down and latch off for shorting 5V ...

Page 36: ...36 Appendix A Power Supply ...

Page 37: ...e common problems that you may encounter while using the AP130 D server It lists the possible causes of the problems and offers solutions You may refer to this part and try to solve simple problems before calling customer support Appendix B Troubleshooting ...

Page 38: ...tem is turned on Problem Action The keyboard does not work Checkthekeyboardcableifproperly connected to the keyboard port The mouse does not work Check the mouse cable if properly connected to the mouse port The system does not perform power on self tests POST after it was turned on 1 Check the memory modules and make sure you installed the DIMMs the system supports 2 Make sure that the DIMMs are ...

Page 39: ...lled on the sockets The message Non system disk or disk error appears Check if bootable HDD is active Onboard IDE HDD is unstable Install the utility drivers from the support CD that came with the package Network connection not available 1 Make sure the network cable is connector the RJ 45 port on the rear panel 2 Make sure that you have installed the network drivers from the motherboard support C...

Page 40: ...40 Appendix B Troubleshooting ...

Reviews: