background image

2-46

Chapter 2: RAID configuration

•  Physical drive 

A red circle to the right of an icon indicates that the device has failed. For example, this icon 
indicates that a physical drive has failed: 

.

A yellow circle to the right of an icon indicates that a device is running in a degraded state. 

For example, this icon indicates that a virtual disk is running in a degraded state because a 
disk drive has failed: 

.

Properties View Panel

The right panel of the MegaRAID Storage Manager window has the 

Properties

 tab that 

displays information about the selected device. For example, if a controller icon is selected in 

the left panel, the Properties tab lists information such as the controller name, NVRAM size, 

and device port count. 

Event Log Panel

The lower part of the MegaRAID Storage Manager window displays the system event log 

entries. New event log entries appear during the session. Each entry has an ID, a timestamp 

and date, an error level indicating the severity of the event, and a brief description of the 

event.

Menu Bar

Here are brief descriptions of the main selections on the MegaRAID Storage Manager menu 

bar.

Manage Menu

The 

Manager

 menu has an 

Exit

 option for exiting from the MegaRAID Storage 

Manager software. It also has a 

Refresh

 option for updating the display in the 

MegaRAID Storage Manager window. (Refresh is seldom required; the display normally 

updates automatically.) The Manage menu options also include 

Check Consistency

Initialize

, and 

Show Progress

.

Go To Menu

The 

Go To

 menu is available when a controller, physical drive, or virtual disk is 

selected in the MegaRAID Storage Manager window. The 

Go To

 menu options vary 

depending on what type of device is selected in the left panel of the MegaRAID Storage 

Manager window. For example, the 

Scan Foreign Configuration

 option is available 

only when a controller is selected. The options also vary depending on the current state 

of the selected device. For example, if you select an offline physical drive, the 

Make 

Drive Online

 option will be available in the 

Go To

 menu.

Summary of Contents for PIKE II 3008 Series

Page 1: ...PIKE II 3008 8i PIKE II 3008 4i4e PIKE II 3008 Series ...

Page 2: ...HANTABILITY OR FITNESS FOR A PARTICULAR PURPOSE IN NO EVENT SHALL ASUS ITS DIRECTORS OFFICERS EMPLOYEES OR AGENTS BE LIABLE FOR ANY INDIRECT SPECIAL INCIDENTAL OR CONSEQUENTIAL DAMAGES INCLUDING DAMAGES FOR LOSS OF PROFITS LOSS OF BUSINESS LOSS OF USE OR DATA INTERRUPTION OF BUSINESS AND THE LIKE EVEN IF ASUS HAS BEEN ADVISED OF THE POSSIBILITY OF SUCH DAMAGES ARISING FROM ANY DEFECT OR ERROR IN T...

Page 3: ... 2 16 2 2 4 Managing the RAID Volumes 2 22 2 2 5 Viewing SAS topology 2 33 2 2 6 Global Properties 2 34 2 3 MegaRAID Storage Manager 2 37 2 3 1 Hardware and Software Requirements 2 37 2 3 2 Installing MegaRAID Storage Manager Sofware on Microsoft Windows OS 2 37 2 3 3 Installing MegaRAID Storage Manager Sofware for Linux 2 41 2 3 4 Linux Error Messages 2 42 2 3 5 Starting MegaRAID Storage Manager ...

Page 4: ...RAID sets using the available utilities Chapter 3 Driver installation This chapter provides instructions for installing the RAID drivers on different operating systems Where to find more information Refer to the following sources for additional information and for product and software updates 1 ASUS websites The ASUS website provides updated information on ASUS hardware and software products Refer...

Page 5: ...hat you must type the command exactly as shown then supply the required item or value enclosed in brackets Example At the DOS prompt type the command line format a DANGER WARNING Information to prevent injury to yourself when trying to complete a task CAUTION Information to prevent damage to the components when trying to complete a task NOTE Tips and additional information to help you complete a t...

Page 6: ...to change without notice PIKE II 3008 8i PIKE II 3008 4i4e Controller LSISAS3008 Controller Interface PCI E Gen3 Ports 8 SAS 12Gb s Ports 2 Mini SAS HD SFF 8643 8 SAS 12Gb s Ports 1 Mini SAS HD SFF 8643 1 Mini SAS HD SFF 8644 Devices Supported 12 6 3 Gb s SAS 6 3 Gb s SATA RAID level RAID 0 1 10 1E Form factor 147 65 mm X 68 9 mm 5 81 in x 2 71 in ...

Page 7: ...This chapter offers the PIKE II 3008 SAS RAID card features and the new technologies it supports 1 Product introduction Chapter 1 Product introduction ...

Page 8: ... 0 RAID 1 RAID 1E and RAID 10 sets from SATA II SATA III SAS SAS II SAS III hard disk drives connected to the SAS connectors on the card Before you start installing the RAID card check the items in your package with the list below If any of the above items is damaged or missing contact your retailer 1 2 Package contents Check your package for the following items ASUS PIKE II 3008 Series SAS RAID c...

Page 9: ...mponents of the RAID card PIKE II 3008 8i PIKE II 3008 4i4e 1 PCI E x8 interface 2 Heartbeat LED and Activity LED This Activity LED blinks to indicate that system is accessing the SAS ports 3 Internal mini SAS HD connectors 4 External mini SAS HD connector 5 Switch for more than one card ...

Page 10: ...7 SW1 1 2 3 001 8 SW1 1 2 3 000 PIKE II card Switch pin settings and recommended configuration 1 3 1 Switch settings When using more than one PIKE II card on your system ensure to manually set the pin settings on the Switch on each of the PIKE II cards to ensure that the system detects all the cards installed You can refer to the following table for the pin settings ...

Page 11: ...Server motherboard PCI E Gen3 slot SAS or SATA hard disk drives Mini SAS HD cable Supported operating system Windows and Linux operating systems refer to website for details Other requirements Appropriate thermal solution Certified power supply module Ensure to update your BIOS to the latest version before using PIKE II 3008 series on ASUS Z9 or P9 series platform ...

Page 12: ...d slot 3 Insert the RAID card into the PCIE Gen3 card slot Ensure the card is completely seated in place 4 For PIKE II 3008 8i connect the hard disk drives to the internal Mini SAS HD connectors For PIKE II 3008 4i4e connect the hard disk drives to the internal and external Mini SAS HD connectors external mini SAS HD connector internal mini SAS HD connector internal mini SAS HD connector PCI E slo...

Page 13: ...This chapter provides instructions on setting up creating and configuring RAID sets using the available utilities 2 RAID Configuration Chapter 2 RAID Configuration ...

Page 14: ...lternate copy stored on a different disk You can use three or more hard disk drives for this configuration RAID 10 is a striped configuration with RAID 1 segments whose segments are RAID 1 arrays This configuration has the same fault tolerance as RAID 1 and has the same overhead for fault tolerance as mirroring alone RAID 10 achieves high input output rates by striping RAID 1 segments In some inst...

Page 15: ...ATA and SAS disk drives in one volume The RAID setup screens shown in this section are for reference only and may not exactly match the items on your screen due to the controller version difference The adapter name shown on the setup screens differs according to the installed SAS RAID card MPTFW and MPTBIOS version of the SAS RAID card Take note of the MPTFW and MPTBIOS version of your SAS RAID ca...

Page 16: ...mirrored volumes with two disks The RAID 1 feature supports hot swap capability so when a disk in an RAID 1 volume fails you can easily restore the volume and the swapped disk is automatically re mirrored To create a RAID 1 volume 1 Turn on the system after installing all SAS hard disk drives 2 During POST press Ctrl C to enter the SAS configuration utility To avoid data loss do not turn off the s...

Page 17: ... Series 2 5 4 From the Adapter Properties screen use the arrow keys to select RAID Properties then press Enter 5 From the Select New Volume Type screen use the arrow keys to select Create RAID 1 Volume then press Enter ...

Page 18: ...default the RAID Disk field shows No before volume creation This field is grayed out under the following conditions The disk does not meet the minimum requirements for use in a RAID volume The disk is not large enough to mirror existing data on the primary drive The disk is already part of another volume 7 If a selected disk contains no files or data the utility adds the disk to the array ...

Page 19: ...files or data the following message appears on the screen To proceed perform either of the following Click any key to continue Press M to keep existing data on the first disk If you choose this option data on the first disk will be mirrored on the second disk that you will add to the volume later Ensure the data you want to mirror is on the first disk Press D to overwrite any data and create the n...

Page 20: ...2 8 Chapter 2 RAID configuration 11 Wait while utility creates the volume 12 When done the utility displays the Adapter Properties screen From this screen click RAID Properties ...

Page 21: ...ASUS PIKE II 3008 Series 2 9 13 From the Select New Volume Type screen click View Existing Volume 14 From the View Volume screen the utility displays the new volume you created ...

Page 22: ...olume use even numbers of hard disk drives to create a RAID 10 volume 3 From the Adapter List screen select an item and press Enter The number of items displayed depends on the controller To create a RAID 1E 10 volume 1 Turn on the system after installing all SAS hard disk drives 2 During POST press Ctrl C to enter the SAS configuration utility To avoid data loss do not turn off the system when re...

Page 23: ...eries 2 11 4 From the Adapter Properties screen use the arrow keys to select RAID Properties then press Enter 5 From the Select New Volume Type screen use the arrow keys to select Create RAID 1E 10 Volume then press Enter ...

Page 24: ... default the RAID Disk field shows No before volume creation This field is grayed out under the following conditions The disk does not meet the minimum requirements for use in a RAID volume The disk is not large enough to mirror existing data on the primary drive The disk is already part of another volume 7 If a selected disk contains no files or data the utility adds the disk to the array ...

Page 25: ...contains files or data the following message appears on the screen To proceed do either of the following Click any key to continue Press M to keep existing data on the first disk If you choose this option data on the first disk will be mirrored on the second disk that you will add to the volume later Ensure the data you want to mirror is on the first disk Press D to overwrite any data and create t...

Page 26: ...2 14 Chapter 2 RAID configuration 11 Wait while utility creates the volume 12 When done the utility displays the Adapter Properties screen To check the new volume you created click RAID Properties ...

Page 27: ...ASUS PIKE II 3008 Series 2 15 13 From the Select New Volume Type screen click View Existing Volume 14 From the View Volume screen the utility displays new volume you created ...

Page 28: ... 1 or RAID 1E 10 volume 3 From the Adapter List screen select an item and press Enter The number of items displayed depends on the controller To create a RAID 0 volume 1 Turn on the system after installing all SAS hard disk drives 2 During POST press Ctrl C to enter the SAS configuration utility To avoid data loss do not turn off the system when rebuilding ...

Page 29: ... Series 2 17 4 From the Adapter Properties screen use the arrow keys to select RAID Properties then press Enter 5 From the Select New Volume Type screen use the arrow keys to select Create RAID 0 Volume then press Enter ...

Page 30: ... default the RAID Disk field shows No before volume creation This field is grayed out under the following conditions The disk does not meet the minimum requirements for use in a RAID volume The disk is not large enough to mirror existing data on the primary drive The disk is already part of another volume 7 If a selected disk contains no files or data the utility adds the disk to the array ...

Page 31: ...contains files or data the following message appears on the screen To proceed do either of the following Click any key to continue Press M to keep existing data on the first disk If you choose this option data on the first disk will be mirrored on the second disk that you will add to the volume later Ensure the data you want to mirror is on the first disk Press D to overwrite any data and create t...

Page 32: ...2 20 Chapter 2 RAID configuration 11 Wait while utility creates the volume 12 When done the utility displays the Adapter Properties screen To check the new volume you created click RAID Properties ...

Page 33: ...ASUS PIKE II 3008 Series 2 21 13 From the Select New Volume Type screen click View Existing Volume 14 From the View Volume screen the utility displays new volume you created ...

Page 34: ...k perform volume consistency check activate the volume delete volume and expand the volume capacity using the utility Viewing volume properties To view volume properties 1 From the Adapter Properties screen use the arrow keys to select RAID Properties then press Enter 2 From the Select New Volume Type screen click View Existing Volume ...

Page 35: ...om the View Volume screen you can view properties of the RAID volume s you created If you have configured a hot spare for a volume it will also be listed If you created more than one volume you can view the next volume by pressing Alt N ...

Page 36: ...is section when adding a hot spare disk on an existing volume If a disk on an RAID 1 1E 10 volume fails the utility automatically rebuilds the failed disk data on the hot spare When the failed disk is replaced the utility assigns the replacement as the new hot spare To create a hot spare 1 From the Adapter Properties screen use the arrow keys to select RAID Properties then press Enter 2 From the S...

Page 37: ...ASUS PIKE II 3008 Series 2 25 3 From the View Volume screen click Manage Volume 4 From the Manage Volume screen select Manage Hot Spares then press Enter ...

Page 38: ...en use the arrow keys to select the disk you want to configure as hot spare Move the cursor to the Hot Spr column then press or Space 7 Press C to commit the changes 9 Wait for the utility to finish 8 Select Save changes then exit this menu to create the the hot spare ...

Page 39: ...ing a consistency check To run a consistency check on the RAID volume 1 From the Adapter Properties screen use the arrow keys to select RAID Properties then press Enter 2 From the Select New Volume Type screen click View Existing Volume ...

Page 40: ...28 Chapter 2 RAID configuration 4 From the Manage Volume screen select Consistency Check then press Enter 3 From the View Volume screen click Manage Volume ...

Page 41: ...h the volume consistency check To check the status go to the Manage Volume screen and look at the information displayed on the Volume Status field If you see a screen similar to the one shown below press Enter to proceed with the volume consistency check ...

Page 42: ...troller computer or moved to another the volume is considered inactive To add the volume back to the system you need to reactivate the volume To activate the volume 1 Go to the Manage Volume screen select Activate Volume then press Enter 2 Press Enter to activate the inactive RAID volume ...

Page 43: ...important data before deleting a volume The hot spare disk that you configured for a volume is also be deleted when you delete the volume If you delete a RAID 1 volume the data is preserved on the primary disk To delete a volume 1 Go to the Manage Volume screen select Delete Volume then press Enter 2 Press Y to delete ...

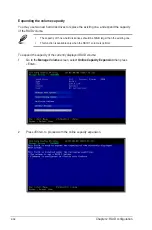
Page 44: ...ID volume The capactiy of th new hard disk drives should be 50GB larger than the existing one This function is available only when the RAID 1 volume is optimal To expand the capacity of the currently displayed RAID volume 1 Go to the Manage Volume screen select Online Capacity Expansion then press Enter 2 Press Enter to proceed with the online capacity expansion ...

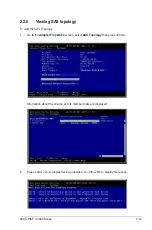
Page 45: ...S topology To view the SAS Topology 1 Go to the Adapter Properties screen select SAS Topology then press Enter 2 Press Alt D to display device properties or Alt M to display more keys Information about the volume and its member disks are displayed ...

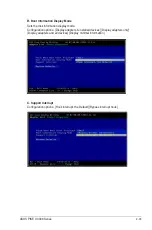
Page 46: ...cess the Global Properties menu Go to the Adapter List screen then press Alt N From Global Properties menu you can change the following settings A Pause When Boot Alert Displayed Sets whether to pause or not when the boot alert displays Configuration options Yes No ...

Page 47: ...s the disk information display mode Configuration options Display adapters installed devices Display adapters only Display adapters and all devices Display minimal information C Support Interrupt Configuration options Hook interrupt the Default Bypass interrupt hook ...

Page 48: ...2 36 Chapter 2 RAID configuration D Restore Defaults This option allows you to discard the selections you made and restore the system defaults ...

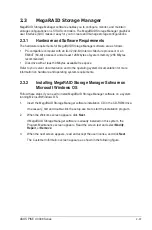
Page 49: ...your server documentation and to the operating system documentation for more information on hardware and operating system requirements 2 3 2 Installing MegaRAID Storage Manager Sofware on Microsoft Windows OS Follow these steps if you need to install MegaRAID Storage Manager software on a system running Microsoft Windows OS 1 Insert the MegaRAID Storage Manager software installation CD in the CD R...

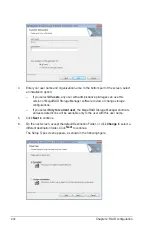
Page 50: ...torage Manager software to view or change storage configurations If you select Only for current user the MegaRAID Storage Manager shortcuts and associated icons will be available only to the user with this user name 5 Click Next to continue 6 On the next screen accept the default Destination Folder or click Change to select a different destination folder Click Next to continue The Setup Type scree...

Page 51: ...l on the next screen that appears 9 Select one of the custom setup options The options are fully explained in the screen text Select Client if you are installing MegaRAID Storage Manager software on a PC that will be used to view and configure servers over a network To begin installation click on Install on the next screen that appears Select Server to install only those components required for re...

Page 52: ...available servers with a registered framework on the local subnet that is servers with a complete installation of MegaRAID Storage Manager software the server screen will appear as shown in the following figure The server screen will not list any servers You can use this screen to manage systems remotely If you select Custom a window listing the installation features appears as shown in the follow...

Page 53: ...ux_installer tar gz A new disk directory is created 3 Go to the new disk directory 4 In the disk directory find and read the readme txt file 5 To start the installation enter the following command csh install sh a If you select Client installation for a PC used to monitor servers and if there are no available servers with a registered framework on the local subnet that is servers with a complete i...

Page 54: ... all the rpm files manually before installing MegaRAID Storage Manager software with the procedure listed previously The version is already installed This message indicates that the version of MegaRAID Storage Manager software you are trying to install is already installed on the system The installed version is newer This message indicates that a version of MegaRAID Storage Manager software is alr...

Page 55: ...k Unblock to allow MegaRAID Storage Manager software to start The Windows Firewall sometimes blocks the operation of programs that use Java To start MegaRAID Storage Manager software on a Red Hat Linux system select Applications System Tools MegaRAID Storage Manager StartupUI To start MegaRAID Storage Manager software on a SUSE SLES system select Start System More Programs MegaRAID Storage Manager...

Page 56: ...at you want to access The Server Login window appears as shown in the following figure 4 Select an access mode from the drop down menu Select Full Access if you need to both view the current configuration and change the configuration Select View Only if you need to only view and monitor the configuration 5 Enter your user name and password and click Login If the computer is networked this is the l...

Page 57: ... itself One or more controllers are installed in the system The controller label identifies the MegaRAID controller such as the ASUS PIKE II 3008 Series controller so that you can easily differentiate between multiple controllers Each controller has one or more ports Disk drives and other devices are attached to the ports The Logical view shows the hierarchy of controllers virtual disks and disk g...

Page 58: ... date an error level indicating the severity of the event and a brief description of the event Menu Bar Here are brief descriptions of the main selections on the MegaRAID Storage Manager menu bar Manage Menu The Manager menu has an Exit option for exiting from the MegaRAID Storage Manager software It also has a Refresh option for updating the display in the MegaRAID Storage Manager window Refresh ...

Page 59: ... Contents to view the MegaRAID Storage Manager online help file You can select Help About MegaRAID Storage Manager to view version information for the MegaRAID Storage Manager software When you use the MegaRAID Storage Manager online help you may see a warning message that Internet Explorer has restricted the file from showing active content If this warning appears click on the active content warn...

Page 60: ...2 48 Chapter 2 RAID configuration ...

Page 61: ...3 Driver installation This chapter provides instructions for installing the RAID card driver on different operating systems Chapter 3 Driver installation ...

Page 62: ...owever we recommend using the RAID driver packaged in the RAID card support CD for better reliability 3 1 1 Windows Server 2012 R2 OS During Windows Server 2012 R2 OS installation To install the RAID card driver when installing Windows Server 2012 R2 OS 1 Boot the computer using the Windows Server 2012 R2 OS installation CD to start the Windows Setup process 2 Follow onscreen installation Ensure t...

Page 63: ...k Browse and locate the driver on the support DVD 7 Select the driver from the list then click Next 8 Wait for the driver installation to finish 9 When done remove the support DVD and replace it with the installation DVD 10 Continue installing the operating system and follow onscreen instructions to complete the installation 11 optional Restart the computer ...

Page 64: ... OS The controller name differs according to the installed SAS RAID card 1 Insert the support DVD that is bundled with your PIKE 3008 Series card into the disc drive 2 Right click on the Start button then click Device Manager 3 Go to Storage Controllers then select LSI Adapter SAS 3008 Fury StorPort 4 Double click LSI Adapter SAS3 3008 Fury StorPort ...

Page 65: ...n click on Update Driver 6 Click Browse my computer for driver software 7 Click Browse locate the installer on the support DVD click OK when done and then click Next 8 Wait for the driver installation to finish 9 When done click Close 10 Restart the system ...

Page 66: ...iso file to a USB storage device then connect the USB storage device to your system To get the dd iso from the support CD go to Driver Linux mpt3sas release rhel5 disks 1 To download dd iso from the ASUS website visit www asus com 2 Boot the system from the Red Hat OS installation CD 3 Key in linux dd then press Enter 4 Using the Tab key select Yes then press Enter ...

Page 67: ...ASUS PIKE II 3008 Series 3 7 7 Select dd iso from the list select OK then press Enter 5 From the Driver Disk Source window select sdb from the list select OK then press Enter 6 Select OK to continue ...

Page 68: ...rwise select No then press Enter 9 Follow on screen instructions to continue with the installation When you reach the part to select storage devices the system should detect the PIKE card and the RAID volume if the driver is loaded successfully The system may display a screen similar to the one shown below ...

Page 69: ...storage device to your system To get the dd iso from the support CD go to Driver Linux mpt3sas release rhel6 disks 1 To download dd iso from the ASUS website visit www asus com 2 Boot the system from the Red Hat OS installation CD 3 From the initial installation page use the arrow keys to select the instalation method then press Esc to enter the boot option 4 After the boot option key in linux dd ...

Page 70: ...3 10 Chapter 3 Driver installation 5 Using the Tab key select Yes then press Enter 5 From the Driver Disk Source window select sdb from the list select OK then press Enter 6 Select OK to continue ...

Page 71: ...ASUS PIKE II 3008 Series 3 11 7 Select dd iso from the list select OK then press Enter 8 If you want to install another driver select Yes then press Enter Otherwise select No then press Enter ...

Page 72: ...instructions to continue with the installation When you reach the part to select storage devices the system should detect the PIKE card and the RAID volume if the driver is loaded successfully The system may display a screen similar to the one shown below ...

Page 73: ...ect the USB storage device to your system To get the dd iso from the support CD go to Driver Linux mpt3sas release sles11 disks 1 To download dd iso from the ASUS website visit www asus com 2 Boot the system from the SUSE OS installation CD 3 From the initial installation page press F6 and select Yes to load the driver ...

Page 74: ...installation When you reach the part to select storage devices the system should detect the PIKE card and the RAID volume if the driver is loaded successfully The system may display a screen similar to the one shown below 4 Select USB storage device from the list select OK then press Enter ...

Page 75: ...ASUS PIKE II 3008 Series 3 15 ...

Page 76: ...C Taiwan Address 15 Li Te Road Peitou Taipei Taiwan 11259 Telephone 886 2 2894 3447 Fax 886 2 2890 7798 E mail info asus com tw Web site http www asus com tw Technical Support Telephone 886 2 2894 3447 0800 093 456 Online Support http support asus com techserv techserv aspx ASUSTeK COMPUTER INC China Address No 508 Chundong Road Xinzhuang Industrial Zone Minhang District Shanghai China Telephone 8...

Page 77: ...Address Harkort Str 21 23 D 40880 Ratingen Germany Fax 49 2102 959911 Web site http www asus de Online contact http www asus de sales Technical Support Telephone 49 1805 010923 Support Fax 49 2102 959911 Online support http support asus com techserv techserv aspx ASUS Czech Service s r o Europe Address Na Rovince 887 720 00 Ostrava Hrabová Czech Republic Telephone 420 596766888 Web site http www a...

Page 78: ...upport asus com techserv techserv aspx ASUS Polska Sp z o o Poland Address Ul Postępu 6 02 676 Warszawa Poland Web site http pl asus com Technical Support Telephone 48 225718033 Online Support http support asus com techserv techserv aspx ASK Service Russia and CIS Address г Москва ул Орджоникидзе д 10 Россия Telephone 495 640 32 75 Web site http ru asus com Technical Support Telephone 008 800 100 ...

Page 79: ...II 3008 4i4e PIKE II 3008 8i Conforms to the following specifications FCC Part 15 Subpart B Unintentional Radiators Supplementary Information This device complies with part 15 of the FCC Rules Operation is subject to the following two conditions 1 This device may not cause harmful interference and 2 this device must accept any interference received including interference that may cause undesired o...

Page 80: ...1 V9 0 2 2003 03 EN 301 908 1 V5 2 1 2011 05 EN 301 908 2 V5 2 1 2011 07 EN 301 893 V1 6 1 2011 11 EN 302 544 2 V1 1 1 2009 01 EN 302 623 V1 1 1 2009 01 EN 50360 2001 EN 62479 2010 EN 50385 2002 EN 62311 2008 EN 301 489 1 V1 9 2 2011 09 EN 301 489 3 V1 4 1 2002 08 EN 301 489 4 V1 4 1 2009 05 EN 301 489 7 V1 3 1 2005 11 EN 301 489 9 V1 4 1 2007 11 EN 301 489 17 V2 2 1 2012 09 EN 301 489 24 V1 5 1 2...

Reviews: