


1-7
Chapter 1: Product Introduction
1.3.5
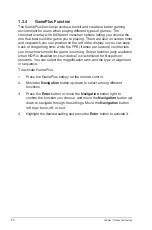
GameVisual Function
The GameVisual function helps you select among different picture modes
in a convenient way.
To activate GameVisual:
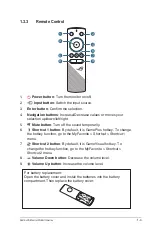
1. Press the GameVisual hotkey on the remote control.
2. Move the
Navigation
button up/down to select the desired setting.
•
Scenery Mode
: This is the best choice for scenery photo displaying
with GameVisual
TM
Video intelligence Technology.
•
Racing Mode
: This is the best choice for racing game playing with
GameVisual
TM
Video intelligence Technology.
•
Cinema Mode
: This is the best choice for movie watching with
GameVisual
TM
Video intelligence Technology.
•
RTS/RPG Mode
: This is the best choice for Real-Time Strategy
(RTS)/ Role-Playing Game (RPG) playing with GameVisual
TM
Video
intelligence Technology.
•
FPS Mode
: This is the best choice for First Person Shooter game
playing with GameVisual
TM
Video intelligence Technology.
•
sRGB Mode
: This is the best choice for viewing photos and graphics
from PCs.
•
MOBA Mode
: This is the best chioce for Multiplayer Online Battle
Arena (MOBA) games playing with GameVisual
TM
Video intelligence
Technology.
•
User Mode
: More items are adjustable in the Color menu.
3. Press the
Enter
button to activate it.
• In the Racing Mode, the Saturation, 6-axis Saturation, and VividPixel
functions are not user-configurable.
• In the sRGB, the Saturation, Color Temp., Sharpness, 6-axis Saturation,
and Contrast functions are not user-configurable. Color space will be
limited on sRGB and the screen size will not affect the screen brightness.


