


6-6
Chapter 6: RAID Configuration
6.
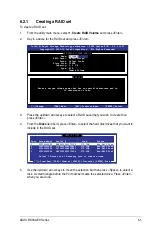
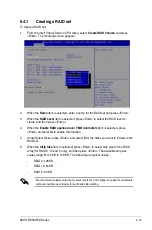
Use the up/down arrow keys to select the stripe size for the RAID array (for RAID 0,
10 and 5 only) then press <Enter>. The available stripe size values range from 4 KB to
128 KB. The following are typical values:
RAID 0:
128KB
RAID 10:
64KB
RAID 5:
64KB
We recommend a lower stripe size for server systems, and a higher stripe size for
multimedia computer systems used mainly for audio and video editing.
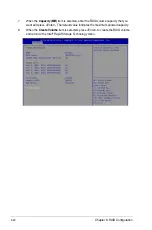
7.
In the
Capacity
field item, key in the RAID volume capacity that you want to use and
press <Enter>. The default value field indicates the maximum allowed capacity.
8.
Press <Enter> to start creating the RAID volume.
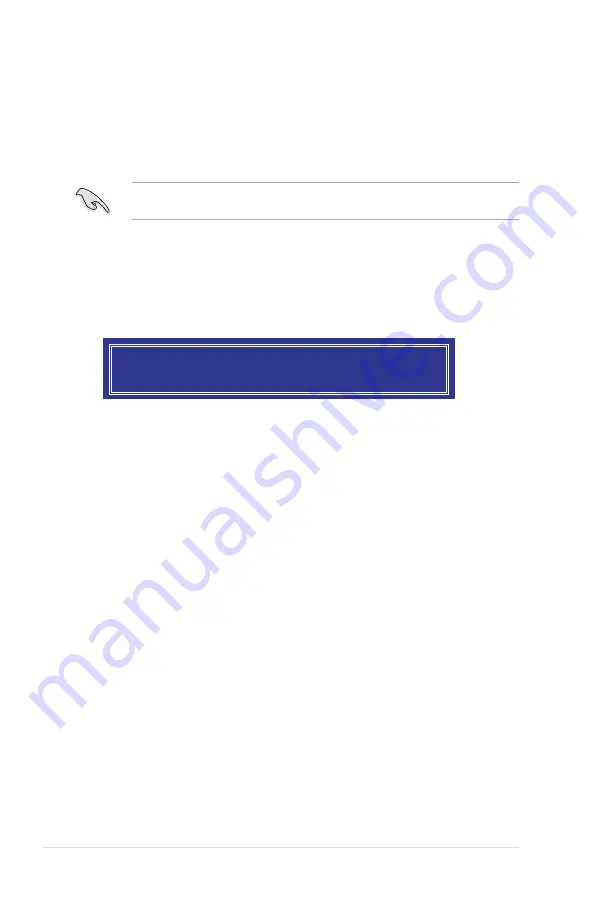
9.
From the following warning message, press <Y> to create the RAID volume and return
to the main menu, or press <N> to go back to the
CREATE VOLUME
menu.
WARNING: ALL DATA ON SELECTED DISKS WILL BE LOST.
Are you sure you want to create this volume? (Y/N):
Summary of Contents for RS500-E9 Series
Page 1: ...1U Rackmount Server User Guide RS500 E9 Series RS500 E9 PS4 RS500 E9 RS4 RS500 E9 RS4 U ...
Page 10: ...x ...
Page 25: ...2 5 ASUS RS500 E9 Series 6 Reinstall the air ducts CPU1 CPU socket 1 CPU2 CPU socket 2 ...
Page 51: ...3 5 ASUS RS500 E9 Series 3 2 Rail kit dimensions 589mm 43 6mm 900mm 43 6mm ...
Page 52: ...Chapter 3 Installation Options 3 6 ...
Page 54: ...Chapter 4 Motherboard Information 4 2 4 1 Motherboard layout ...
Page 148: ...6 22 Chapter 6 RAID Configuration ...
Page 155: ...7 7 ASUS RS500 E9 Series 5 Follow the onscreen instructions to complete the installation ...
Page 156: ...7 8 Chapter 7 Driver Installation ...
Page 157: ...Appendix Appendix ...
Page 158: ...Z11PR D16 DC block diagram ...


