2-13
ASUS RS520-E8-RS8 V2, RS520-E8-RS12-EV2
2.4.2
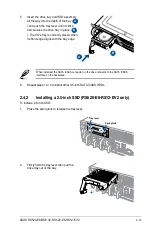
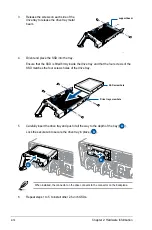
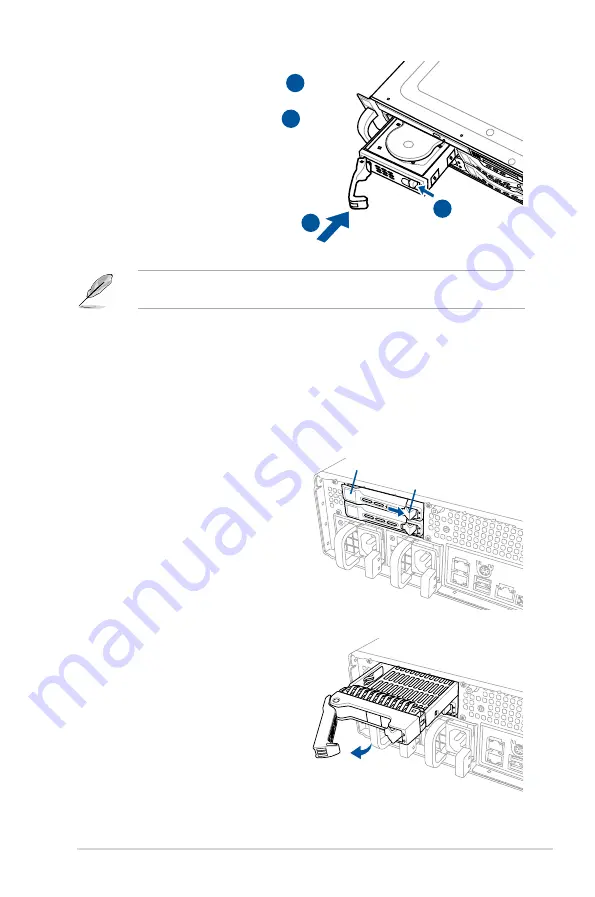
Installing a 2.5-inch SSD (RS520-E8-RS12-EV2 only)
To install a 2.5-inch SSD:
1.
Press the spring lock to release the tray lever.
5.
Insert the drive tray and HDD assembly
all the way into the depth of the bay (
A
) and push the tray lever until it clicks
and secures the drive tray in place (
B
). The drive tray is correctly placed when
its front edge aligns with the bay edge.
A
B
When installed, the SATA II/SAS connector on the drive connects to the SATA II/SAS
interface on the backplane.
6.
Repeat steps 1 to 5 to install other 3.5-inch SATA II/SAS HDDs.
2.
Firmly hold the tray lever then pull the
drive tray out of the bay.
Tray lever
Spring lock
Summary of Contents for RS520-E8-RS12-EV2
Page 1: ...Server User Guide RS520 E8 RS8 V2 RS520 E8 RS12 EV2 ...
Page 12: ...xii ...
Page 56: ...Chapter 2 Hardware Information 2 32 ...
Page 82: ...Chapter 4 Motherboard Information 4 22 ...
Page 106: ...5 24 Chapter 5 BIOS Setup 5 5 IntelRCSetup menu ...
Page 136: ...5 54 Chapter 5 BIOS Setup ...
Page 174: ...6 38 Chapter 6 RAID Configuration ...
Page 202: ...7 28 Chapter 7 Driver Installation ...
Page 203: ...A Contact Information Appendices ...


