


Chapter 2: Hardware Information
2-6
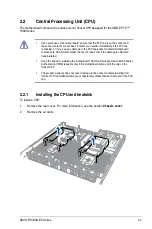
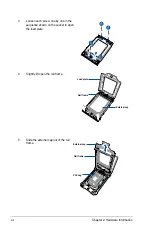
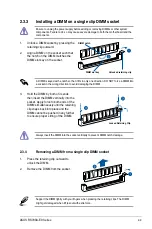
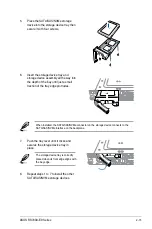
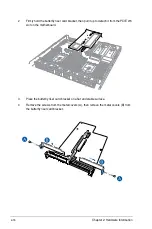
9.
Twist each of the four screws with a
screwdriver just enough to attach the
heatsink to the motherboard. When the
four screws are attached, tighten them
one by one in a diagonal sequence to
completely secure the heatsink.
The heatsink screws are T20 models.
A torque value of 12 inch-lbf is
recommended.
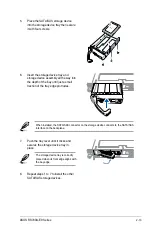
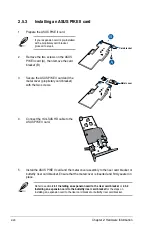
10. Reinstall the air ducts to complete.
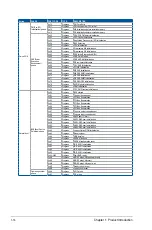
Summary of Contents for RS700A-E9-RS12
Page 1: ...1U Rackmount Server User Guide RS700A E9 Series RS700A E9 RS4 RS700A E9 RS12 ...
Page 70: ...Chapter 4 Motherboard Information 4 2 4 1 Motherboard layout ...
Page 92: ...Chapter 4 Motherboard Information 4 24 ...
Page 136: ...6 10 Chapter 6 Driver Installation ...
Page 138: ...A 2 Appendix KNPP D32 block diagram ...
Page 144: ...A 8 Appendix ...


