Chapter 2: Hardware Information
2-32
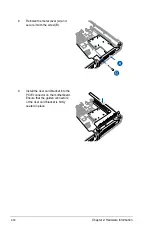
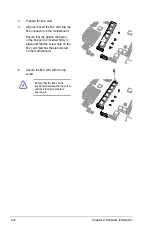
Ensure that the M.2 card is
positioned between the top screw
and the stand screw before
securing it.
4.
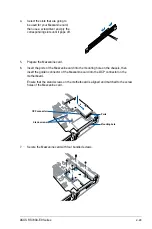
Prepare the M.2 card.
5.
Align and insert the M.2 card into the
M.2 connector on the motherboard.
Ensure that the golden connector
of the M.2 card is inserted firmly in
place and that the screw hole on the
M.2 card matches the stand screw
on the motherboard.
6.
Secure the M.2 card with the top
screw.
Summary of Contents for RS700A-E9-RS12
Page 1: ...1U Rackmount Server User Guide RS700A E9 Series RS700A E9 RS4 RS700A E9 RS12 ...
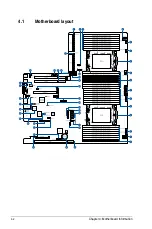
Page 70: ...Chapter 4 Motherboard Information 4 2 4 1 Motherboard layout ...
Page 92: ...Chapter 4 Motherboard Information 4 24 ...
Page 136: ...6 10 Chapter 6 Driver Installation ...
Page 138: ...A 2 Appendix KNPP D32 block diagram ...
Page 144: ...A 8 Appendix ...

