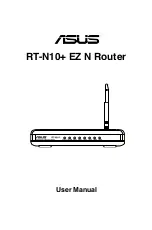
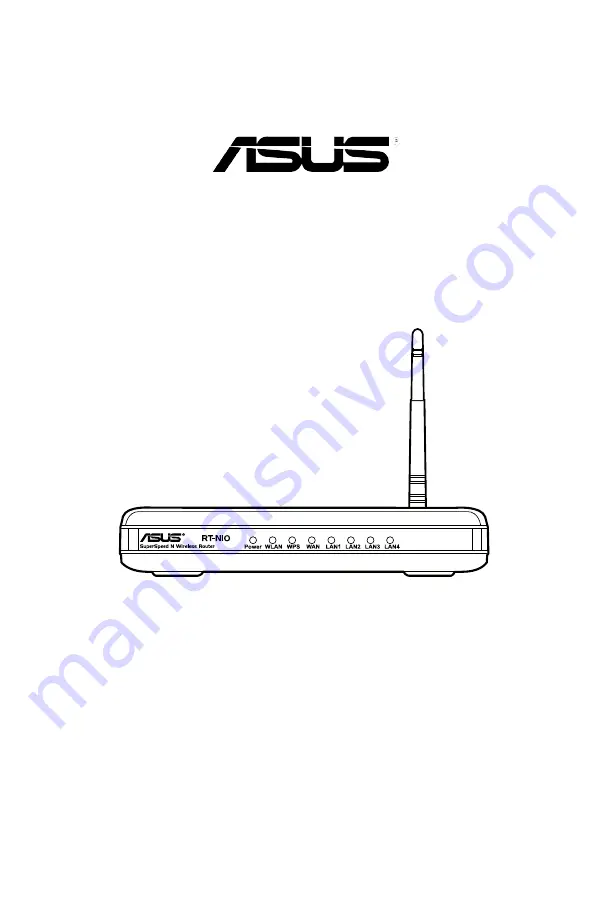
background image

User Manual

RT-N10+ EZ N Router

+

Summary of Contents for RT-N10 B1 (RT-N10+ B1)

Page 1: ...User Manual RT N10 EZ N Router ...

Page 2: ...S NO RESPONSIBILITY OR LIABILITY FOR ANY ERRORS OR INACCURACIES THAT MAY APPEAR IN THIS MANUAL INCLUDING THE PRODUCTS AND SOFTWARE DESCRIBED IN IT Products and corporate names appearing in this manual may or may not be registered trademarks or copyrights of their respective companies and are used only for identification or explanation and to the owners benefit without intent to infringe Offer to P...

Page 3: ...11 Using the Quick Internet Setup QIS 11 Setting up the wireless router in Router mode 12 Setting up the wireless router in Repeater mode 15 Setting up the wireless router in AP mode 16 Chapter 3 Configuring the network clients Accessing the wireless router 18 Setting an IP address for wired or wireless clients 18 Chapter 4 Configuring via the web GUI Configuring via the web GUI 22 Using the Netwo...

Page 4: ... Chapter 2 Getting started This chapter provides instructions on setting up the Router and Access Point modes of the ASUS Wireless Router Chapter 3 Configuring the network clients This chapter provides instructions on setting up the clients in your network to work with your ASUS Wireless Router Chapter 5 Installing the utilities Installing the utilities 29 Device Discovery 31 Firmware Restoration ...

Page 5: ...es you with a troubleshooting guide for solving common problems you may encounter when using the ASUS Wireless Router Appendices This chapter provides you with the regulatory Notices and Safety Statements Conventions used in this guide WARNING Information to prevent injury to yourself when trying to complete a task CAUTION Information to prevent damage to the components when trying to complete a t...

Page 6: ...11b g n device with wireless capability An installed TCP IP and Internet browser Before you proceed Take note of the following guidelines before installing the ASUS Wireless Router The length of the Ethernet cable that connects the device to the network hub ADSL cable modem router wall patch must not exceed 100 meters Place the device on a flat and stable surface as far from the ground as possible...

Page 7: ... connection On Has physical connection to an Ethernet network Flashing Transmitting or receiving data through Ethernet cable WAN Wide Area Network Off No power or no physical connection On Has physical connection to an Ethernet network Flashing Transmitting or receiving data through Ethernet cable Install the device at least 20cm from a person to insure that the product is operated in accordance w...

Page 8: ...WAN connection LAN1 LAN4 Connect RJ 45 Ethernet cables to these ports to establish LAN connection Power Insert the AC adapter into this port to connect your router to a power source WPS Press this button to establish wireless connection Reset Press this button for more than five seconds to reset the system to its factory default settings ...

Page 9: ...e the mounting hooks to mount your router on concrete or wooden surfaces using two round head screws 2 Air vents These vents provide ventilation to your router Note For details on mounting your router on a wall or ceiling refer to the section Mounting options on the next page of this user manual ...

Page 10: ...lso be converted for mounting to a wall or ceiling To mount the ASUS Wireless Router 1 Look on the underside for the two mounting hooks 2 Mark two upper holes in a flat surface 3 Tighten two screws until only 1 4 is showing 4 Latch the hooks of the ASUS Wireless Router onto the screws Note Re adjust the screws if you cannot latch the ASUS Wireless Router onto the screws or if it is too loose ...

Page 11: ... any of these three operation modes Router IP Sharing Repeater and Access Point AP Set up these three operation modes via the Quick Internet Setup QIS Using the Quick Internet Setup QIS The Quick Internet Setup QIS function which is integrated in the wireless router s web GUI detects the Internet connection type automatically and guides you in setting up your network quickly The QIS web page appea...

Page 12: ... mode In the Router mode the wireless router connects to the Internet via PPPoE Automatic IP PPTP L2TP or Static IP and provides you with wireless radio signals The NAT firewall and IP sharing services for LAN clients are enabled To set up the wireless router in Router mode 1 Connect your devices Modem Client RT N10 Note We recommend that you use an Ethernet cable wired connection to connect your ...

Page 13: ...pe 3 Key in the user name and password Click Apply all settings Note The PPPoE Internet connection type is used in this setup case The setup screen varies with different Internet connection types Obtain the required information such as the user name and password from your Internet Service Provider ISP ...

Page 14: ... Simply Wireless Security Setting to configure the basic security settings including the SSID authentication and encryption methods for the wireless router Click Advanced Setting page to manually configure advanced settings for the wireless router Click Add to Favorites to add this URL to your Favorites list for quick access to the web GUI ...

Page 15: ...outer in Repeater mode 1 Connect your devices 2 Launch your web browser and the QIS web page appears automatically Select Repeater mode then click Next Note If the QIS web page does not appear after you launched your web browser disable the proxy settings on your web browser RT N10 Client Modem Wireless Router Note We recommend that you use an Ethernet cable wired connection to connect your comput...

Page 16: ...signals The NAT firewall and IP sharing services are disabled To set up the wireless router in AP mode 1 Connect your devices RT N10 Client Modem Router Note We recommend that you use an Ethernet cable wired connection to connect your computer to the wireless router for initial configuration to avoid possible setup problems due to wireless uncertainty 3 Select the AP whose wireless signal you want...

Page 17: ...ears automatically Select Access Point mode then click Next Note If the QIS web page does not appear after you launched your web browser disable the proxy settings on your web browser 3 Configure the wireless security settings including the SSID authentication and encryption methods Click Finish ...

Page 18: ...may want to manually assign static IP addresses on some of the clients or computers in your network rather than automatically getting IP addresses from your wireless router Follow the instructions below that correspond to the operating system installed on your client or computer Note In the Router mode if you want to manually assign an IP address to your client we recommend that you use the follow...

Page 19: ...ct Obtain an IP address automatically if you want the IP settings to be assigned automatically Otherwise select Use the following IP address and key in IP address Subnet mask and Default gateway 4 Select Obtain DNS server address automatically if you want the DNS server settings to be assigned automatically Otherwise select Use the following DNS server addresses and key in the Preferred and Altern...

Page 20: ...ain an IP address automatically if you want the IP settings to be assigned automatically Otherwise select Use the following IP address and key in IP address Subnet mask and Default gateway 4 Select Obtain DNS server address automatically if you want the DNS server settings to be assigned automatically Otherwise select Use the following DNS server addresses and key in the Preferred and Alternate DN...

Page 21: ...operties 3 Select Obtain an IP address automatically if you want the IP settings to be assigned automatically Otherwise select Use the following IP address and key in IP address and Subnet mask 4 Select Obtain DNS server address automatically if you want the DNS server settings to be assigned automatically Otherwise select Use the following DNS server addresses and key in the Preferred and Alterna...

Page 22: ...ort CD to find the router s IP address Configuring via the web GUI The router s web graphics user interface web GUI allows you to configure these features Network Map and EZQoS Bandwidth Management To access the web GUI 1 Launch a web browser then key in the router s IP address The login page of the router s web GUI appears 2 On the login page key in the default user name admin and password admin ...

Page 23: ...23 Chapter 4 Configuring via the web GUI RT N10 3 From the main page click the navigation menu or links to configure the various features of the ASUS Wireless Router ...

Page 24: ... status or configure the settings click any of these icons displayed on the main page Icon Description Internet status Click this icon to display information on the Internet connection status WAN IP address DNS connection type and gateway address From the Internet status screen use the Quick Internet Setup QIS feature to quickly set up your WAN System status Click this icon to display information ...

Page 25: ...T N10 Creating multiple SSID profiles The wireless router allows you to create multiple SSID profiles that meet various working scenarios To create an SSID profile 1 Under System status click Add 2 Configure the profile settings then click Add ...

Page 26: ...lick each of these four applications to set the bandwidth priority Icon Description Gaming Blaster The router handles gaming traffic at first priority Internet Application The router handles the e mail web browsing and other Internet applications traffic at first priority FTP The router handles at first priority the traffic of downloading uploading data to from the FTP server Voip Video Streaming ...

Page 27: ... left side of your screen 2 Under the Administration menu click Firmware Upgrade 3 In the New Firmware File field click Browse to locate the new firmware on your computer 4 Click Upload The uploading process takes about three minutes Note If the upgrade process fails use the Firmware Restoration utility to restore the system For details on this utility refer to the section Firmware Restoration in ...

Page 28: ...menu click Restore Save Upload Setting 3 Select the tasks that you want to do To restore to the default factory settings click Restore and click OK in the confirmation message To save the current system settings click Save and click Save in the file download window to save the system file in your preferred path To restore previous system settings click Browse to locate the system file that you wan...

Page 29: ...ties The support CD contains the utilities for configuring the ASUS Wireless Router To install the ASUS WLAN Utilities in Microsoft Windows insert the support CD in the CD drive If Autorun is disabled run setup exe from the root directory of the support CD To install the utilities 1 Click Install Utilities ...

Page 30: ...alling the utilities 3 Click Next to accept the default destination folder or click Browse to specify another path 4 Click Next to accept the default program folder or enter another name 5 Click Finish when setup is completed ...

Page 31: ...ables you to configure the device To launch the Device Discovery utility From your computer s desktop click Start All Programs ASUS Utility RT N10 Wireless Router Device Discovery Click Configure to access the web GUI and configure the wireless router Click Search to search for ASUS wireless routers within range Click Exit to exit the application ...

Page 32: ...uring via the web GUI for more details To launch the rescue mode and use the Firmware Restoration utility 1 Unplug the wireless router from the power source 2 Hold the Restore button at the rear panel and simultaneously re plug the wireless router into the power source Release the Restore button when the WPS LED at the front panel flashes slowly which indicates that the wireless router is in the r...

Page 33: ... with UT v4 0 6 0 or later ASUS USB N10 with UT v1 0 0 9 or later XP SP3 Intel wireless LAN card ASUS USB N13 with UT v4 1 1 0 or later ASUS PCE N13 with UT v4 0 6 0 or later ASUS USB N10 with UT v1 0 0 9 or later 2000 Intel wireless LAN card ASUS USB N13 with UT v4 1 1 0 or later ASUS PCE N13 with UT v4 0 6 0 or later ASUS USB N10 with UT v1 0 0 9 or later To use WPS Wizard 1 Follow the onscreen ...

Page 34: ... the WPS Wizard click Next to continue Notes When running WPS the Internet connection pauses briefly then reestablishes the connection If the WPS button is pushed without running the WPS Wizard the WPS LED indicator flashes and Internet connection pauses briefly and then reestablishes the connection ...

Page 35: ...SSID service set identifier When done click Next 5 Create and key in a passphrase consisting of 8 63 characters or use the automatically generated passphrase then click Next A passphrase is a sentence phrase or sequence of alpha numeric characters used to generate a security key ...

Page 36: ...devices to the network Click Next to connect to the Internet 7 You have connected to the wireless router If you want to configure the Internet settings click Setup Click Finish to close the WPS Wizard Note For more details on adding devices to the network using a USB flash drive refer to the section Adding network devices using a USB flash drive on the next page ...

Page 37: ...WPS utility you can add devices to your network using a USB flash drive To add network devices using a USB flash drive 1 In the WPS Wizard click Save settings to a USB flash drive 2 Insert a USB flash drive into your computer s USB port then select the drive from the dropdown list When done click Next ...

Page 38: ...m your computer then insert it to the other computer that you want to add to your wireless network 4 Locate SetupWireless exe from the USB drive and double click to run it Click Yes to add the computer to the wireless network 5 Click OK to exit the Wireless Network Setup Wizard ...

Page 39: ...a web browser then click Tools Internet Options 2 Under Temporary Internet files click Delete Cookies and Delete Files 3 Disable the proxy settings of the web browser The client cannot establish a wireless connection with the router Out of Range Put the router closer to the wireless client Try to change the channel settings Authentication Use wired connection to connect to the router Check the wir...

Page 40: ...Start Guide of the wireless router and re configure the settings Check if the WAN LED on the wireless router is ON Check the wireless encryption settings Check if the computer can get the IP address via both wired network and wireless network Ensure that your web browser is configured to use the local LAN and is not configured to use a proxy server If the ADSL LINK light blinks continuously or sta...

Page 41: ...of this user manual The following are the factory default settings User Name admin Password admin Enable DHCP Yes if WAN cable is plugged in IP address 192 168 1 1 Domain Name Blank Subnet Mask 255 255 255 0 DNS Server 1 192 168 1 1 DNS Server 2 Blank SSID ASUS I cannot use 192 168 1 1 to enter the web GUI Check the router s operation mode In the Router mode the default IP address is 192 168 1 1 I...

Page 42: ...mation and the domain name may be registered by others 2 I did not register the ASUS DDNS for the router I bought six months ago Can I still register it Yes you can still register the ASUS DDNS service for your router The DDNS service is embedded in your router so you can register the ASUS DDNS service anytime Before registering click Query to check if the hostname has been registered or not If no...

Page 43: ...time between the ISP DNS server and ASUS DDNS results in different WAN IPs in MS DOS and in the router configuration page Different ISPs may have different interval time for IP updating 6 Is the ASUS DDNS service free or is it just a trial version The ASUS DDNS service is a free and embedded service in some ASUS routers Check your ASUS router if it supports the ASUS DDNS service ...

Page 44: ...nstallation If this equipment does cause harmful interference to radio or television reception which can be determined by turning the equipment off and on the user is encouraged to try to correct the interference by one or more of the following measures Reorient or relocate the receiving antenna Increase the separation between the equipment and receiver Connect the equipment into an outlet on a ci...

Page 45: ...1 for N America Ch1 14 Japan Ch1 13 Europe ETSI IC Warning The Class B digital apparatus meets all requirements of the Canadian Interference Causing Equipment Regulation Cet appareil numerique de la class B respecte toutes les exigences du Reglement sur le materiel brouilleur du Canada GNU General Public License Licensing information This product includes copyrighted third party software licensed ...

Page 46: ...s translate to certain responsibilities for you if you distribute copies of the software or if you modify it For example if you distribute copies of such a program whether gratis or for a fee you must give the recipients all the rights that you have You must make sure that they too receive or can get the source code And you must show them these terms so they know their rights We protect your right...

Page 47: ...hat refer to this License and to the absence of any warranty and give any other recipients of the Program a copy of this License along with the Program You may charge a fee for the physical act of transferring a copy and you may at your option offer warranty protection in exchange for a fee 2 You may modify your copy or copies of the Program or any portion of it thus forming a work based on the Pr...

Page 48: ...on a medium customarily used for software interchange or b Accompany it with a written offer valid for at least three years to give any third party for a charge no more than your cost of physically performing source distribution a complete machine readable copy of the corresponding source code to be distributed under the terms of Sections 1 and 2 above on a medium customarily used for software int...

Page 49: ...er reason not limited to patent issues conditions are imposed on you whether by court order agreement or otherwise that contradict the conditions of this License they do not excuse you from the conditions of this License If you cannot distribute so as to satisfy simultaneously your obligations under this License and any other pertinent obligations then as a consequence you may not distribute the P...

Page 50: ...undation If the Program does not specify a version number of this License you may choose any version ever published by the Free Software Foundation 10 If you wish to incorporate parts of the Program into other free programs whose distribution conditions are different write to the author to ask for permission For software which is copyrighted by the Free Software Foundation write to the Free Softwa...

Page 51: ...RTIES OR A FAILURE OF THE PROGRAM TO OPERATE WITH ANY OTHER PROGRAMS EVEN IF SUCH HOLDER OR OTHER PARTY HAS BEEN ADVISED OF THE POSSIBILITY OF SUCH DAMAGES END OF TERMS AND CONDITIONS DGT Warning REACH Complying with the REACH Registration Evaluation Authorisation and Restriction of Chemicals regulatory framework we published the chemical substances in our products at ASUS REACH website at http gr...

Page 52: ...ate Way Fremont CA 94539 USA Telephone 15029550883 Fax 15029338713 Website usa asus com Online support support asus com ASUS COMPUTER GmbH Germany and Austria Address Harkort Str 21 23 D 40880 Ratingen Germany Fax 492102959911 Website www asus de Online contact www asus de sales Technical Support Telephone Component 491805010923 Telephone System Notebook Eee LCD 491805010920 Fax 492102959911 Onlin...

Page 53: ...Computer GmbH Address HARKORT STR 21 23 40880 RATINGEN GERMANY Authorised distributors in Turkey BOGAZICI BIL GISAYAR SAN VE TIC A S Tel 90 212 3311000 Address AYAZAGA MAH KEMERBURGAZ CAD NO 10 AYAZAGA ISTANBUL INDEX BILGISAYAR SISTEMLERI MUHENDISLIK SAN VE TIC A S Tel 90 212 3312121 Address AYAZAGA MAH CENDERE YOLU NO 9 AYAZAGA ISTANBUL EEE Yönetmeliğine Uygundur ...

Reviews: