2 - 2 3
2 - 2 3
2 - 2 3
2 - 2 3
2 - 2 3
A S U S T 2 - A H 1
A S U S T 2 - A H 1
A S U S T 2 - A H 1
A S U S T 2 - A H 1
A S U S T 2 - A H 1
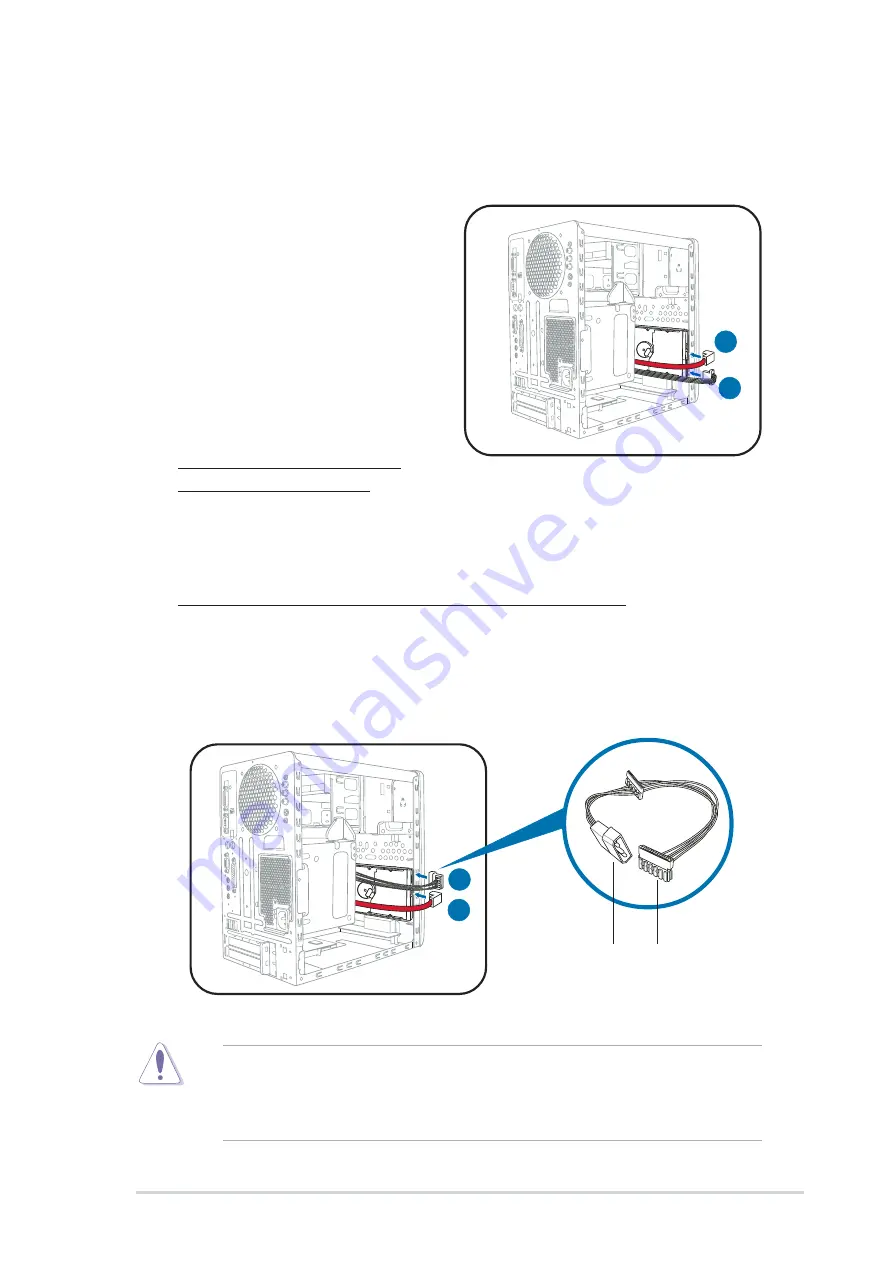
To install a Serial ATA hard disk drive:
1.
Follow steps 1-7 of the previous section.
2.
Connect one end of the supplied
7-pin SATA cable (right angle
side) to the SATA connector at
the back of the drive, then
connect the other end to a
SATA connector on the
motherboard. See page 4-8 for
the location of the Serial ATA
connectors.
2
2
2
2
2
2
2
2
2
2
3a
3a
3a
3a
3a
3
3
3
3
3b
b
b
b
b
1 5 - p i n S A T A
1 5 - p i n S A T A
1 5 - p i n S A T A
1 5 - p i n S A T A
1 5 - p i n S A T A
p o w e r p l u g
p o w e r p l u g
p o w e r p l u g
p o w e r p l u g
p o w e r p l u g
4 - p i n ( m a l e )
4 - p i n ( m a l e )
4 - p i n ( m a l e )
4 - p i n ( m a l e )
4 - p i n ( m a l e )
p o w e r p l u g
p o w e r p l u g
p o w e r p l u g
p o w e r p l u g
p o w e r p l u g
If your Serial ATA HDD has both 4-pin and 15-pin connectors at the
back, use either the 15-pin SATA power adapter plug O R
O R
O R
O R
O R the legacy
4-pin power connector. D O N O T
D O N O T
D O N O T
D O N O T
D O N O T use both to prevent damage to
components and to keep the system from becoming unstable.
3.
For Serial ATA HDDs with a
4
-
pin power connector:
a. Connect a 4-pin (female) power plug from the power supply unit
to the 4-pin (male) power connector at the back of the drive. See
page 2-25 for details on the power supply unit plugs.
For Serial ATA HDDs without a 4
-
pin power connector:
b. Connect the 15-pin SATA power adapter plug to the power
connector at the back of the drive, then connect the other end
(4-pin male) to a 4-pin (female) power plug from the power
supply unit. See page 2-25 for details on the power supply unit
plugs.


