2-7
ASUS TS700-E8-PS4 V2, TS700-E8-RS8 V2
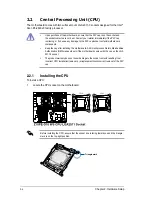
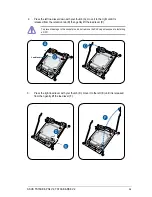
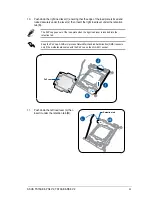
10. Push down the right load lever (I) ensuring that the edge of the load plate is fixed and
tucked securely under the lever (J) then
insert the right load lever under the retention
tab (K)
.
The PnP cap pops out of the load plate when the right load lever is inserted into the
retention tab.
Keep the PnP cap. ASUS will process Return Merchandise Authorization (RMA) requests
only if the motherboard comes with the PnP cap on the LGA 2011 socket.
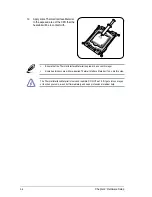
11. Push down the left load lever (L) then
insert it under the retention tab (M).
PnP cap
Retention tab
Summary of Contents for TS700-E8-PS4 V2
Page 1: ...Server User Guide TS700 E8 PS4 V2 TS700 E8 RS8 V2 ...
Page 24: ...Chapter 1 Product Introduction 1 12 ...
Page 60: ...Chapter 2 Hardware Setup 2 36 ...
Page 150: ...5 58 Chapter 5 BIOS Setup ...
Page 188: ...6 38 Chapter 6 RAID Configuration ...
Page 210: ...A 2 Appendix Z10PE D16 WS block diagram ...
Page 214: ......


