Chapter 2: Hardware Setup
2-18
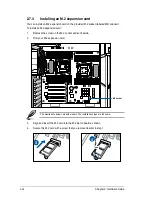
6.
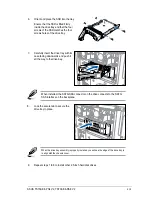
Push the tray lever until it clicks, and
secures the drive tray in place. The drive
tray is correctly placed when its front
edge aligns with the bay edge.
7.
Repeat steps 1 to 6 if you wish to install
a second SATA/SAS drive.
2.5.5
Installing a 2.5-inch hard disk drive (TS700-E8-RS8 V2
only)
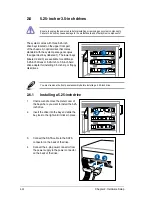
The system comes with two hot-swap 2.5-inch hard disk drives on the rear panel for mounting
SATA/SAS or SSD hard disk drives.
To install a 2.5-inch hard disk drive:
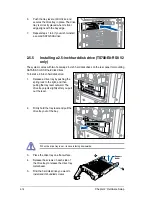
1.
Release a drive tray by pushing the
spring lock to the right, and then
pulling the tray lever outward. The
drive tray ejects slightly after you pull
out the lever.
Support
beam
3.
Place the drive tray on a flat surface.
4.
Release the screws on each side of
the drive tray to release the drive tray
metal beam.
5.
Find the hard disk drive you want to
install and its bundled screws.
When the drive tray is out, its case is facing downwards.
2.
Firmly hold the tray lever and pull the
drive tray out of the bay.
Summary of Contents for TS700-E8-PS4 V2
Page 1: ...Server User Guide TS700 E8 PS4 V2 TS700 E8 RS8 V2 ...
Page 24: ...Chapter 1 Product Introduction 1 12 ...
Page 60: ...Chapter 2 Hardware Setup 2 36 ...
Page 150: ...5 58 Chapter 5 BIOS Setup ...
Page 188: ...6 38 Chapter 6 RAID Configuration ...
Page 210: ...A 2 Appendix Z10PE D16 WS block diagram ...
Page 214: ......

