3-22
Chapter 3: BIOS Setup
Chapter 3
3.6
Advanced menu
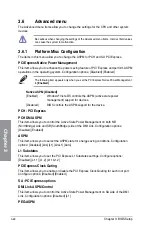
The Advanced menu items allow you to change the settings for the CPU and other system
devices.
Be cautious when changing the settings of the Advanced menu items. Incorrect field values
can cause the system to malfunction.
3.6.1
Platform Misc Configuration
The items in this menu allow you to change the ASPM for PCH and SA PCI Express.
PCI Express Native Power Management
This item allows you to enhance the power saving feature of PCI Express and perform ASPM
operations in the operating system. Configuration options: [Disabled] [Enabled]
The following item appears only when you set the PCI Express Native Power Management
to
[Enabled]
.
Native ASPM [Disabled]
[Enabled] Windows
®
Vista OS controls the ASPM (active state power
management) support for devices.
[Disabled]
BIOS controls the ASPM support for the device.
PCH - PCI Express
PCH DMI ASPM
This item allows you to control the Active State Power Management on both NB
(NorthBridge) side and SB (SouthBridge) side of the DMI Link. Configuration options:
[Disabled] [Enabled]
ASPM
This item allows you to select the ASPM state for energy-saving conditions. Configuration
options: [Disabled] [L0s] [L1] [L0sL1] [Auto]
L1 Substates
This item allows you to set the PCI Express L1 Substates settings. Configure options:
[Disabled] [L1.1] [L1.2] [L1.1&1.2]
PCI Express Clock Gating
This item allows you to enable or disable the PCI Express Clock Goating for each root port.
Configure options: [Disabled] [Enabled]
SA - PCI Express options
DMI Link ASPM Control
This item allows you to control the Active State Power Management on SA side of the DMI
Link. Configuration options: [Disabled] [L1]
PEG-ASPM
Summary of Contents for TUF Z370-PLUS GAMING
Page 1: ...Motherboard TUF Z370 PLUS GAMING ...
Page 5: ...v Appendix Notices A 1 ASUS contact information A 5 ...
Page 38: ...2 6 Chapter 2 Basic Installation Chapter 2 To uninstall the CPU heatsink and fan assembly ...
Page 39: ...ASUS TUF Z370 PLUS GAMING 2 7 Chapter 2 To remove a DIMM 2 1 4 DIMM installation ...


