4-46
Chapter 4: BIOS setup
User Password
To set a user password:
1.
Select the User Password item and press <Enter>.
2.
From the Create New Password box, key in a password, then press <Enter>.
3.
Confirm the password when prompted.
To change a user password:
1.
Select the User Password item and press <Enter>.
2.
From the Enter Current Password box, key in the current password, then press
<Enter>.
3.
From the Create New Password box, key in a new password, then press <Enter>.
4.
Confirm the password when prompted.
To clear a user password:
1.
Select the Clear User Password item and press <Enter>.
2.
Select
Yes
from the Warning message window then press <Enter>.
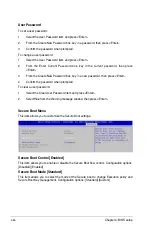
Secure Boot Menu
This item allows you to customize the Secure Boot settings.
Secure Boot Control [Enabled]
This item allows you to enable or disable the Secure Boot flow control. Configuration options:
[Disabled] [Enabled]
Secure Boot Mode [Standard]
This item allows you to select the mode of the Secure boot to change Execution policy and
Secure Boot Key management. Configuration options: [Standard] [Custom]
Summary of Contents for Z9PE-D16-10G Series
Page 1: ...Motherboard Z9PE D16 10G Series ...
Page 14: ...xiv ...
Page 15: ...Chapter 1 Product Introduction ...
Page 21: ...Chapter 2 Hardware Information ...
Page 25: ...Z9PE D16 10G Series 2 5 2 2 3 Motherboard layout ...
Page 26: ...2 6 Chapter 2 Hardware information ...
Page 64: ...2 44 Chapter 2 Hardware information ...
Page 65: ...Chapter 3 Powering Up ...
Page 69: ...Chapter 4 BIOS setup ...
Page 118: ...4 50 Chapter 4 BIOS setup ...
Page 119: ...Chapter 5 RAID Configuration ...
Page 157: ...Chapter 6 Driver installation ...
Page 193: ...Appendix A Reference Information ...
Page 195: ...Z9PE D16 10G Series A 3 A 1 Z9PE D16 10G Series block diagram ...
Page 196: ...A 4 Appendix A Reference information ...
Page 202: ......

