background image

Chapter 4: Your precious moments

75

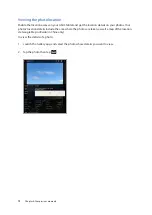
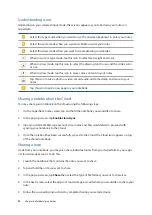
Sharing files from the Gallery

1.  From the Gallery app’s home screen, tap the folder where the files you want to share are 

located.

2.  After opening the folder, tap  

  to activate file selection.

3.  Tap the files you want to share. A check mark appears on top of the image you have selected.

4.  Tap  

  then select from the list where you want to share the images.

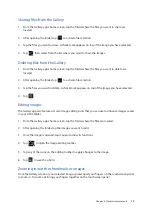
Deleting files from the Gallery

1.  From the Gallery app’s home screen, tap the folder where the files you want to delete are 

located.

2.  After opening the folder, tap  

  to activate file selection.

3.  Tap the files you want to delete. A check mark appears on top of the image you have selected.

4.  Tap  

.

Editing images

The Gallery app also features its own image editing tools that you can use to enhance images saved 

in your ASUS Tablet.

1.  From the Gallery app’s home screen, tap the folder where the files are located.

2.  After opening the folder, tap the image you want to edit.

3.  Once the image is opened, tap it again to show its functions.

4.  Tap  

  to open the image editing toolbar.

5.  Tap any of the icons on the editing toolbar to apply changes to the image.

6.  Tap  

  to save the photo.

Zooming in/out the thumbnails or images

From the Gallery screen or your selected image, spread apart your fingers on the touchscreen panel 

to zoom in. To zoom out, bring your fingers together on the touchscreen panel.

Summary of Contents for ZenPad 3 Z581KL

Page 1: ...ASUSTablet ...

Page 2: ... NOTICE AND SHOULD NOT BE CONSTRUED AS A COMMITMENT BY ASUS ASUS ASSUMES NO RESPONSIBILITY OR LIABILITY FOR ANY ERRORS OR INACCURACIES THAT MAY APPEAR IN THIS MANUAL INCLUDING THE PRODUCTS AND SOFTWARE DESCRIBED IN IT Copyright 2016 ASUSTeK COMPUTER INC All Rights Reserved LIMITATION OF LIABILITY Circumstances may arise where because of a default on ASUS part or other liability you are entitled to...

Page 3: ...g or deleting items 23 Moving through pages or screens 24 Zooming in 24 Zooming out 25 ZenMotion 25 2 There s no place like Home Zen Home features 27 Home screen 27 Personalizing your Home screen 29 App shortcuts and widgets 29 Wallpapers 30 Extended Home screen 31 Setting up the date and time 32 Setting up your ringtone and alert sounds 32 Quick settings 33 System notifications 34 Weather and Tim...

Page 4: ...53 Managing contacts 54 Launching the Contacts app 54 Contacts Settings 54 Setting up your profile 54 Adding contacts 55 Customizing your contact s profile 55 Setting up your VIPs 56 Adding an event to a contact 57 Marking your favorite contacts 58 Importing contacts 59 Exporting contacts 59 Social networking with your contacts 60 Linking your contacts info 60 Sending messages 61 Messenger 61 4 Yo...

Page 5: ...0 Adding to do tasks 80 Prioritizing to do tasks 80 Deleting to do tasks 80 SuperNote 81 Creating a notebook 81 Understanding icons 82 Sharing a notebook on the Cloud 82 Sharing a note 82 File Manager 83 Accessing the internal storage 83 Accessing the external storage device 83 Accessing Cloud Storage 83 The Cloud 84 WebStorage 84 ZenPad Care 84 6 Staying connected Wi Fi 85 Enabling Wi Fi 85 Conne...

Page 6: ...tings 90 Launching PlayTo from Settings 90 7 Zen Everywhere Special Zen Tools 91 Share Link 91 Calculator 92 Quick Memo 93 Sound Recorder 94 AudioWizard 96 Splendid 97 Power Saver 99 8 Maintain your Zen Keeping your device up to date 101 Updating your system 101 Storage 101 Backup and reset 101 Securing your ASUS Tablet 102 Knowing your ASUS Tablet identity 105 Appendix Notices 107 ...

Page 7: ...near medical equipment near gas or fuel construction sites blasting sites and other areas Use only AC adapters and cables approved by ASUS for use with this device Refer to the rating label on the bottom of your device and ensure that your power adapter complies with this rating Do not use damaged power cables accessories and other peripherals with your device Keep your device dry Do not use or ex...

Page 8: ... crossed out wheeled bin indicates that the product electrical electronic equipment and mercury containing button cell battery should not be placed in municipal waste Check local regulations for disposal of electronic products DO NOT throw the battery in municipal waste The symbol of the crossed out wheeled bin indicates that the battery should not be placed in municipal waste DO NOT throw the dev...

Page 9: ...her liquids can cause the touch screen to malfunction Avoid covering the ambient light sensor with your screen protector to ensure an accurate detection of ambient light for optimal display effect 1 Get your Zen ready Front camera Touch screen panel Volume button Power button Ambient light sensor Audio speakers Audio speakers Speaker Headset port Micro SIM MicroSD card slot cover USB Type C port M...

Page 10: ...sure that you use only compatible memory cards to prevent loss of data damage to your device or memory card or both CAUTION Be extra careful when handling a memory card ASUS is not responsible for any data loss or damage incurred to your memory card To install a memory card 1 Orient your device as shown then locate the groove and open the card slot cover CAUTION Do not forcibly remove shear or dis...

Page 11: ...ot cover NOTE After installing a formatted memory card you can access its contents from ASUS File Manager MicroSD 2 Align and insert a memory card into the memory card slot 3 Push the memory card all the way into the slot until it is seated firmly in place ...

Page 12: ... data loss or damage incurred to your memory card Eject the memory card properly to safely remove it from device To eject the memory card go to Settings Storage USB then tap under Portable storage 1 Orient your device as shown then locate the groove and open the card slot cover CAUTION Do not forcibly remove shear or distort the back cover ...

Page 13: ...Chapter 1 Get your Zen ready 13 2 Press the memory card to eject then pull it out 3 Put back the card slot cover ...

Page 14: ... micro SIM card without a SIM adapter or the use of a cutter CAUTION Be extra careful when handling a micro SIM card ASUS is not responsible for any data loss or damage incurred to your micro SIM card To install a micro SIM card 1 Orient your device as shown then locate the groove and open the card slot cover CAUTION Do not forcibly remove shear or distort the back cover ...

Page 15: ...r 1 Get your Zen ready 15 2 Align and insert a micro SIM card into the micro SIM card slot 3 Push the micro SIM card all the way into the slot until it is seated firmly in place 4 Put back the card slot cover ...

Page 16: ...hen handling a micro SIM card ASUS is not responsible for any data loss or damage incurred to your micro SIM card To remove a micro SIM card 1 Orient your device as shown then locate the groove and open the card slot cover CAUTION Do not forcibly remove shear or distort the back cover ...

Page 17: ...240V outlet The output voltage of the AC power adapter for this device is DC 5V 2A When using your ASUS Tablet while plugged in to a power outlet the power outlet must be near your device and easily accessible Do not use or expose your ASUS Tablet near liquids rain or moisture Do not use your ASUS Tablet near heating equipment or in places where there is likelihood of high temperature Keep your AS...

Page 18: ...arge is indicated by the following icons Low Not Charging Charging Full 4 When fully charged disconnect the USB cable from your ASUS Tablet first before unplugging the AC power adapter from the power outlet NOTE You can use your device while charging but it may take longer to fully charge the device Charging your device via USB port of a computer may take longer to fully charge the device If your ...

Page 19: ...lose all running apps that are not in use When not in use press the power button to put the device in sleep mode Set up Power Saver in ASUS Mobile Manager app Set AudioWizard to Smart Mode Decrease brightness of display Keep the speaker volume to a low level Disable Wi Fi feature Disable Bluetooth feature Disable PlayTo feature Disable GPS Disable the screen auto rotate feature Disable all auto sy...

Page 20: ...evice starts up Turning your device off To turn your device off 1 If your screen is turned off press the power button to turn it on If your screen is locked unlock the device screen 2 Press and hold the power button then when prompted tap Power off then tap OK Sleep mode To put your device in sleep mode press the power button once until the screen turns off ...

Page 21: ...if you do not have a Google or ASUS account yet go ahead and create one Google Account Using a Google Account allows you to fully utilize these Android OS features Organize and see all your information from anywhere Automatically backup all your data Leverage Google services conveniently from anywhere ASUS Account Having an ASUS Account allows you to enjoy the following perks Personalized ASUS sup...

Page 22: ...user forum Camera With PixelMaster technology capture those precious moments in vivid and high quality photos and videos Clock Customize the time zone settings set alarms and use your ASUS Tablet as a stop watch using the Clock app Splendid Easily adjust the display settings and enrich the color of your screen with preset screen color modes Do It Later Get hold and act on your important emails SMS...

Page 23: ... apps or selecting items Do any of the following To launch an app simply tap on it To select an item such as in File Manager app simply tap on it Moving or deleting items Do any of the following To move an app or widget tap and hold then drag it to the location where you want it to be To delete an app or widget from the Home screen tap and hold then drag it to Remove ...

Page 24: ... your finger to the left or to the right to switch between screens or to flip through images in Gallery Scroll your finger up or down to go through web pages or list of items Zooming in Spread apart your two fingers on the touch panel to zoom in an image in Gallery or Maps or zoom in a web page ...

Page 25: ...web page ZenMotion When your touch screen panel is off with these easy and intuitive gestures you can launch apps on your ASUS Tablet in a snap by simply writing down an alphabet Gesture Wi Fi only models 3G LTE phone function models W Weather Weather S Camera front lens Camera front lens e Clock Clock C Camera Camera Z Gallery Gallery V Contacts Phone ...

Page 26: ...Chapter 1 Get your Zen ready 26 ...

Page 27: ...e screen 2 There s no place like Home 2 There s no place like Home Swipe the Home screen to the left or right to display the extended Home screen NOTE For details on adding more pages to your Home screen see the Extended Home screen section Swipe down from this area to display System notifications and Quick settings Tap to display Time settings Tap to update Weather settings Tap to open Voice Sear...

Page 28: ... life Shows the battery status of your ASUS Tablet MicroSD card Shows that a microSD card is inserted in your ASUS Tablet Do Not Disturb mode Shows that Do Not Disturb mode is enabled Screenshots Shows that you took screenshots of your ASUS Tablet Airplane mode Shows that your ASUS Tablet is in Airplane mode Bluelight Filter mode Shows that Bluelight Filter mode is enabled NOTE For more details se...

Page 29: ...idgets make it easier to quickly access your favorite items from your Home screen You can add or remove your apps and widgets anytime you like and you can also group your apps into one folder Adding app shortcuts and widgets 1 Tap and hold an empty area on your Home screen and select Apps widgets 2 From the Apps or Widgets tab tap and hold an app or widget then drag it to an empty area on your Hom...

Page 30: ...ted wallpaper to make your screen come alive Applying wallpaper and background tint To apply wallpaper and background tint 1 Tap and hold an empty area on your Home screen and select Wallpapers 2 Select a wallpaper and tap Download 3 Tap Apply and select where you want to set your wallpaper on your Home screen Lock screen or Home and lock screen 4 Adjust the transparency level of status bar or ski...

Page 31: ...ou can also set up your wallpaper settings from Settings Display Wallpaper Extended Home screen Extending your Home screen You can add more pages to extend your Home screen and put more app shortcuts and widgets on it 1 Tap and hold an empty area on your Home screen and select Home edit 2 Tap Edit pages then tap to add a new page If you wish to delete an extended Home screen tap and hold the page ...

Page 32: ...me 3 Slide Automatic date time and Automatic time zone to OFF 4 Select the time zone and manually set the date and time 5 You can opt to use the 24 hour format if you prefer NOTE For more details see the Clock section Setting up your ringtone and alert sounds Set up the sound for your notifications You can also choose to enable or disable the touch sounds or screen locking sounds To set up the sou...

Page 33: ...ablet NOTE A blue button indicates that the feature is currently enabled while a gray button indicates a disabled feature The green buttons refer to individual utilities that you can quickly access via the Quick Settings Notification Panel Tap to open Settings Tap these buttons to enable or disable their functions Tap these buttons to quick launch these utilities Slide left or right to adjust the ...

Page 34: ... is accessible via the ASUS Quick settings notification panel while an unchecked box means the opposite System notifications From System notifications you can see the latest updates done and system changes made on your ASUS Tablet Most of these changes are data and system related To launch the System notifications panel swipe down from the top of your ASUS Tablet Tap this to delete all of the list...

Page 35: ...of the following options Tap Weather From your ASUS Tablet s home screen tap the weather icon Weather home screen Set up and get your current location s weather updates as well as other parts of the world Tap to search for a city s weather info Tap to refresh the weather info edit the location list or configure the weather settings Swipe up to see other weather information Swipe left or right to s...

Page 36: ...take the necessary protective measures against harmful ultra violet rays or air pollutants 1 Before getting the weather updates ensure the following Wi Fi or mobile network on selected models is turned on when you are indoors and GPS is turned on when you are outdoors Turn on the location access from Settings Location 2 Launch the Weather app 3 Tap Edit locations then tap 4 In the search box enter...

Page 37: ...options Tap Clock From your ASUS Tablet s home screen tap the digital clock display World Clock Tap to access the world clock settings of your ASUS Tablet Tap this to display weather information of the location marked on the world clock map Tap this to access the Clock app settings Tap this to edit the cities marked on the world clock map Tap this to set your clock on night mode Tap this to add a ...

Page 38: ...k settings of your ASUS Tablet Tap this to set a new alarm time Tap this to access the settings of the alarm clock feature Tap this to delete any of the previously set alarms Stopwatch Tap to use your ASUS Tablet as a stopwatch Tap this button to start running the stopwatch feature ...

Page 39: ...f your ASUS Tablet Use the numeric keypad to input your target time NOTE You may set multiple timer options for your ASUS Tablet Tap this to set a new timer Tap this to access the settings of the timer feature Tap this to set the ringtones for the timer Tap this to delete previously set timer Tap to start the timer ...

Page 40: ...ce s lock screen can also be customized to regulate access to your mobile data and apps Customizing your lock screen If you want to change your lock screen settings from the default Swipe option refer to the following steps 1 Launch Quick settings then tap 2 Scroll down the Settings screen and select Lock screen 3 In the next screen tap Screen lock 4 Tap the screen lock option you would like to us...

Page 41: ...using the following steps 1 Launch Quick settings then tap 2 Scroll down the Settings screen and select Lock screen 3 Tap Quick access 4 Under the Quick access screen select which button you would like to customize 5 Tap the app you would like to preset on the quick access button you chose to configure NOTE Scroll up or down to view the current list of apps you can preset ...

Page 42: ...Launch apps inside your ASUS Tablet Get directions to a location IMPORTANT Your ASUS Tablet must be connected to the Internet to be able to use this feature Launching Voice Search 1 Launch the Voice Search app by doing any of the following Tap on the Google search bar Tap Voice Search 2 Start saying your voice command NOTE Speak clearly and use concise phrases when talking to your ASUS Tablet It a...

Page 43: ...e search results gathered from your Google account and your ASUS Tablet s data you may do so using the following steps 1 On your ASUS Tablet s Home screen tap Voice Search 2 Once your voice search results are shown tap Settings 3 Tap Tablet search and tick the box of the search groups you would like to include as source when using Voice Search ...

Page 44: ...44 Chapter 2 There s no place like Home ...

Page 45: ...frequently called contact NOTE Organize your contacts in the Contacts app For more details see the Managing contacts section From the lock screen Drag down until the Phone app is launched From the home screen Tap Dialing a phone number Use the Phone app to directly dial a phone number 1 From the Phone app s home screen enter the number you wish to call 2 Tap Call to make the call NOTE The labels o...

Page 46: ...he extension number will be dialed automatically 1 From the Phone app s home screen enter the main number 2 Tap and hold to insert a pause which is denoted by a comma 3 Enter the extension number after then tap Call to make the call Smart dialing your contacts As you enter the first few numbers or letters of your contact s name Smart Dial filters through your contacts list or call logs and provide...

Page 47: ...on the Speed Dial confirmation message Tap Speed dial to launch the Speed Dial screen 2 Select a contact from your contacts list This speed dial entry will be saved on the Speed Dial screen Deleting a speed dial entry To delete a speed dial entry 1 From the Phone app s home screen tap Speed dial to launch the Speed Dial screen 2 Tap and hold a speed dial entry then tap Remove 3 Tap OK on the confi...

Page 48: ...gs then tap OK when done NOTE For info on other call settings see the Call Settings section Calling from Contacts app Use the Contacts app to make a call from your contacts list 1 From your Home screen tap Contacts 2 To make the call tap the contact name then tap the number that you wish to dial 3 Tap to end the call NOTE To view all contacts from all contact accounts tap Contacts to display dropd...

Page 49: ... or redial your recently called number or contact Blocking calls You can add a number or call from your call log to your block list 1 From the Phone app s home screen tap to display your call logs 2 Tap and hold the call that you want to block then tap Add to block list 3 Tap OK to confirm Saving calls to Contacts You can add a call from your call logs to your contacts list 1 From the Phone app s ...

Page 50: ... in the conference call depend on your conference call subscription You can inquire from your mobile service provider about this service For more details on conference call see the Managing multiple calls section SuperNote Launches the SuperNote app letting you take down notes during an active call NOTE For more details see the SuperNote section Record Records an active call IMPORTANT Before recor...

Page 51: ... into one conference call 1 Call a contact or dial a number Wait for the other line to answer your call 2 When your call is answered tap then tap a contact or dial a number that you wish to include in your conference call 3 Tap to put the two calls in a conference call 4 Tap to add another contact then tap to merge the call to the current conference call Repeat this step if you want to add more co...

Page 52: ...number 2 Tap to record the call IMPORTANT Before recording a call ensure that you ask for permission from the other party or parties 3 To stop recording tap This icon appears on the system notification bar to indicate your call recording was saved 4 Swipe down from the top of the screen then tap Call recording saved notification to view the recorded conversation ...

Page 53: ...s Dial pad touch tones Tick or untick to enable or disable the dial pad sound in the Phone app Connection alert settings Turn vibration on or off for the connection alert settings Fixed Dialing Numbers FDN Set up these settings when you want to restrict outgoing calls only to those numbers in your FDN list or to numbers with certain prefixes Inquire from your mobile service provider about availing...

Page 54: ...tings tap Settings Contact settings from the Contacts app Select how you would want to display your contacts Only contacts with phones Display source account Sort list by First Last name or View contact names as First Last names first Setting up your profile Make your ASUS Tablet truly your own and set up your profile info 1 Launch the Contacts app then tap Set up my profile or ME NOTE ME appears ...

Page 55: ... to put the contact in 4 After filling in the information and you want to add more information tap Add new 5 If you want to add other contact information tap Add another field 6 When you ve completed the info tap Done Customizing your contact s profile Edit your contact s info add a photo or take a photo as a cover for your contact s profile 1 Launch the Contacts app then select the contact whose ...

Page 56: ... a VIP then select Add to VIP group Set up your VIP from the Groups screen To set up your VIP from the Groups screen 1 Launch the Contacts app 2 Tap VIP 3 Tap and select the contact or contacts you want to group as VIPs then tap Add The contact or contacts are added to your VIP list Set up your VIP from the VIP screen To set up your VIP from the VIP screen 1 Launch the Contacts app 2 Tap 3 In the ...

Page 57: ...o a contact such as anniversary birthday and other important events 1 Launch the Contacts app tap the contact you want to add an event detail to then tap 2 In the contact s info screen tap Add another field Events 3 Select the date for the event then tap Set 4 When finished tap Done ...

Page 58: ...orites screen Marking your favorite contacts Set your frequently accessed contacts as your favorites to be able to locate them quickly from the Contacts app 1 Launch the Contacts app 2 From the Contacts app screen tap then tap 3 Tick the boxes of the contacts that you wish to add to Favorites ...

Page 59: ...s from 3 Tap to select where you would like to save the contacts to 4 Tick to select the contacts that you wish to import and when done tap Import Exporting contacts Export your contacts to any of the storage accounts in your ASUS Tablet 1 Launch the Contacts app then tap Manage contacts 2 Tap Import Export then select where you would like to export your contacts to 3 Tap to select where you would...

Page 60: ...al network accounts of your contacts 4 Launch the Contacts app to view your contacts list 5 To view only your contacts with social network accounts tap Contacts to display then untick the other contact sources leaving the social network name checked 6 When done tap or anywhere on the screen Linking your contacts info When you add social network or email accounts data from these accounts automatica...

Page 61: ...owing to launch the Messenger app Tap Tap Messenger Sending messages 1 Launch the Messaging app then tap 2 In the To field enter the number or contact name to select a contact from your list 3 Start composing your message in the Send message field 4 When you re done tap to send the message Replying to messages 1 Tap your message alert from your Home screen or Lock screen 2 Start composing your rep...

Page 62: ...rvice message NOTE Ensure that you have MMS subscription with your mobile service provider Ensure that data access is enabled on your device From your Home screen tap Settings More Celluar networks then slide Data enabled to ON Mobile data and messaging rates apply when forwarding conversations to others Other messaging options When you open a message thread you can tap and do any of these other o...

Page 63: ...of the steps below to open the Camera app From the lock screen Drag down until the Camera app is launched From the home screen Tap Using the volume key While your ASUS Tablet is in sleep mode double click the volume key to wake it up and immediately launch the Camera app NOTE Before using the volume key to launch the Camera app enable this function from Settings Lock screen then slide Instant Came...

Page 64: ... Location services before you take the photo Use advanced camera settings Switch between the front and rear cameras Adjust settings Camera home screen Your ASUS Tablet s camera is equipped with auto scene detection and auto image stabilizer features It also features a video stabilization function that helps prevent shakiness while video recording Tap the icons to start using your camera and explor...

Page 65: ...able options Video settings Adjust the appearance of your recorded videos by configuring your camera s settings using the steps below IMPORTANT Apply the settings first before taking images 1 From the Camera app s home screen tap 2 Scroll down and configure the available options Others settings Adjust advanced settings to customize your camera IMPORTANT Apply the settings first before taking image...

Page 66: ...DR photos 1 From the Camera app s home screen tap HDR 2 Tap to start capturing HDR photos Beautification Have fun during and after taking photos of your family and friends using the Beautification feature of your ASUS Tablet When enabled this feature allows you to make live beauty enhancements on your subject s face before you press the shutter button Capturing Beautification photos 1 From the Cam...

Page 67: ...g a video Night Take well lit photos even in night time or low light situations using the Night feature of your ASUS Tablet NOTE Keep your hands steady before and while the ASUS Tablet is capturing the image to prevent blurry results Capturing Night photos 1 From the Camera app s home screen tap Night 2 Tap to start capturing Night photos Depth of Field Take macro shots with a soft background usin...

Page 68: ... and tap to select your preferred effect then tap to save the photo Selfie Take advantage of your rear camera s high megapixel specs without worrying about pressing the shutter button Using face detection you can set your ASUS Tablet to detect up to four faces using the rear camera then automatically capture your selfie or group selfie Capturing Selfie photos 1 From the Camera app s home screen ta...

Page 69: ...to the left or right to capture the image NOTE While panning your ASUS Tablet a timeline of thumbnails appears on your screen as it captures the image 3 Tap when finished GIF Animation Create GIF Graphics Interchange Format images straight from your ASUS Tablet s camera using the GIF Animation feature Capturing GIF Animation photos 1 From the Camera app s home screen tap GIF Animation 2 Long press...

Page 70: ...ower part of your screen as it captures the scenery 3 Tap when finished Miniature Simulate the tilt shift effect of DSLR lenses via the Miniature feature Using this feature allows you to focus on specific areas of your subject adding a bokeh effect that can be used on both photos and video using your ASUS Tablet Capturing Miniature photos 1 From the Camera app s home screen tap Miniature 2 Tap or ...

Page 71: ...he Time Rewind viewer appears onscreen on top of the captured photo Rotate the button on the viewer to browse through the photos you just took NOTE Tap Best to view the best photo suggestion from the timeline 4 Tap when finished Smart Remove Eliminate unwanted details immediately after capturing the image using the Smart Remove feature Capturing Smart Remove photos 1 From the Camera app s home scr...

Page 72: ...best facial expression 4 Swipe down from the top then tap to save the photo Slow motion The Slow motion video feature allows you to record videos for slow motion playback Recording Slow motion videos 1 From the Camera app s home screen tap Slow motion 2 Tap to start taking Slow motion videos Time Lapse The Time Lapse video feature of your ASUS Tablet allows you to capture stills for automatic time...

Page 73: ...es on your ASUS Tablet according to their album folders To view the media files from other locations accessible via your ASUS Tablet 1 From the Gallery app s home screen tap 2 Tap any of the following source locations to view their respective media files NOTE You can download photos to your ASUS Tablet from your cloud account and use them as your wallpaper or a contact s cover image For details on...

Page 74: ... get the location details on your photos Your photos location details include the area where the photos are taken as well a map of the location via Google Map or Baidu in China only To view the details of a photo 1 Launch the Gallery app and select the photo whose details you want to view 2 Tap the photo then tap ...

Page 75: ...he files you want to delete A check mark appears on top of the image you have selected 4 Tap Editing images The Gallery app also features its own image editing tools that you can use to enhance images saved in your ASUS Tablet 1 From the Gallery app s home screen tap the folder where the files are located 2 After opening the folder tap the image you want to edit 3 Once the image is opened tap it a...

Page 76: ...ou would like to use for your photo slideshow 4 After selecting a theme tap to save or share the slideshow Tap any of these themes to see its preview Tap to edit the photo order focal point or replace a specific photo in the applied theme Tap to get the newest theme content s Tap to apply a mixed theme Tap again to customize the settings Tap to add more photos or remove the selected photos Tap to ...

Page 77: ...ome screen tap Photos 2 Tap to activate file selection 3 After selecting your photos tap MiniMovie 4 Select the MiniMovie theme you would like to use for your photo slideshow 5 After selecting a theme tap to save or share the slideshow You can access your saved slideshows from ASUS File Manager Videos MiniMovie ...

Page 78: ...Chapter 4 Your precious moments 78 ...

Page 79: ...aring NOTE We highly recommend to use only compatible headsets or the bundled headset with this device Unplugging the audio jack while listening to music automatically pauses the music played Unplugging the audio jack while watching a video automatically pauses the video playback Email Setting up a Gmail account Set up your Gmail account to get into Google related services and apps as well as rece...

Page 80: ...itize and act on them accordingly 1 From the Home screen tap ASUS Do It Later 2 Tap the task that you want to set as a top priority 3 Under the Importance field in the task screen select High 4 When you re done tap Done NOTE High priority to do tasks are marked as on your Do It Later list This allows you to quickly determine which to do tasks need immediate actions Deleting to do tasks You can del...

Page 81: ...eating notes you can also add multimedia files from other apps and share them via social networks or your cloud storage account Creating a notebook To create new files using SuperNote refer to the following steps 1 From the Home screen tap SuperNote then tap 2 Select a template and start writing your notes Tap to select the input mode Tap to configure the settings for the notebook Tap to redo the ...

Page 82: ...tes Select this draw mode when you want to create drawings or doodles When in write or type mode tap this icon to select text weight and color When in draw mode tap this icon to select the drawing tool to use and the stroke color or size When in draw mode tap this icon to erase some contents in your notes Tap this icon to take a photo or video record audio add timestamp and more to your notes Tap ...

Page 83: ...nts of your ASUS Tablet Accessing the external storage device To access the external storage device 1 Insert the microSD card into your ASUS Tablet 2 Tap File Manager 3 Tap MicroSD to view the contents of your microSD card Accessing Cloud Storage IMPORTANT Ensure that Wi Fi or mobile network on selected models is enabled on your ASUS Tablet For more details see the Staying connected section To acc...

Page 84: ...ured photos for instant sharing sync files among different devices or share files via your WebStorage account IMPORTANT Ensure that Wi Fi or mobile network on selected models is enabled on your ASUS Tablet For more details see the Staying connected section ZenPad Care Find answers from FAQs Frequently Asked Questions or directly interact with other ZenUI users to find and share solutions about Zen...

Page 85: ...he Wi Fi switch to the right to turn on the Wi Fi NOTE You can also enable the Wi Fi from Quick settings screen For details on how to launch Quick settings screen see the Quick settings section Connecting to a Wi Fi network 1 On the Settings screen tap Wi Fi to display all detected Wi Fi networks 2 Tap a network name to connect to it For a secured network you may be prompted to key in a password o...

Page 86: ...ablet to send or receive files and stream multimedia files with other smart devices over short distances With Bluetooth you can share your media files with your friends smart devices send data for print with a Bluetooth printer or play music files with a Bluetooth speaker Enabling Bluetooth 1 Do any of the following to launch the Settings screen Launch Quick settings then tap Tap Settings 2 Slide ...

Page 87: ...isplay all available devices IMPORTANT If the device that you want to pair is not in the list ensure to enable its Bluetooth feature 3 In the list of available devices tap the Bluetooth device that you want to pair with 4 Ensure that the same pairing code is shown on both devices then tap Pair NOTE Turn off the Bluetooth feature when you re not using it to help save battery power Unpairing your AS...

Page 88: ...ry power Airplane mode Airplane mode disables wireless communication allowing you to use your ASUS Tablet safely while in flight Enabling Airplane mode 1 Launch the Settings screen by doing any of the following Launch Quick settings then tap Tap Settings 2 Tap More and slide the Airplane mode switch to the right to turn on the Airplane mode NOTE You can also enable the Airplane mode from Quick set...

Page 89: ...e Tethering then slide USB tethering to ON Wi Fi hotspot Turn your ASUS Tablet into a Wi Fi hotspot to link with other devices 1 Do any of the following to launch the Settings screen Launch Quick settings then tap Tap Settings 2 Tap More Tethering Set up Wi Fi hotspot 3 Assign a unique SSID or network name and a strong 8 character password for your Wi Fi hotspot When done tap Save 4 From the Tethe...

Page 90: ...ing Once the connection is made your streaming supported display shows the same content currently shown on your ASUS Tablet Launching PlayTo from Settings 1 Tap Settings 2 Tap More then tap PlayTo 3 Refer to the SSID shown on your streaming supported display and select the same SSID on your ASUS Tablet to start pairing Once the connection is made your streaming supported display shows the same con...

Page 91: ...time Share Link app sends and receives files faster than using Bluetooth Sharing files 1 From your Home screen tap Share Link 2 Tap Send files then select from the options that appear on your screen 3 Tap the files that you want to send then tap Share selected files Send 4 After your ASUS Tablet detects the other devices tap the device that you want to share your files with NOTE Ensure to launch S...

Page 92: ...en Calculator One swipe and a tap is all it takes to launch your Calculator When you open the Quick settings panel the Calculator icon is there visibly on top of the list Tap it to get started with your computations Tap this to enable Calculator ...

Page 93: ... Link and social media sites or turn them into a task inside Do It Later To launch Quick Memo tap Quick Memo Creating a sticky note You can turn Quick Memo notes into a sticky note so you can view them anywhere on your ASUS Tablet To create a sticky note just tap on the pin icon on the upper right corner of Quick Memo after creating your note Tap to create a sticky note Drag to move the sticky not...

Page 94: ...dio files using your ASUS Tablet by enabling the Sound Recorder app To launch Sound Recorder tap Sound Recorder Tap to customize the Sound Recorder settings Tap to start audio recording During recording tap this to temporarily stop or pause the recording ...

Page 95: ...e the recording Tap to play pause your selected recording Tap to share delete or rename your selected recording Recording list From the recording list you can play share delete or rename a saved audio recording file View your recording list at the bottom of the Sound Recorder main screen Tap to resume the recording Tap to save the recording ...

Page 96: ...r ASUS Tablet for a clearer audio output that fits actual usage scenarios Using AudioWizard To use AudioWizard 1 Tap AudioWizard 2 In the AudioWizard window tap the sound mode you want to activate When enabled the ASUS Tablet auto switches to the best audio quality for the currently running ASUS app ...

Page 97: ...your Home screen tap Splendid 2 Select any of these screen color modes Balance Bluelight Filter Vivid and Customized Balance mode This mode provides a balanced display of color on your ASUS Tablet Move to adjust the color temperature Tap to reset to factory defaults Bluelight Filter mode This mode aims to reduce eye strain for a comfortable reading experience on your ASUS Tablet Tap to select your...

Page 98: ...omized mode This mode allows you to adjust the screen display based on your preferred color temperature hue and saturation Move to adjust saturation Tap to reset to factory defaults Move to adjust hue Move to adjust the color temperature Tap to reset to factory defaults Move to adjust the color temperature Tap to reset to factory defaults ...

Page 99: ...ions 1 Tap ASUS Mobile Manager Power Saver 2 Select any of these battery modes Performance Normal Power saving Super saving Customized 3 For advanced settings tap Smart switch for more options Customizing Power Saver Set the brightness level for your frequent activities such as reading emails or ebooks watching videos browsing websites and listening to music You can also enable the power saving fu...

Page 100: ...Chapter 7 Zen Everywhere 100 ...

Page 101: ...oad your files on an online storage Use the bundled USB cable to copy files to or from the computer to your ASUS Tablet Backup and reset Back up data Wi Fi passwords and other settings to Google servers using your ASUS Tablet 1 Tap Settings Backup reset 2 From the Backup reset window you can Backup my data This feature backs up your data Wi Fi passwords and other settings to Google servers when en...

Page 102: ... security unlocking options that the ASUS Tablet offers you 1 Tap Settings Lock screen 2 Tap Screen lock then select an option to unlock your ASUS Tablet NOTE For more details see the Unlock screen options section To deactivate the unlock screen option that you set tap None on the Choose screen lock screen Unlock screen options Choose from these options to unlock your ASUS Tablet Swipe Swipe up to...

Page 103: ...a PIN IMPORTANT Ensure to remember the PIN that you created to unlock your device Pattern Slide your finger on the dots and create a pattern IMPORTANT You can create a pattern with a minimum of four dots Ensure to remember the pattern that you created to unlock your device ...

Page 104: ...ide from the mode of screen lock you can also do the following on the Lock screen window Quick access Tap this to edit Quick access on the lock screen Instant Camera Slide the Instant Camera switch to ON to launch the Camera app even if your ASUS Tablet is in idle mode by pressing the volume button twice Lock screen message Tap this to edit and key in the information that you want to appear even w...

Page 105: ...your mobile carrier and provide the information to blacklist the unauthorized use of your ASUS Tablet To display your ASUS Tablet s identity 1 Tap Settings 2 On the Settings screen slide down then tap About The About screen displays the status legal information model number operating system version hardware and software information of your ASUS Tablet 3 To see the serial number SIM contact number ...

Page 106: ...Chapter 8 Maintain your Zen 106 ...

Page 107: ... visit the ASUS Support Site at https www asus com support ASUS Recycling Takeback Services ASUS recycling and takeback programs come from our commitment to the highest standards for protecting our environment We believe in providing solutions for you to be able to responsibly recycle our products batteries other components as well as the packaging materials Please go to http csr asus com english ...

Page 108: ...lied to insulate the device except on the areas where the I O ports are located Regional notice for California WARNING This product may contain chemicals known to the State of California to cause cancer birth defects or other reproductive harm Wash hands after handling India RoHS This product complies with the India E waste Management and Handling Rule 2011 and prohibits use of lead mercury hexava...

Page 109: ...way of health protection The limits are part of extensive recommendations for the protection of the general public These recommendations have been developed and checked by independent scientific organizations through regular and thorough evaluations of scientific studies The unit of measurement for the European Council s recommended limit for mobile devices is the Specific Absorption Rate SAR and ...

Page 110: ...V7 1 1 2015 03 EN 301 908 2 V6 2 1 2013 10 EN 301 908 13 V6 2 1 2014 02 EN 301 893 V1 8 1 2015 03 EN 300 330 2 V1 5 1 2010 02 EN 50360 2001 A1 2012 EN 62479 2010 EN 62311 2008 EN 301 489 1 V1 9 2 2011 09 EN 301 489 3 V1 6 1 2013 08 EN 301 489 4 V2 1 1 2013 12 EN 301 489 7 V1 3 1 2005 11 EN 301 489 9 V1 4 1 2007 11 EN 301 489 17 V2 2 1 2012 09 EN 301 489 24 V1 5 1 2010 10 EN 301 357 2 V1 4 1 2008 1...

Page 111: ...Appendix 111 ...

Page 112: ... 112 Manufacturer ASUSTeK Computer Inc Address 4F No 150 LI TE Rd PEITOU TAIPEI 112 TAIWAN Authorised representative in Europe ASUS Computer GmbH Address HARKORT STR 21 23 40880 RATINGEN GERMANY Model name P008 ...

Reviews: