38
Maintenance and Service
4.6.9 Attaching the Film Coater to the Robot
To attach the film coater to the robot:
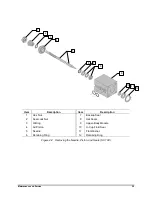
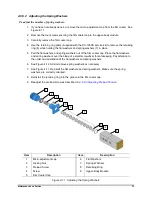
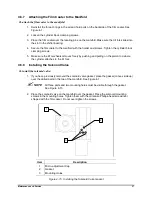
1. Mate the slots on the back side of the manifold with the locating pins on the robot Z-axis
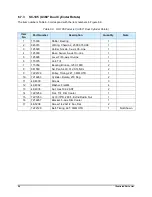
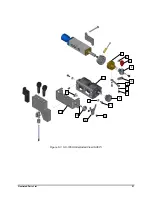
slide. Reattach the manifold with the mounting screws. See Figure 4-1.
2. Make sure the rotate latch on the robot Z-head is able to engage the pins on the rotate pulley.
3. Reattach all air and fluid lines from the workcell to the film coater. Reconnect the solenoid
valve wiring.
4.6.10 Resetting the Micro-Adjustment
After completely rebuilding the film coater, reset the micro-adjustment. If you noted the original setting,
set the micro-adjustment to that setting.
To calibrate the micro-adjustment:
1. Turn the micro-adjustment cap to gently seat the needle into the extension.
2. Open the micro-adjustment cap by ½-turn counterclockwise.
NOTE
The piston and needle travel is adjusted by turning the micro-adjustment cap. Turning
the micro-adjustment clockwise decreases the piston and needle travel, which
decreases the amount of coating material flowing through the seat. Turning the micro-
adjustment cap counterclockwise increases the piston and needle travel, which
increases coating material flow.
NOTE
Do not open the micro-adjustment cap more than one full turn from fully closed.
4.7
Testing the Film Coater
To test the film coater:
1. Cycle the film coater and check for air leaks. Refer to the Select Coat System Manual for
procedures.
CAUTION!
Obtain and read the Material Safety Data Sheets (MSDS) for all materials used.
2. Fill the fluid system with a compatible solvent and check for fluid leaks. Refer to the
appropriate Select Coat System manual for procedures.
3. Flush and fill the fluid system with coating material.
4. Perform a characterization procedure. Refer to the
Easy Coat User Guide
for instructions.
Compare this procedure to the characterization done before the film coater was
disassembled. Adjust the reassembled film coater as necessary.

