background image

22

INSTALLATIEVOORSCHRIFT

inbouwen

23

inbouwen

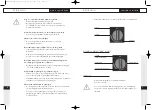
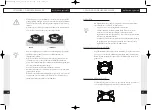
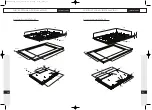
inbouwmaten HG76..M

522

794

31

45

min.50

490

750

155

152

331

1*

1*

1*

1*

1*

1*

G1/2"

740

voorzijde

voorzijde

INSTALLATIEVOORSCHRIFT

750

490

min.50

794

522

45 31

400

740

391

331

G1/2"

1*

1*

1*

1*

1*

voorzijde

voorzijde

inbouwmaten HG71..M

700001740000_hl_HG_4t:opm

23-10-2007

9:58

Page 22

Summary of Contents for HG61 MT Series

Page 1: ...HG61 M HG61 N HG71 M HG76 M HG96 M HG96 S HG77 M HG97 M art nr 700001740100 handleiding notice d utilisation Anleitung manual 700001740000_hl_HG_4t opm 23 10 2007 9 58 Page b...

Page 2: ...tion tip conseil Tipp tip 3 uw gaskookplaat beschrijving 4 inleiding 5 veiligheid waar u op moet letten 6 bediening ontsteken en instellen 7 comfortabel koken de kookplaat optimaal gebruiken 8 9 onder...

Page 3: ...informatie over de bediening treft u ook achtergrondinformatie aan die u van dienst kan zijn bij het gebruik van dit product Bewaar deze handleiding zorgvuldig zodat een eventuele volgende gebruiker...

Page 4: ...contact met niet hittebestendige materialen Dompel hete branderdoppen en pandragers nooit onder in koud water Door de snelle afkoeling kan het emaille beschadigen De afstand van de pan tot een knop of...

Page 5: ...verkleinrooster dat is meegeleverd of als accessoire verkrijgbaar is zorgt ervoor dat u extra kleine pannen kunt gebruiken 8 COMFORTABEL KOKEN Zorg er altijd voor dat de vlammen onder de pan blijven A...

Page 6: ...der wijzigen waardoor de brander slechter of niet ontsteekt De bougie werkt alleen goed in een droge omgeving Bij zware vervuiling kunt u de punt met een fijn borsteltje reinigen Plaats de pandragers...

Page 7: ...erdoor ontstaan vallen niet onder de garantie Wanneer de vlekken met de hierboven beschreven methode niet te verwijderen zijn kunt u de kookplaat reinigen met HG oven grillreiniger Houd er echter reke...

Page 8: ...diep ingedrukt tussen vol en kleinstand Zet de branderdelen via de centreernokken in elkaar Reinig droog de branderdelen Let er hierbij op dat de uitstroomgaten open zijn Controleer of het gebruikte g...

Page 9: ...et er voor het toestel een aansluitkraan geplaatst worden op een makkelijk bereikbare plaats Voordat u het toestel in gebruik neemt moet u de aansluitingen met zeepsop controleren op gasdichtheid INST...

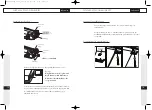
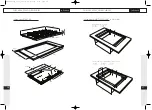
Page 10: ...28 recht 1 2 ISO 228 recht Afdichtring INSTALLATIEVOORSCHRIFT inbouwen A uitsparing in werkblad zagen Zaag de uitsparing in het werkblad Doe dit zeer nauwkeurig zie inbouwmaten Als het werkblad van ho...

Page 11: ...2 min 50 490 560 20 G1 2 1 1 1 1 550 voorzijde voorzijde inbouwen INSTALLATIEVOORSCHRIFT 644 618 45 31 560 585 min 50 1 331 550 60 1 1 1 1 G1 2 56 voorzijde voorzijde inbouwmaten HG61 N inbouwen INSTA...

Page 12: ...G76 M 522 794 31 45 min 50 490 750 155 152 331 1 1 1 1 1 1 G1 2 740 voorzijde voorzijde INSTALLATIEVOORSCHRIFT 750 490 min 50 794 522 45 31 400 740 391 331 G1 2 1 1 1 1 1 voorzijde voorzijde inbouwmat...

Page 13: ...04 522 45 31 490 860 min 50 850 491 331 510 G1 2 1 1 1 1 1 voorzijde voorzijde INSTALLATIEVOORSCHRIFT inbouwen inbouwmaten HG77 M 750 490 min 50 794 522 45 31 400 740 391 331 G1 2 1 1 1 1 1 voorzijde...

Page 14: ...30 Y X 600 X 31 mm Y 31 mm X Z 45 X Y X 31 mm Y 0 mm Z 45 X Inbouwmaten HG76 77 96 97 MX MT en HG96 SX ST in 60 cm corpus inbouwen INSTALLATIEVOORSCHRIFT inbouwen INSTALLATIEVOORSCHRIFT inbouwmaten HG...

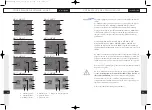
Page 15: ...0 mbar G25 20 mbar G30 29 mbar G31 29 mbar G31 37 mbar G30 50 mbar G31 50 mbar brandertype kW kW kW kW g h kW g h kW g h kW g h kW g h sudder 1 00 1 00 0 90 0 90 65 0 79 57 0 90 65 1 00 72 0 88 63 nor...

Page 16: ...isiner confortablement utilisation optimale 36 37 entretien g n ralit s 38 41 pannes tableau 42 environnement que faire de l emballage et de l appareil us 43 instructions d installation g n ralit s 44...

Page 17: ...ommande vous trouverez galement une information de base qui vous sera utile lors de l utilisation de ce produit Conservez bien ce manuel pour permettre un autre utilisateur ventuel d en tirer aussi pr...

Page 18: ...t l utilisation mais aussi directement apr s l utilisation Evitez tout contact direct avec des mat riaux non r sistants la chaleur Ne plongez jamais dans l eau froide des br leurs et des grilles de cu...

Page 19: ...tre d utiliser des casseroles de taille tr s r duite 36 CUISINER CONFORTABLEMENT Veillez toujours ce que les flammes se trouvent sous la casserole Un grand gaspillage d nergie se produit en laissant t...

Page 20: ...eau pour lui viter de s introduire dans le br leur ou dans les points d a ration Nettoyez de pr f rence les bougies d allumage avec un chiffon Soyez prudent en effectuant cette op ration Si vous appu...

Page 21: ...ettoyage de salir encore la plaque en verre t ches tenaces sur mail grilles de cuissons chapeaux de br leurs Elles s enl vent avec un abrasif liquide ou une ponge grattoir synth tique N utilisez jamai...

Page 22: ...ents du br leur n ont pas t correctement assembl s El ments du br leur sales humides Robinet du gaz principal est ferm Panne dans le r seau de distribution du gaz R servoir bouteille pour le gaz est v...

Page 23: ...n Le type de gaz et le pays auxquels l appareil est destin sont mentionn s sur la plaque d identification C est un appareil appartenant la classe 3 raccordement du gaz Le branchement au gaz doit satis...

Page 24: ...de cuisson Montez le coude livr sur le raccordement de gaz de l appareil Eliminez la feuille de protection de la bande d tanch it A et collez la bande dans la rainure des profils en aluminium ou de l...

Page 25: ...s hors tout HG61 N encastrement INSTRUCTIONS D INSTALLATION dimensions hors tout HG61 M 1 point de fixation pour trier de montage 48 45 640 522 min 50 490 560 20 G1 2 1 1 1 1 550 avant avant encastrem...

Page 26: ...N 750 490 min 50 794 522 45 31 400 740 391 331 G1 2 1 1 1 1 1 avant avant 50 INSTRUCTIONS D INSTALLATION encastrement 522 794 31 45 min 50 490 750 155 152 331 1 1 1 1 1 1 G1 2 740 avant avant dimensio...

Page 27: ...96 M S 904 522 45 31 490 860 min 50 850 491 331 510 G1 2 1 1 1 1 1 avant avant encastrement INSTRUCTIONS D INSTALLATION dimensions hors tout HG77 M 750 490 min 50 794 522 45 31 400 740 391 331 G1 2 1...

Page 28: ...30 Y X 600 X 31 mm Y 31 mm X Z 45 X Y X 31 mm Y 0 mm Z 45 X dimensions d encastrement HG76 77 96 97 MX MT et HG96 SX ST dans corpus de 60 cm INSTRUCTIONS D INSTALLATION encastrement INSTRUCTIONS D INS...

Page 29: ...rective visant la conversion sera livr e avec le set donn es pour le gaz 56 INSTRUCTIONS D INSTALLATION espace libre qui est n cessaire autour Une plaque de cuisson d gage de la chaleur Observez un es...

Page 30: ...ellen 63 Bequem kochen Die optimale Benutzung der Kochmulde 64 65 Pflege Allgemeines 66 69 St rungen Tabelle 70 Umweltaspekte Verpackung und Ger t entsorgen 71 Installationsanweisung Allgemeines 72 73...

Page 31: ...lde so optimal wie m glich benutzt werden kann Neben Angaben zur Bedienung des Ger tes finden Sie auch zweckdienliche Hintergrundinformationen Heben Sie dieses Handbuch sorgf ltig auf so dass es auch...

Page 32: ...geschaltetem Gebl se Brand verursachen Die Brennerteile sind bei der Benutzung und auch noch danach hei Vermeiden Sie direkte Ber hrung und Kontakt mit nicht hitzebest ndigen Materialien Tauchen Sie d...

Page 33: ...iche Verkleinerungsrost sorgt daf r dass extra kleine T pfe benutzt werden k nnen 64 BEQUEM KOCHEN Sorgen Sie immer daf r dass die Flammen unter dem Topf bleiben Wenn die Flammen um den Topf z ngeln g...

Page 34: ...Feuchtigkeit da sie in den Brenner oder die L ftungs ffnungen eindringen kann Reinigen Sie die Z ndkerzen vorzugsweise mit einem Tuch Seien Sie vorsichtig dabei Bei zu schwerer Belastung kann sich de...

Page 35: ...e erst die Knebel Brenner und Topfroste und dann die Glasplatte Damit wird vermieden dass die glasplatte beim Reinigen wieder schmutzig wird Hartn ckige Flecken auf Email Topfroste Brennerdeckel Hartn...

Page 36: ...gez ndet Die Kopplung eines Flaschen gasger tes hat sich gel st Stecker nicht in der Steckdose Sicherung defekt Sicherung im Z hlerschrank ausgeschaltet Bougie vervuild vochtig Brennerteile nicht ric...

Page 37: ...geschlossen werden Achtung Gasart und Land wof r sich das Ger t eignet sind auf dem Typenschild angegeben Dies ist ein Klasse 3 Ger t Gasanschlu Der Gasanschlu mu den nationalen und kommunalen Vorschr...

Page 38: ...en dicke Arbeitsplatten Gewindeloch Arbeitsplattenschraube 74 Kochmulde vorbereiten Montieren Sie den mitgelieferten Kr mmer auf den Gasanschluss des Ger tes Entfernen Sie die Schutzfolie des Dichtung...

Page 39: ...te Vorderseite Einbauma e HG61 N Einbauen INSTALLATIONSANWEISUNG Einbauma e HG61 M 1 Befestigungspunkt Montageb gel 76 45 640 522 min 50 490 560 20 G1 2 1 1 1 1 550 Vorderseite Vorderseite Einbauen IN...

Page 40: ...n 50 794 522 45 31 400 740 391 331 G1 2 1 1 1 1 1 Vorderseite Vorderseite 78 INSTALLATIONSANWEISUNG Einbauen 522 794 31 45 min 50 490 750 155 152 331 1 1 1 1 1 1 G1 2 740 Vorderseite Vorderseite Einba...

Page 41: ...22 45 31 490 860 min 50 850 491 331 510 G1 2 1 1 1 1 1 Vorderseite Vorderseite INSTALLATIONSANWEISUNG Einbauen Einbauma e HG77 M 750 490 min 50 794 522 45 31 400 740 391 331 G1 2 1 1 1 1 1 Vorderseite...

Page 42: ...130 Y X 600 X 31 mm Y 31 mm X Z 45 X Y X 31 mm Y 0 mm Z 45 X Einbauma e HG76 77 96 97 MX MT und HG96 SX ST in 60 cm Korpus Einbauen INSTALLATIONSANWEISUNG INSTALLATIONSANWEISUNG Einbauen Einbauma e HG...

Page 43: ...e Umbauvorschrift wird mit dem Satz mitgeliefert Gastechnische Daten 84 INSTALLATIONSANWEISUNG Ben tigter Freiraum Eine Gaskochmulde entwickelt W rme Sorgen Sie f r ausreichenden Freiraum zu nicht hit...

Page 44: ...ting 91 comfortable cooking optimal use of the hob 92 93 maintenance general 94 97 faults table 98 environmental aspects disposal of packaging and appliance 99 installation instructions general 100 10...

Page 45: ...information that may be useful to you when using this product Keep this manual carefully so that possible subsequent users can also benefit from it The manual also serves as reference material for se...

Page 46: ...flames can cause a fire even if the fan is switched off The burner parts are hot during and immediately after use Do not touch them and avoid contact with non heat resistant materials Never immerse ho...

Page 47: ...stration use of the reduction support The reduction support supplied with the unit or available as an accessory enables you to use very small pans 92 COMFORTABLE COOKING Always ensure that the flames...

Page 48: ...the burner or ventilation openings Clean the spark plugs preferably with a cloth Do this carefully If too much pressure is applied the distance from the point of the sparkplug to the burner may chang...

Page 49: ...at are difficult to remove Use a mild cleaning agent Clean the control knobs burners and pan supports first and then the glass plate This avoids the glass plate getting dirty again during cleaning stu...

Page 50: ...on but not lit The coupling on a bottled gas unit has come undone Plug not in socket Fuse defective fuse in meter cabinet switched off Sparkplug dirty damp Burner parts not correctly installed Burner...

Page 51: ...istered Corgi gas fitter please note The type of gas and the country for which the appliance has been designed are indicated on the ratings plate This is a category 3 appliance gas connection The gas...

Page 52: ...appliance s gas connection Remove the protective foil of the sealing strip A and attach the sealing strip in the groove of the aluminium profiles or the edge of the glass plate Do not attach the seal...

Page 53: ...g in dimensions HG61 N building in INSTALLATION INSTRUCTIONS building in dimensions HG61 M 1 attachment point for mounting bracket 104 45 640 522 min 50 490 560 20 G1 2 1 1 1 1 550 front front buildin...

Page 54: ...S 750 490 min 50 794 522 45 31 400 740 391 331 G1 2 1 1 1 1 1 front front 106 INSTALLATION INSTRUCTIONS building in 522 794 31 45 min 50 490 750 155 152 331 1 1 1 1 1 1 G1 2 740 front front building i...

Page 55: ...G96 M S 904 522 45 31 490 860 min 50 850 491 331 510 G1 2 1 1 1 1 1 front front INSTALLATION INSTRUCTIONS building in building in dimensions HG77 M 750 490 min 50 794 522 45 31 400 740 391 331 G1 2 1...

Page 56: ...30 Y X 600 X 31 mm Y 31 mm X Z 45 X Y X 31 mm Y 0 mm Z 45 X fitted unit dimensions for HG76 77 96 97 MX MT and HG96 SX ST in 60 cm corpus building in INSTALLATION INSTRUCTIONS INSTALLATION INSTRUCTION...

Page 57: ...and service organisation The conversion instructions are supplied with the kit gas information 112 INSTALLATION INSTRUCTIONS space to be left free around the appliance A hob generates heat Leave a su...

Page 58: ...ie mit der Kundendienstabteilung Kontakt aufnehmen When contacting the service department have the production code PCODE and complete item number ITEMNR to hand Adressen en telefoonnummers van de serv...

Reviews: