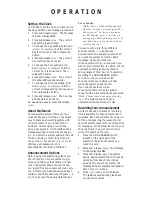
background image

O P E R A T I O N

Setting the Clock

You’ll need to set the clock so it can record
the day and time each message is received.

1

Press and release 

g

.  The Message

Window displays 

CH

.

2

Press and release 

C

.  The current

day setting is announced.

3

To change the day setting, hold down

/

 or 

?

 until the correct

day is announced.  Then release the
button.

4

Press and release 

C

.  The current

hour setting is announced.

5

To change the hour setting, hold
down 

/

 or 

?

 until the

correct hour is announced.  Then
release the button.

6

Press and release 

C

.  The current

minutes setting is announced.

7

To change the minutes setting, hold
down 

/

 or 

?

 until the

correct minutes setting is announced.
Then release the button.

8

Press and release 

C

.  The new day

and time are announced.

To check the clock, 

press and release

C

.

About Mailboxes

This answering system offers you four
voice mailboxes, providing a convenient
way to share an answering system with
other members of your household or
business.  Callers using a touch tone
phone can select in which mailbox their
messages will be recorded by pressing 1,
2, 3, or 4 after the system answers the call.
Those not using a touch tone phone, or
those who do not press 1, 2, 3, or 4, can
still leave a message, which is
automatically recorded in Mailbox 1.

Announcement Options

Before using this answering system, you
should record an announcement (up to
three minutes long) that callers will hear
when the system answers a call.  When
you record this announcement, make sure
you indicate who has been assigned each
mailbox, and that callers should press 1, 2,
3, or 4 to access the appropriate mailbox.

For example,

"Hello.  You’ve reached Meadowlark
Nursery.  To leave a message for Ms.
Arbor, press 2.  To leave a message
for Ms. Brooks, press 3.  To leave a
message for Mr. Cardinal, press 4.  If
you don’t have a touch tone phone,
wait for the tone."

You can record up to three different
announcements — 

A

B

, and 

AO

.

Announcements 

A

 and 

B

 are used when

you want the system to record callers’
messages.  Announcement 

AO

(Announcement Only) is used when you
want to give information to callers.  (Some
businesses use this announcement to
advise callers of their hours of operation.)
By setting the 

ANNC SELECT

 switch

to 

A

B

, or 

AO

, you decide which

announcement your callers will hear
when the system answers a call.

If you choose not to record an
announcement for 

A

 or 

B

, the system

answers with a prerecorded announcement:

“Hello.  Please leave a message after the
tone.” 

 The system does not have a

prerecorded announcement for 

AO

.

Recording Your Announcement

A total of about 24 minutes of recording
time is available for announcements and
messages.  Each announcement can be up
to three minutes long; however, shorter
announcements leave more recording time
for messages.  For best results, record your
announcement in a quiet environment,
without “background”  noise.

1

Move the 

ANNC SELECT

 switch,

located on the right side of the
system, to the announcement you
want to record.

2

Press and release 

g

.  The Message

Window displays 

CH

.

3

Press and release 

A

.  The system

beeps.  Speak toward the microphone
normally, from about nine inches
away.  While you are recording, the
Message Window displays the elapsed
time of your recording.

4

Press 

S

 when you are finished.

The system automatically plays back
your announcement.

Summary of Contents for 1725

Page 1: ...oduct s installation and operation Please also read Part 1 Important Product Information 1 AT T and the globe symbol are registered trademarks of AT T Corp licensed to Advanced American Telephones 2000AdvancedAmericanTelephones All rights reserved Printed in Mexico 850002650 Issue 1AT T 5 00 USER S MANUAL Part 2 ...

Page 2: ... line cord from the telephone into the jack labeled TEL SET on the back of the system 3 Connect the power cord Plug the power cord into the jack labeled POWER on the back of the system Plug the power cord into an electrical outlet not controlled by a wall switch Fit the power cord behind the strain relief tab When you connect the system to power the Message Window flashes CL to indicate that you n...

Page 3: ... off Preview first five seconds of each message Delete all or selected messages Turn system on or off Use with other buttons to change settings Record and hear outgoing announcement Set and hear Remote Access and Priority Calling Codes Select number of times line rings before system answers Repeat all or part of a message Message Window Skip all or part of a message Select announcement callers wil...

Page 4: ...lers should press 1 2 3 or 4 to access the appropriate mailbox For example Hello You ve reached Meadowlark Nursery To leave a message for Ms Arbor press 2 To leave a message for Ms Brooks press 3 To leave a message for Mr Cardinal press 4 If you don t have a touch tone phone wait for the tone You can record up to three different announcements A B and AO Announcements A and B are used when you want...

Page 5: ...system to select how many times the line will ring before the system answers a call Set to 2 for two rings set to 4 for four rings or set to TS for Toll Saver When you set the system to TS the system answers after four rings when you have no new messages and after two rings when you have new messages Message Window The Message Window displays the number of messages that have been recorded If the M...

Page 6: ...can press S at any time to exit previewing NOTE Day and time are not announced during message previewing Saving Messages The system saves your messages automatically if you do not delete them The system can save about 24 minutes of messages including your announcement for up to a total of 99 messages When memory is full you must delete some or all messages before new messages can be recorded Movin...

Page 7: ...m to use this feature 1 Your caller dials your telephone number from a touch tone phone 2 When the announcement begins to play your caller can enter the Priority Calling Code 3 The system beeps three times then pauses This continues for up to 30 seconds unless you answer the phone The beeps are audible on both ends of the call 4 If you do not answer your caller can enter a mailbox number 1 2 3 or ...

Page 8: ... 2 Hold down c for at least two seconds The system announces First digit 3 Press or to change the digit 4 When the Message Window displays the desired first digit press c The system announces Second digit 5 Press or to change the digit 6 When the Message Window displays the desired second digit press c The system announces Third digit 7 Press or to change the digit 8 When the Message Window displa...

Page 9: ...k to someone in the room for up to 30 seconds 4 Press 1 again during intercom operation to return to listening only 5 Press 5 at any time to exit Room Monitor with Intercom Remote Access Code You can use many features of this answering system remotely from a touch tone phone Most features can be accessed only after you enter a Remote Access Code preset to 500 You can view the Remote Access Code by...

Page 10: ... to turn the system on 2 The system beeps twice and is ready to answer calls and record messages If the system beeps five times the memory is full Memory Full If the system answers after 10 rings and beeps twice instead of playing your announcement the system is off memory is full or the AO announcement is selected but not recorded 1 Enter your Remote Access Code after the two beep signal 2 Press ...

Page 11: ...sages waiting In some cases the system might be affected by the ringing system used by the local telephone company If the system s memory is full or the system is off the system answers after 10 rings System Does Not Respond To Remote Commands Make sure you are calling from a touch tone phone When you dial a number you should hear tones If you hear clicks instead the phone is not a touch tone tele...

Page 12: ...Menu will prompt you after message playback Tapeless Digital Answering System 1725 Remote Commands 2 fold To connect with your answering system 1 Dial your telephone number from a touch tone phone 2 When the system answers enter your Remote Access Code The system announces the number of messages and beeps twice 3 Wait four seconds for the system to play back all messages in Mailbox 1 OR Enter a re...

Page 13: ...remote access call 9 Change Remote Access Code 9 9 Turn system off 8 8 then hang up Turn system on 0 COMMAND PRESS Play all messages in a mailbox 1 then enter mailbox number Play only new messages 2 then enter mailbox in a mailbox number Repeat message 4 while message is playing Skip message 6 while message is playing Delete all messages in a mailbox 3 then enter mailbox number Delete selected mes...

Reviews: