background image

Headset base installation

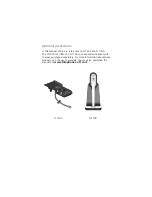
For calls using your computer

You can use your DECT cordless headset for VoIP (Voice over IP) 
calls through your computer. You can use any software program 
that supports VoIP (such as Skype or Google Talk) to make and 
answer calls.

Connect your headset to your computer

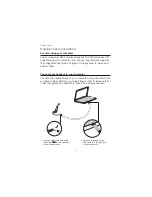
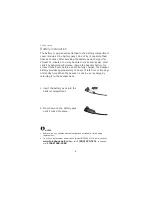
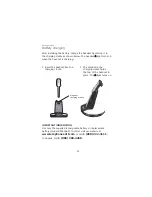
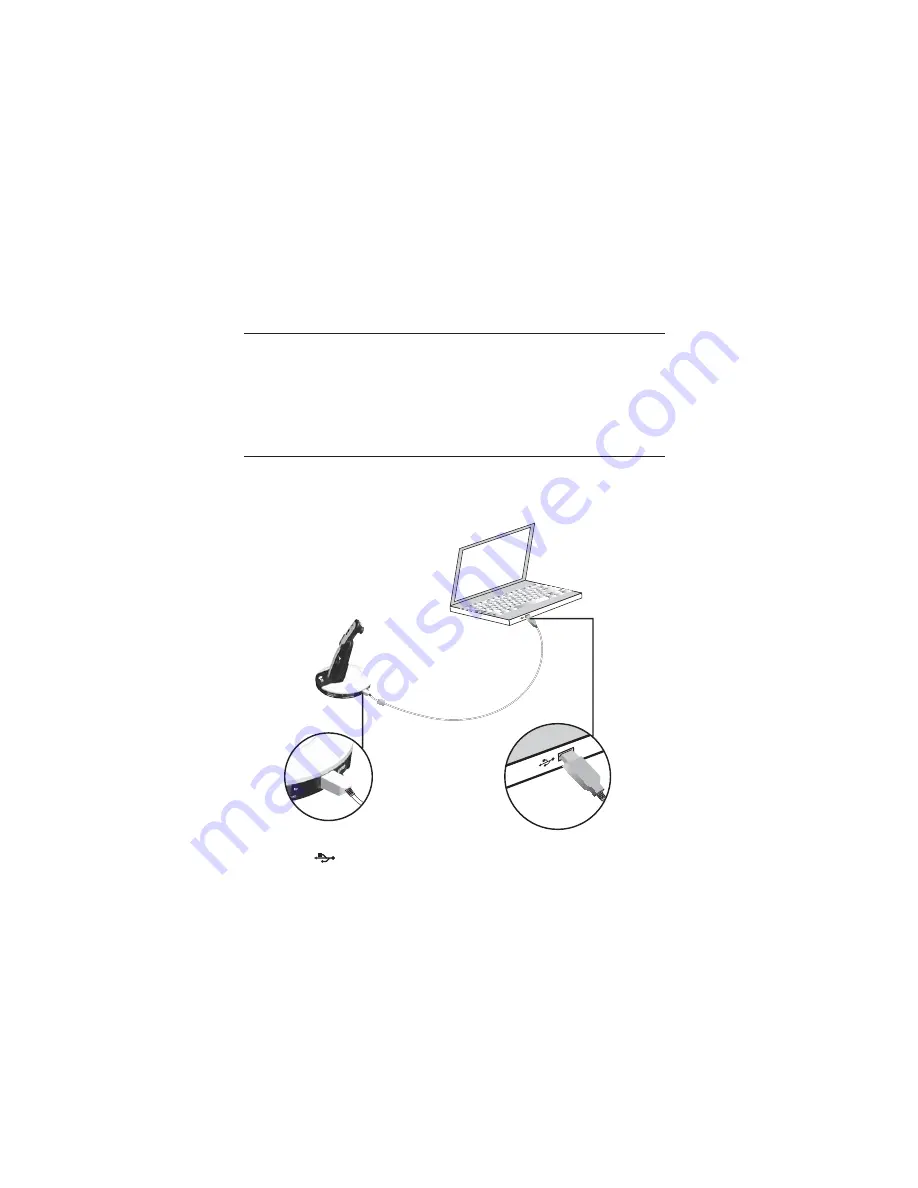
Connect the headset base to your computer using the USB cable 
as shown below. Wait for your operating system to indicate that 
it has recognized the headset (a sound or a pop-up window).

Getting started

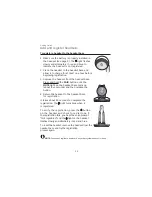
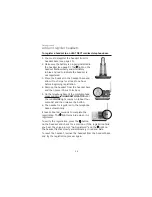
Plug the large end of the 
USB cable into the USB port 
of your computer.

Plug the small end of the USB 
cable into 

 at the right side 

of the headset base.

7

Summary of Contents for TL7710

Page 1: ...User s manual TL7710 DECT 6 0 cordless headset...

Page 2: ...ll 1 800 222 3111 In Canada dial 1 866 288 4268 Model number TL7710 Headset and headset base Type DECT 6 0 cordless headset Serial number Purchase date Place of purchase Both the model and serial numb...

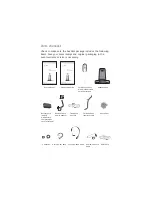
Page 3: ...nd Parts checklist Check to make sure the headset package includes the following items Save your sales receipt and original packaging in the event warranty service is necessary Line splitter Battery p...

Page 4: ...es to TL7100 and TL7700 The TL7100 is a lifter and TL7700 is an expansion headset with charger purchased separately For more information about these products see the user s manuals You may also downlo...

Page 5: ...sers 12 To register a headset to the headset base 13 To register a headset to an AT T DECT cordless telephone base 14 Replace a headset 15 To deregister all headsets from the headset base 15 To deregi...

Page 6: ...E and PC calls 35 Appendix Alert tones and lights 36 Headset alert tones 36 Headset lights 37 Headset base lights 38 Troubleshooting 39 Important safety information 50 Safety information 50 Especially...

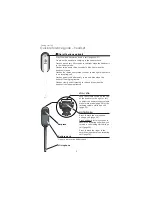
Page 7: ...e seconds in blue light when the headset is in use Flashes four times every three seconds in blue light when there is an incoming call Flashes quickly and alternately in red and blue when the headset...

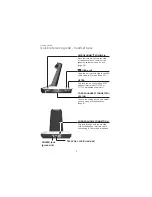
Page 8: ...n when the mute function is on PAIR Use to initiate headset registration or deregistration PHONE mode button and light On when the home or office phone line is chosen for calls Flashes twice every thr...

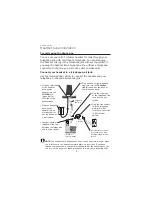
Page 9: ...on whether you are using a corded handset page 8 TEL WALL JACK red dot POWER jack green dot CORDED PHONE CONNECTION This jack orange dot is only used with corded phone interface cable connecting to th...

Page 10: ...r for more information about DSL filters For customer service or product information visit our website at www telephones att com or call 1 800 222 3111 In Canada dial 1 866 288 4268 Avoid placing the...

Page 11: ...ou have telephones connected to the same telephone line as the headset base you can rely on the ringers of those telephones to alert you to incoming calls Plug the small end of the headset base power...

Page 12: ...e telephone line as the headset base you can rely on the ringers of those telephones to alert you to incoming calls Plug the small end of the headset base power adapter into the POWER jack green dot a...

Page 13: ...e Talk to make and answer calls Connect your headset to your computer Connect the headset base to your computer using the USB cable as shown below Wait for your operating system to indicate that it ha...

Page 14: ...ephone set the switch to NO OR If you are using a corded telephone you must set the switch to YES To change the setting When the headset is not in use slide the CORDED HANDSET CONNECTED switch on the...

Page 15: ...use When fully charged the headset battery provides approximately 12 hours of talk time or five days of standby time When the headset is not in use recharge by returning it to the headset base NOTES...

Page 16: ...INFORMATION Use only the supplied rechargeable battery or replacement battery model BT191665 To order visit our website at www telephones att com or call 1 800 222 3111 In Canada dial 1 866 288 4268...

Page 17: ...acts only as a charger for the headset You can place the headset base anywhere you have an available power outlet Do not plug in the telephone line cord you only need to plug the headset base into a...

Page 18: ...ation and the Synapse User s Guide for how to use the headset with the Synapse system These manuals are available for free viewing and download at http www telephones att com SynapseGuides For SynJ TM...

Page 19: ...eadset base turns on about four seconds and then release the button Return the headset to the headset base for registration It takes about 60 seconds to complete the registration The light turns blue...

Page 20: ...ck to its base On the telephone base of the cordless phone press and hold HANDSET LOCATOR until the red IN USE light comes on about four seconds and then release the button The headset is registered t...

Page 21: ...You must press the PAIR button while the MUTE light is still flashing The light flashes for about seven seconds If the light stops flashing start again with step one above It takes about 10 seconds t...

Page 22: ...It takes about 10 seconds to complete the deregistration The light flashes slowly and alternately blue and red when it is not registered 3 To register the headset s to the telephone base again follow...

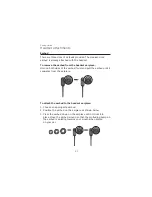
Page 23: ...both sides of the earbud Twist and pull the earbud until it separates from the earpiece To attach the earbud to the headset earpiece Choose an appropriate earbud Position the earbud on the earpiece as...

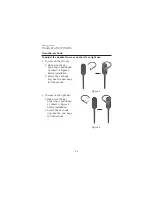
Page 24: ...e headset to wear on the left or right ear Make sure the ear hook ring is positioned as shown in Figure 1 before installation Attach the ear hook ring See the next page for instructions 1 2 Make sure...

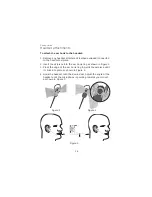
Page 25: ...e Insert the earpiece into the ear hook ring as shown in Figure 1 Press the edge of the ear hook ring towards the earpiece until it clicks into place as shown in Figure 2 4 Hook the headset onto the d...

Page 26: ...Headset attachments To remove the ear hook from the headset Hold the headset with one hand Twist and pull the ear hook with the other hand until it separates from the earpiece Getting started 20...

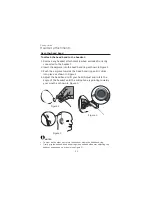
Page 27: ...band ring until it clicks into place as shown in Figure 2 Adjust the head band to fit your head Adjust and rotate the angle of the headset until the microphone is pointing towards your mouth as shown...

Page 28: ...chments To remove the head band from the headset Hold the headset with one hand and the head band ring with the other hand Twist and pull the headset until it separates from the head band ring Getting...

Page 29: ...ure 2 4 Place the neck band around your neck with the padded neck band rings over your ears 5 Adjust and rotate the angle of the headset until the microphone is pointing towards your mouth as shown in...

Page 30: ...e neck band from the headset Hold the headset with one hand and the neck band ring with the other hand Twist and pull the headset until it separates from the neck band ring Headset attachments Getting...

Page 31: ...t is being powered on Power off the headset if it will not be used for a long time To power off the headset Press and hold for two seconds The light flashes in red when the headset is being powered of...

Page 32: ...in the call on the headset you can hang up the telephone and continue the call on the headset When the headset base is connected to a corded telephone and its corded headset Lift the corded handset fr...

Page 33: ...e headset at any time to switch to the headset The corded handset must be lifted up until you are ready to end your call End a call When the headset base is connected to a telephone wall jack Press on...

Page 34: ...ress VOL or VOL when the headset is not in use To turn off the volume of the earpiece ringer Press VOL until you hear two beeps from the headset Temporary ringer silencing Press MUTE FLASH to temporar...

Page 35: ...through your computer audio settings and in some VoIP calling software NOTES Listening volume settings are independent for each headset but the speaking volume is shared by all registered headsets Whe...

Page 36: ...y conversation Switch a call between the handset and headset To switch from the corded handset to the headset while on a call press on the headset then place the corded handset back into the telephone...

Page 37: ...call in progress The number of headset s and handset s that can join may be limited by your telephone system See your telephone user s manual for more information To join a call with a headset press...

Page 38: ...If you receive an incoming outside call during an intercom call you hear two low beeps Press on the headset to end the intercom call The headset rings after a two second pause Press again to answer t...

Page 39: ...u may also need to configure the default audio settings of your computer if you would like to use another device for playback and recording at the same time as your headset For example you can listen...

Page 40: ...on the headset base in PC mode The PC call is put on hold You can press the PC button on the headset in PC mode The PHONE call is put on hold Press on the headset to end the call you are on and recon...

Page 41: ...til both the PC and PHONE buttons flash together Create a conference while in PC mode press and hold the PHONE button on the base until both the PC and PHONE buttons flash together Press to end the co...

Page 42: ...g Two low beeps Call waiting alert tone Two rapid beeps every 20 seconds Low battery warning Three rising beeps A conference call starts Three rapid beeps every 10 seconds Out of range while the heads...

Page 43: ...to indicate the power will be on Flashes twice every three seconds when the fully charged headset is in use Flashes four times every three seconds when there is an incoming call in PHONE mode Flashes...

Page 44: ...re is an incoming call Flashes twice every three seconds when the headset is in use in PHONE mode or when there is a conference call in both PHONE and PC modes Flashes when a call is on hold in PHONE...

Page 45: ...t in use Reset the headset Power off the headset Press and hold for two seconds then press and hold for two seconds or place it in the headset base power it on Allow up to one minute for the cordless...

Page 46: ...problem is in your wiring or local service Contact your telephone service provider The battery does not charge Make sure that the battery is securely installed in the cordless headset If the cordless...

Page 47: ...fferent working electrical outlet not controlled by a wall switch Move the cordless headset closer to the headset base You might have moved out of range Reset the headset Press and hold for two second...

Page 48: ...erference with your cordless headset Try installing your headset as far away as possible from these types of electronic devices Do not install this headset near a microwave oven or on the same electri...

Page 49: ...aving the same problem the problem is in your wiring or local service Contact your telephone service provider charges may apply Test a working phone at the phone jack If another phone has the same pro...

Page 50: ...udio from your computer Make sure you are using a software program that supports VoIP calling such as Skype or Google Talk Make sure the headset listening volume is turned on and set to an audible lev...

Page 51: ...he Start menu and choose Control Panel If you are not already in Classic View mode click on Switch to Classic View In Classic View mode click on Sounds and Audio Devices Click on the Audio tab and sel...

Page 52: ...ck on the Playback tab and select your speakers Click on the Properties button to open the Speakers Properties window Click on the Levels tab and adjust the volume slider as necessary Make sure the sp...

Page 53: ...nnot answer an incoming call in PC mode Your headset cannot directly answer a call You must answer all incoming calls on your computer through your VoIP program Make sure PC mode is selected on the he...

Page 54: ...ving the same problem the problem is in your wiring or local service Contact your telephone service provider charges may apply The light on the headset is off while charging Make sure the power and li...

Page 55: ...nd do the following in the order listed Disconnect the power to the headset base Remove the cordless headset battery Wait a few minutes Connect power to the headset base Install the battery again and...

Page 56: ...from the area Do not use this product near water or when you are wet For example do not use it in a wet basement or shower or next to a swimming pool bathtub kitchen sink or laundry tub Do not use liq...

Page 57: ...headset by radio waves so there is a possibility that your cordless headset conversations could be intercepted by radio receiving equipment within range of the cordless headset For this reason you sho...

Page 58: ...of service within the United States These batteries may be taken to a participating local retailer of replacement batteries or recycling center Or you may call 1 800 8 BATTERY for locations accepting...

Page 59: ...y Research LLC WTR an independent research entity led a multidisciplinary evaluation of the interference between portable cordless telephones and implanted cardiac pacemakers Supported by the U S Food...

Page 60: ...storms can sometimes cause power surges harmful to electronic equipment For your own safety take caution when using electrical appliances during storms Cleaning your headset Your headset has a durabl...

Page 61: ...s manual The Ringer Equivalence Number REN is used to determine how many devices you may connect to your telephone line and still have them ring when you are called The REN for this product is encode...

Page 62: ...the FCC Your telephone service provider may make changes in its facilities equipment operation or procedures that could affect the proper functioning of this product The telephone service provider is...

Page 63: ...n number only signifies that the Industry Canada technical specifications were met The Ringer Equivalence Number REN for this terminal equipment is 0 1 The REN is an indication of the maximum number o...

Page 64: ...y turning the equipment off and on the user is encouraged to try to correct the interference by one or more of the following measures Reorient or relocate the receiving antenna Increase the separation...

Page 65: ...intended usage of the product This product has been tested and found to comply with the FCC criteria The headset may be safely held against the ear of the user The headset base shall be installed and...

Page 66: ...roducts purchased and used in the United States of America and Canada 2 What will be done if the PRODUCT is not free from defects in materials and workmanship during the limited warranty period materi...

Page 67: ...or other physical damage improper installation abnormal operation or handling neglect inundation fire water or other liquid intrusion or PRODUCT that has been damaged due to repair alteration or modif...

Page 68: ...n the transport of the PRODUCT s to the service location The manufacturer will return repaired or replaced PRODUCT under this limited warranty to you Transportation delivery or handling charges are pr...

Page 69: ...gives you specific legal rights and you may also have other rights which vary from state to state or province to province Limitations Implied warranties including those of fitness for a particular pur...

Page 70: ...tance which can vary with the locations of the headset base and headset the weather and the construction of your home or office Extended range and clarity This cordless headset provides enhanced clari...

Page 71: ...n 15 16 DSL 4 6 42 E Earbud 17 Ear hook 18 20 End a call 27 an intercom call 32 F Flash 29 H Headset alert tones 36 attachments 17 24 lights 37 38 operation 25 35 registration 11 14 ringer 28 I Incomi...

Page 72: ...r on 25 Q Quick reference guide headset 1 headset base 2 3 R Replace a headset 15 16 Ringer 28 S Safety information 50 53 Speaking volume 29 T Technical specifications 64 Temporary ringer silencing 28...

Page 73: ...m 2010 Advanced American Telephones All Rights Reserved AT T and the AT T logo are trademarks of AT T Intellectual Property licensed to Advanced American Telephones San Antonio TX 78219 Printed in Chi...

Reviews: