14
Configuring an Always-On Cellular Connection
To configure an Always-On Cellular connection, follow these steps after reaching
1. Ensure your supported Cellular modem is inserted into one of the two USB ports on the back of the U115 or if an
internal modem is installed, that a SIM has been inserted.
2. Select the radio button next to Cellular
in the “Always-On” section and click
OK
to proceed to the setup
sequence.
3. Select your modem type from the drop-down menu on
. For more detailed information on supported
Cellular modems and associated configuration, please contact your IS Department.
4. The Access Point Name and AT Strings are optional fields that you can enter information into if they are required.
If these fields are not required, then leave them blank. Click
NEXT
to proceed to the next page.
5. Enter the phone number provided by your Cellular service provider on
6. Enter the user ID and password provided by your Cellular service provider. Some networks/APNs don't use the
user ID and some Cellular service providers require that the user ID is NOT sent. In those cases,
enter “empty”
(without quotes) for both the user ID and password to ensure that no user ID and password information is sent in
the authentication flow.
7. At the end of the setup, you will see a summary of the configuration and will be asked to reboot to pick up the
new configuration. After reboot, skip to the section
“Establishing VPN Connectivity” on page 20.
Summary of Contents for U115
Page 1: ...1 AT T U115 Install Guide Version D6 0 1 ...
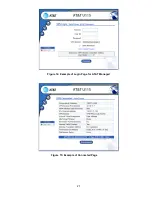
Page 21: ...21 Figure 14 Example of Login Page for AT T Managed Figure 15 Example of Connected Page ...
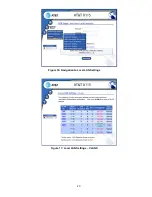
Page 23: ...23 Figure 16 Navigation to Local LAN Settings Figure 17 Local LAN Settings VLANS ...


