


VARENA
16
A73023342
5.9.
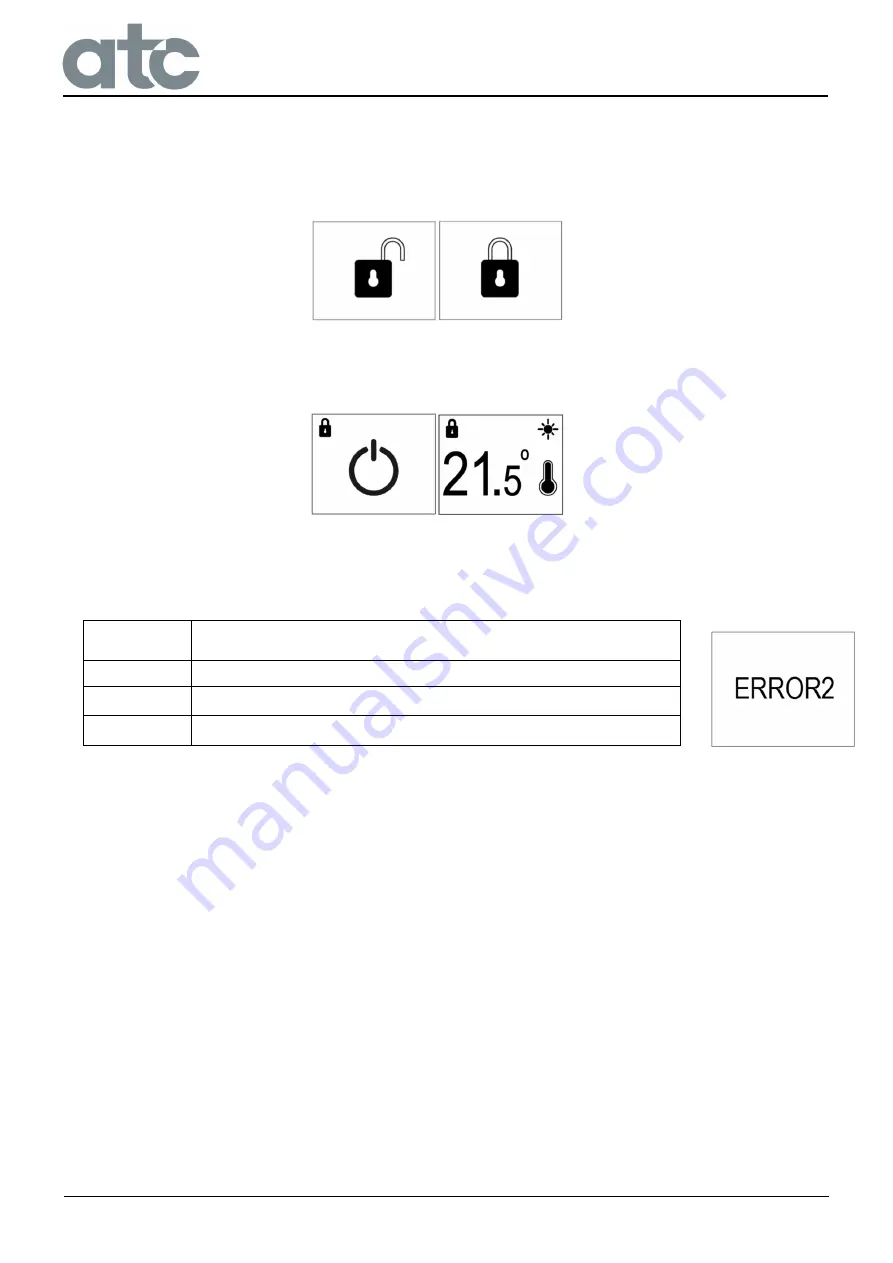
Keyboard lock
The user can lock the keyboard on the Varena radiator by pressing and holding the
-
and
+
keys
for 2.5 seconds. The unlock is performed in the same way. When the keypad is unlocked or
locked, the screens are displayed:
This is possible in all modes of operation except in Configuration. The radiator can be also locked
when is on Standby. When the radiator is locked, the padlock icon will appear in the upper left
area of the screen:
6. ERROR NOTIFICATIONS
There are 3 types of errors that the electronics can detect; if an error is detected one of the codes
below will be displayed on the screen until it is resolved:
ERROR CODE DESCRIPTION
ERROR1
Failure in microcontroller or RTC (problems with the current time)
ERROR2
Failure of the NTC temperature probe (e.g. disconnected, short-circuited, etc.)
ERROR3
Failure of the EPROM memory
When recovering from an error, the radiator will always go to Standby mode; the radiator will not
retain any previous mode or state.
If the radiator goes to Standby without any specific reason, it may have recovered from an error.
7. MAINTENANCE AND CARE
The Varena radiators require very little maintenance.
The surfaces of the radiator must not be cleaned with an abrasive product or those containing
granular substances. We recommend regular cleaning with PH neutral products.
In order to clean the radiator, it is recommended that the electric power is switched off.
Failure to keep the Varena radiators clean may result in dust becoming burnt and depositing on
the wall above the heater in the form of dark streaks or patches. This type of marking is expressly
due to failure to keep the heater and surrounding area clean.
ATC take no responsibility for any such damage caused.
Summary of Contents for VARENA 1000
Page 2: ......
Page 19: ...A73023342 19 ...


