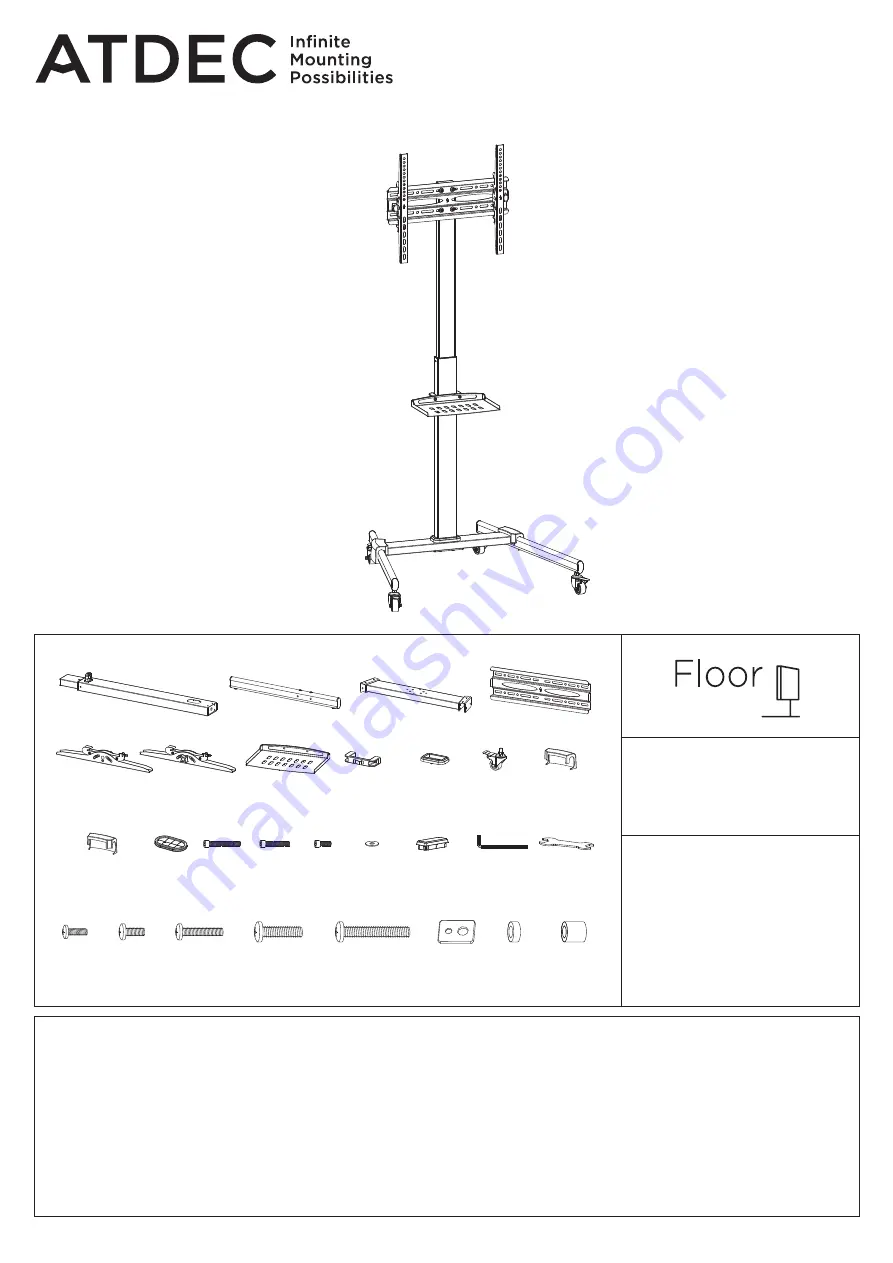
AD-TVC-20 Page 1 of 4
Installation Guide
AD-TVC-20
AV Cart 20
COMPONENT CHECKLIST
REQUIRED TOOLS
A
Column (x1)
B
Base Leg (x2)
C
Base Crossbar (x1)
D
Rail (x1)
E
Left Display
Bracket (x1)
F
Right Display
Bracket (x1)
G
AV Shelf
(x1)
H
AV Shelf
Bracket (x1)
I
Column Base
Cover (x1)
J
Castor
(x4)
K
Base Leg Cover
Left (x1)
L
Base Leg Cover
Right (x1)
M
Cable
Cover
(x2)
N
M6X50
Screw
(x4)
O
M6X35
Screw
(x4)
P
M6X16
Screw
(x11)
Q
Washer
(x8)
R
Column Top
Cover (x1)
S
5mm Allen
Key(x1)
T
M8 + M10
Wrench
(x1)
M-A
M5X14
Screw
(x4)
M-B
M6X14
Screw
(x4)
M-C
M6X30
Screw
(x4)
M-D
M8X30
Screw
(x4)
M-E
M8X50
Screw
(x4)
M-F
Multi
Washer
(x4)
M-G
Small
Spacer
(x8)
M-H
Large
Spacer
(x8)
• Phillips Head Screwdriver
CAPACITY
IMPORTANT INFORMATION
! Please ensure this product is installed as per these installation instructions.
! The manufacturer accepts no responsibility for incorrect installation.
! Failure to assemble this product correctly may cause serious injury/death during or following installation.
! This product should only be installed by professional installers of good mechanical aptitude, who fully understand these instructions and the
consequences of incorrect installation.
! Do not over tighten screws.
! Two person installation is recommended.
! Product not suitable for use outdoors.
! After installation is complete check to verify that AV Cart is secure and safe for use.
! Curved monitors, deep devices (such as all-in-one PCs), VESA mounted accessories (such as mini PC brackets and mounts), and offset VESA
locations exert additional leverage that can exceed the capacity of the mount even though the monitor weight may be within the stated range.
Please contact Atdec if you would like further information.
!
WARNING!
Death or serious injury may occur when children climb on audio and/or video equipment furniture. A remote control or toys placed on
the cart may encourage a child to climb on the cart and as a result the cart may tip over on to the child.
DISPLAY
0 - 20kg (0 - 44lb)
32” - 55”
SHELF
0 - 5kg (0 - 11lb)


